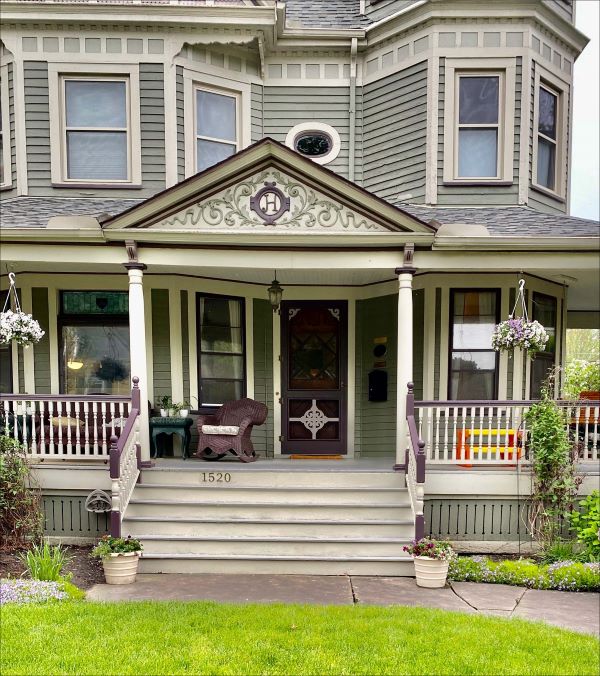
Door 7103
Return to previous page

| Length | Base | | Top |
| | | | |
| | | | |
| | | | |
| | | | |
| | | | |
 We offer most of our products in AZEK® Brand Cellular PVC. As a service to our customers, we also sell AZEK® PVC Trimboards (below), AZEK® Adhesive, and Color Matched Stainless Steel Trim Head Screws in white for those who prefer to use screws for installation. Installation Guidelines
 We offer most of our products in AZEK® Brand Cellular PVC. As a service to our customers, we also sell AZEK® PVC Trimboards (below), AZEK® Adhesive, and Color Matched Stainless Steel Trim Head Screws in white for those who prefer to use screws for installation. Installation Guidelines
 We offer most of our products in AZEK® Brand Cellular PVC. As a service to our customers, we also sell AZEK® PVC Trimboards (below), AZEK® Adhesive, and Color Matched Stainless Steel Trim Head Screws in white for those who prefer to use screws for installation. Installation Guidelines
 We offer most of our products in AZEK® Brand Cellular PVC. As a service to our customers, we also sell AZEK® PVC Trimboards (below), AZEK® Adhesive, and Color Matched Stainless Steel Trim Head Screws in white for those who prefer to use screws for installation. Installation Guidelines
 We offer most of our products in AZEK® Brand Cellular PVC. As a service to our customers, we also sell AZEK® PVC Trimboards (below), AZEK® Adhesive, and Color Matched Stainless Steel Trim Head Screws in white for those who prefer to use screws for installation. Installation Guidelines
| Column Size | Structural Load Rating (lbs.) |  | |
|---|---|---|---|
| Stated | Actual | ||
| 6" | 5" x 5" Order Here | 8,500 | |
| 8" | 6-3/4" x 6-3/4" Order Here | 13,100 | |
| 10" | 8-3/4" x 8-3/4" x 119-1/2" | 21,000 | |
| 12" | 10-3/4" x 10-3/4" Order Here | 26,000 | |
| Column Size | Structural Load Rating (lbs.) |  | |
|---|---|---|---|
| Stated | Actual | ||
| 6" | 5" x 5" Order Here | 8,500 | |
| 8" | 6-3/4" x 6-3/4" Order Here | 13,100 | |
| 10" | 8-3/4" x 8-3/4" x 143-1/2" | 21,000 | |
| 12" | 10-3/4" x 10-3/4" Order Here | 26,000 | |
| Column Size | Structural Load Rating (lbs.) |  | |
|---|---|---|---|
| Stated | Actual | ||
| 6" | 5" x 5" Order Here | 8,500 | |
| 8" | 6-3/4" x 6-3/4" Order Here | 13,100 | |
| 10" | 8-3/4" x 8-3/4" x 95-1/2" | 21,000 | |
| 12" | 10-3/4" x 10-3/4" Order Here | 26,000 | |


| Column Size | Structural Load Rating (lbs.) |  | |
|---|---|---|---|
| Stated | Actual | ||
| 6" | 5" x 5" Order Here | 8,500 | |
| 8" | 6-3/4" x 6-3/4" Order Here | 13,100 | |
| 10" | 8-3/4" x 8-3/4" Order Here | 21,000 | |
| 12" | 10-3/4" x 10-3/4" x 119-1/2" | 26,000 | |
| Column Size | Structural Load Rating (lbs.) |  | |
|---|---|---|---|
| Stated | Actual | ||
| 6" | 5" x 5" Order Here | 8,500 | |
| 8" | 6-3/4" x 6-3/4" Order Here | 13,100 | |
| 10" | 8-3/4" x 8-3/4" Order Here | 21,000 | |
| 12" | 10-3/4" x 10-3/4" x 143-1/2" | 26,000 | |
| Column Size | Structural Load Rating (lbs.) |  | |
|---|---|---|---|
| Stated | Actual | ||
| 6" | 5" x 5" Order Here | 8,500 | |
| 8" | 6-3/4" x 6-3/4" Order Here | 13,100 | |
| 10" | 8-3/4" x 8-3/4" Order Here | 21,000 | |
| 12" | 10-3/4" x 10-3/4" x 95-1/2" | 26,000 | |
 We offer most of our products in AZEK® Brand Cellular PVC. As a service to our customers, we also sell AZEK® PVC Trimboards (below), AZEK® Adhesive, and Color Matched Stainless Steel Trim Head Screws in white for those who prefer to use screws for installation. Installation Guidelines
 We offer most of our products in AZEK® Brand Cellular PVC. As a service to our customers, we also sell AZEK® PVC Trimboards (below), AZEK® Adhesive, and Color Matched Stainless Steel Trim Head Screws in white for those who prefer to use screws for installation. Installation Guidelines
 We offer most of our products in AZEK® Brand Cellular PVC. As a service to our customers, we also sell AZEK® PVC Trimboards (below), AZEK® Adhesive, and Color Matched Stainless Steel Trim Head Screws in white for those who prefer to use screws for installation. Installation Guidelines
 We offer most of our products in AZEK® Brand Cellular PVC. As a service to our customers, we also sell AZEK® PVC Trimboards (below), AZEK® Adhesive, and Color Matched Stainless Steel Trim Head Screws in white for those who prefer to use screws for installation. Installation Guidelines
 We offer most of our products in AZEK® Brand Cellular PVC. As a service to our customers, we also sell AZEK® PVC Trimboards (below), AZEK® Adhesive, and Color Matched Stainless Steel Trim Head Screws in white for those who prefer to use screws for installation. Installation Guidelines
| Above left: Photo illustrates the use of the following products: Balusters BAL 2019, Rails RAL 2105T & B, and custom Newel Post and Cap. | Above right: Photo illustrates the use of the following products: Balusters BAL 2019, Rails RAL 2110T & B, and custom Newel Post and Cap. |
 See MORE OPTIONS for LONGER LENGTHS, additional widths, and more wood choices.


Size | Beads | Width |
| | | |
 We offer most of our products in AZEK® Brand Cellular PVC. As a service to our customers, we also sell AZEK® PVC Trimboards (below), AZEK® Adhesive, and Color Matched Stainless Steel Trim Head Screws in white for those who prefer to use screws for installation. Installation Guidelines
 We offer most of our products in AZEK® Brand Cellular PVC. As a service to our customers, we also sell AZEK® PVC Trimboards (below), AZEK® Adhesive, and Color Matched Stainless Steel Trim Head Screws in white for those who prefer to use screws for installation. Installation Guidelines
 We offer most of our products in AZEK® Brand Cellular PVC. As a service to our customers, we also sell AZEK® PVC Trimboards (below), AZEK® Adhesive, and Color Matched Stainless Steel Trim Head Screws in white for those who prefer to use screws for installation. Installation Guidelines
 We offer most of our products in AZEK® Brand Cellular PVC. As a service to our customers, we also sell AZEK® PVC Trimboards (below), AZEK® Adhesive, and Color Matched Stainless Steel Trim Head Screws in white for those who prefer to use screws for installation. Installation Guidelines
 We offer most of our products in AZEK® Brand Cellular PVC. As a service to our customers, we also sell AZEK® PVC Trimboards (below), AZEK® Adhesive, and Color Matched Stainless Steel Trim Head Screws in white for those who prefer to use screws for installation. Installation Guidelines
Length | Base | Top | |
Length | Base | Top | ||
Length | Base | Top | |

| 5" sizes (4" actual) | |||
Length | |||
Length | Base | Top | |
Length | Base | Top | |
| 5" sizes (4" actual) | |||
Length | |||
Length | Base | Top | |

| 6" size = 5" actual | |||
Length | |||
| Length | Base | Area | Top |
| | | | |
| Length | Base | Area | Top |
| | | | |
| Length | Base | Area | Top |
| | | | |
| Length | Base | | Top |
| | | | |
| Length | Base | | Top |
| | | | |
Length | Base | Top | ||
Length | Base | Top | |
| Length | Base | | Top |
| | | | |
| Length | Base | Area | Top |
| | | | |
| Length | Base | Area | Top |
| | | | |
| Length | Base | Area | Top |
| | | | |
| Column Size | Structural Load Rating (lbs.) |  | |
|---|---|---|---|
| Stated | Actual | ||
| 6" | 5" x 5" x 119-1/2" | 8,500 | |
| 8" | 6-3/4" x 6-3/4" Order Here | 13,100 | |
| 10" | 8-3/4" x 8-3/4" Order Here | 21,000 | |
| 12" | 10-3/4" x 10-3/4" Order Here | 26,000 | |
| Length | Base | | Top |
| | | | |
| Length | Base | | Top |
| | | | |
Length | Base | Top | ||
Length | Base | Top | |
| Length | Base | | Top |
| | | | |
| Column Size | Structural Load Rating (lbs.) |  | |
|---|---|---|---|
| Stated | Actual | ||
| 6" | 5" x 5" x 143-1/2" | 8,500 | |
| 8" | 6-3/4" x 6-3/4" Order Here | 13,100 | |
| 10" | 8-3/4" x 8-3/4" Order Here | 21,000 | |
| 12" | 10-3/4" x 10-3/4" Order Here | 26,000 | |
| Length | Base | Area | Top |
| | | | |
| | | | |
| | | | |
| | | | |
| | | | |
| Length | Base | Area | Top |
| | | | |
| | | | |
| | | | |
| | | | |
| | | | |
| Length | Base | | Top |
| | | | |
| | | | |
| | | | |
| | | | |
| | | | |
| Length | Base | | Top |
| | | | |
| | | | |
| | | | |
| | | | |
| | | | |
6" size (3-1/2" top; 5-1/2" bottom actual) Tapered portion has chamfered edges. | |||
Length | Base | Top | ||
| 6" size = 5" actual | |||
Length | |||
Length | Base | Top | |
| Length | Base | | Top |
| | | | |
| | | | |
| | | | |
| | | | |
| Column Size | Structural Load Rating (lbs.) |  | |
|---|---|---|---|
| Stated | Actual | ||
| 6" | 5" x 5" x 95-1/2" | 8,500 | |
| 8" | 6-3/4" x 6-3/4" Order Here | 13,100 | |
| 10" | 8-3/4" x 8-3/4" Order Here | 21,000 | |
| 12" | 10-3/4" x 10-3/4" Order Here | 26,000 | |

| Column Size | Structural Load Rating (lbs.) |  | |
|---|---|---|---|
| Stated | Actual | ||
| 6" | 5" x 5" Order Here | 8,500 | |
| 8" | 6-3/4" x 6-3/4" x 119-1/2" | 13,100 | |
| 10" | 8-3/4" x 8-3/4" Order Here | 21,000 | |
| 12" | 10-3/4" x 10-3/4" Order Here | 26,000 | |
| Column Size | Structural Load Rating (lbs.) |  | |
|---|---|---|---|
| Stated | Actual | ||
| 6" | 5" x 5" Order Here | 8,500 | |
| 8" | 6-3/4" x 6-3/4" x 143-1/2" | 13,100 | |
| 10" | 8-3/4" x 8-3/4" Order Here | 21,000 | |
| 12" | 10-3/4" x 10-3/4" Order Here | 26,000 | |
| Column Size | Structural Load Rating (lbs.) |  | |
|---|---|---|---|
| Stated | Actual | ||
| 6" | 5" x 5" Order Here | 8,500 | |
| 8" | 6-3/4" x 6-3/4" x 95-1/2" | 13,100 | |
| 10" | 8-3/4" x 8-3/4" Order Here | 21,000 | |
| 12" | 10-3/4" x 10-3/4" Order Here | 26,000 | |


| | |
| Classic Corbel # 3101n9 # 3101n13 | 4" at top |
| Swan's Neck Corbel # 3102 | |
| Bird of Paradise Corbel # 3105 | |
| 17" Corbel # 3106 | |
| 8" Corbel # 3107 | |


| |||||||||
| |||||||||
| ||||||||||||||||||||||||||||||||||||

 Slate Gray |  Oyster | ||
 Coastline |  Dark Hickory |  Mahogany |  Weathered Teak |
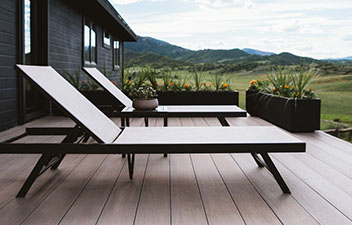 Outstanding features include:
 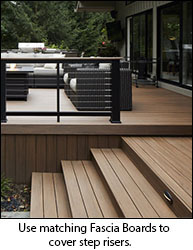 Azek® Deck's proprietary embossing system creates one of the most aesthetically pleasing wood grain finishes in the industry. You'll enjoy the classic beauty of stained wood without the ongoing hassle of upkeep. This natural-looking wood grain finish provides the safety of a slip resistant surface while looking great! Ideal for boat docks, boardwalks, pool & hot tub surrounds, or any place a weatherproof flooring is desired.
 Choice of Plain (Square Shouldered) or Grooved Sides
  Compare AZEK® Decking to other wood and non-wood decking materials, and it's easy to see the difference. Thanks to Colorfast Solutions(tm) by Americhem, Inc., one of the industry's leading color experts, you get vibrant colors that will hold up in the harshest climate and the hardest use.
| Collection |  Brownstone |  Kona |  Slate Gray | |
| |
 Outstanding features include:
  Azek® Deck's proprietary embossing system creates one of the most aesthetically pleasing wood grain finishes in the industry. You'll enjoy the classic beauty of stained wood without the ongoing hassle of upkeep. This natural-looking wood grain finish provides the safety of a slip resistant surface while looking great! Ideal for boat docks, boardwalks, pool & hot tub surrounds, or any place a weatherproof flooring is desired.
 Choice of Plain (Square Shouldered) or Grooved Sides
  Compare AZEK® Decking to other wood and non-wood decking materials, and it's easy to see the difference. Thanks to Colorfast Solutions(tm) by Americhem, Inc., one of the industry's leading color experts, you get vibrant colors that will hold up in the harshest climate and the hardest use.
| Collection |  American Walnut |  Boardwalk |  Castle Gate |  French White Oak | |
| |
 Outstanding features include:
  Azek® Deck's proprietary embossing system creates one of the most aesthetically pleasing wood grain finishes in the industry. You'll enjoy the classic beauty of stained wood without the ongoing hassle of upkeep. This natural-looking wood grain finish provides the safety of a slip resistant surface while looking great! Ideal for boat docks, boardwalks, pool & hot tub surrounds, or any place a weatherproof flooring is desired.
 Choice of Plain (Square Shouldered) or Grooved Sides
  Compare AZEK® Decking to other wood and non-wood decking materials, and it's easy to see the difference. Thanks to Colorfast Solutions(tm) by Americhem, Inc., one of the industry's leading color experts, you get vibrant colors that will hold up in the harshest climate and the hardest use.
| Collection |  Coastline |  Cypress |  Dark Hickory |
 English Walnut |  Mahogany |  Weathered Teak |




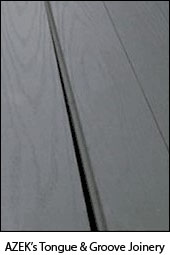 Tongue and groove installation with a slight crack between boards... just like wood porch flooring! Wood grain surface is almost impossible to distinguish from wood porch decking.
 Almost all spills, such as the drink to the left can be taken care of with just a damp cloth. An added advantage of this special formulation: unlike some competing products containing polyethylene and wood fiber, AZEK® Porch can be used in covered or uncovered areas.
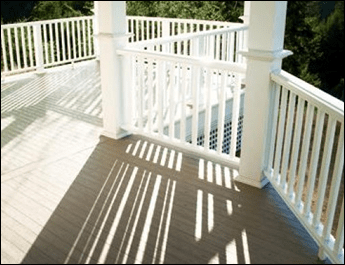 Slip Resistant Surface
  Solid Workability & Beauty
  Coastline |  Dark Hickory |  Mahogany |  Weathered Teak |

 Tongue and groove installation with a slight crack between boards... just like wood porch flooring! Wood grain surface is almost impossible to distinguish from wood porch decking.
 Almost all spills, such as the drink to the left can be taken care of with just a damp cloth. An added advantage of this special formulation: unlike some competing products containing polyethylene and wood fiber, AZEK® Porch can be used in covered or uncovered areas.
 Slip Resistant Surface
  Solid Workability & Beauty
  Slate Gray |  Oyster |
 AZEK® Rails
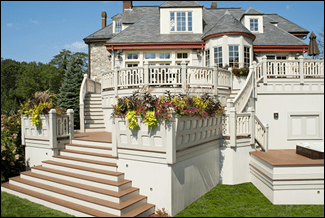 AZEK® Brand Cellular PVC is a synthetic wood that will never crack, warp, or rot. It's impervious to moisture, salt, and insects but feels and sounds like real wood! In addition to the items we stock that are made by AZEK®, we also make most of our items in AZEK® Brand Cellular PVC, THE wood alternative. Read more about the benefits of AZEK® Cellular PVC.
 | | |
| Before - Porch looks vacant. | After - Balusters help define porch. |
| Exterior Balusters | Interior Balusters | Info |
| Turned Hemlock | Square Top | Exterior Baluster Info |
| Turned Cedar | Taper Top | Material Choices, Spacing, |
| Turned Polyurethane | Plain Square | Installation, and more |
| Plain Square - Wood or PVC | Interior Baluster Info | |
| Sawn - Wood or PVC | Baluster Style, Heights, | |
| Stair Part Diagram, etc |
 | |

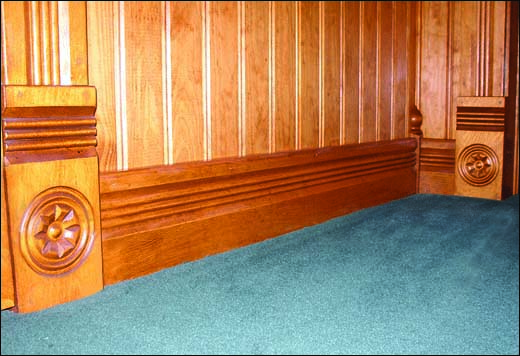

 Baseboards are used to cover the joint between the wall surface and the floor. Baseboards can be used as decorative items. They can also protect walls from kicks, abrasions, and furniture.
| | |
| | |
| | |
| | |
| | |
| | |
| | |
| | |
| | |
| | |
| | |
 |


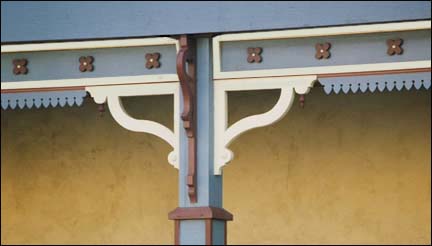
| 2-3/4" x 2-7/8" x 6" Polyurethane only BL 2857 (Shown Vertical) | 2-7/8" x 2-3/4" x 6" Polyurethane only BL 2857 |
| 3" x 3" x 6" Polyurethane only BL 2792 | (Unframed) Callie |
| (Unframed) Small Citrus | 4" - 3 Ball Fan |
| 4" - 3 Spindle Fan | 4-7/16" x 4-1/2" x 2-7/8" Polyurethane only BL 2649 (Shown Vertical) |
| 4-1/2" x 4-7/16" x 2-7/8" Polyurethane only BL 2649 | Callie |
| Jolene (Shown Vertical) | Almont |
| 4-3/4" x 4-3/4" x 3/4" Polyurethane only BL 2603 | (Unframed) Callie (Shown Horizontal) |
| 5" - 3 Ball Fan | 5" - 3 Spindle Fan |
Small Citrus | 5" x 5-5/16" x 3" Polyurethane only BL 2612 (Shown Vertical) |
| F.B. 12 | Kirby |
| Zoe | (Unframed) Riley |
| 5-1/4" x 6" x 12" Polyurethane only BL 2719 | (Unframed) Camden |
| (Unframed) Newberry (Shown Vertical) | (Unframed) Kirby |
| 5-5/16" x 5" x 3" Polyurethane only BL 2612 | Agatha |
| Sidney | (Unframed) Olga |
| Jasmine | Stanton |
| Haley | Bailey |
| Mariposa | 5-5/8" x 13-1/4" x 1-3/4" Polyurethane only GB 3310 (Shown Vertical) |
| 6" x 5-1/4" x 12" Polyurethane only BL 2719 (Shown Horizontal) | Sidney (Shown Horizontal) |
| Little Swan | Meredith |
| 6" x 17-3/4" x 1" Polyurethane only GB 3307A - UNframed (Shown Vertical) | 6-1/16" x 10" x 1" Polyurethane only GB 3314 (Shown Vertical) |
| (Unframed) Emma | (Unframed) Three Circles |
| (Unframed) Phoebe | (Unframed) Dickson |
| Callie (Shown Horizontal) | (Unframed) Effie |
| Footed | Ida Scroll |
| Olympian | (Unframed) Kirby |
| (Unframed) Zoe | (Unframed) Camden (Shown Horizontal) |
| (Unframed) Newberry | 6-3/4" - 3 Ball Fan |
| 6-3/4" - 12 Ball Fan | 6-3/4" - 4 Spindle Fan |
| (Unframed) 13" Unruffled Swan | (Unframed) 18" Unruffled Swan |
| (Unframed) Mariposa | (Unframed) 24" Ruffled Swan |
| (Unframed) 30" Ruffled Swan | Angel Wings |
| Riley | Camden |
| Newberry (Shown Horizontal) | Olga |
| Drooping Crescent | (Unframed) Tread Bracket 3 (Shown Vertical) |
| (Unframed) Kirby | Tufted Scroll |
| (Unframed) 15" Cupid's Key | Mariposa |
| (Unframed) Stanton | (Unframed) Kirby |
| (Unframed) Kirby | (Unframed) 23" Cupid's Key |
| (Unframed - 3" thick) Citrus Top | (Unframed) 31" Cupid's Key |
| (Unframed) 36" Cupid's Key | (Unframed - 3" thick) Citrus Top |
| (Unframed) Olga (Shown Horizontal) | (Unframed) Phoebe (Shown Horizontal) |
| Kirby | 7-3/8" x 21-5/16" x 1" Polyurethane only GB 3308A - UNframed (Shown Vertical) |
| (Unframed) Beau | (Unframed) Bradie |
| Celeste | (Unframed) Felicity |
| Trefoils | Winged Messenger |
| 7-1/2" x 10-5/8" x 3" Polyurethane only BL 2673 | Michele |
| F.B. 4 | F.B. 9 |
| (Unframed) Jasmine | (Unframed) Haley |
| (Unframed) Bailey | (Unframed) Almont |
| 7-3/4" x 11-1/2" x 1" Polyurethane only GB 3332 (Shown Vertical) | (Unframed) Meredith |
| Tread Bracket 2 (Shown Vertical) | 7-7/8" x 19-3/4" x 2" Polyurethane only GB 3331 (Shown Vertical) |
| Jolene | Footed (Shown Horizontal) |
| Emma | Footed Crescent |
| Screen Door Corner | Three Circles |
| Phoebe | 8" x 10" x 3-1/2" Polyurethane only BL 2608 (Shown Vertical) |
| F.B. 11 | Tread Bracket 1 (Shown Vertical) |
| Camden (Shown Horizontal) | Newberry |
| Effie | Circle Crescent |
| Sawyer | Cockscomb |
| Footed | F.B. 1 |
| F.B. 8 | F.B. 13 |
| 13" Unruffled Swan | F.B. 12 |
| Arched (Shown Vertical) | 8-1/2" x 18" Kirby |
| Bird of Paradise | 8-1/2" x 19" x 1-3/4" Polyurethane only GB 3311 (Shown Vertical) |
| 18" Unruffled Swan | 8-1/2" x 20-1/4" x 1-1/2" Polyurethane only GB 3307B (Shown Vertical) |
| 21" Scroll | 24" Ruffled Swan |
| F.B. 12 (Shown Horizontal) | Olga (Shown Horizontal) |
| Phoebe (Shown Horizontal) | Agatha |
| Barrett | Quarter Circle |
| Santa Fe | Brooks |
| Sidney | Cockatoo |
| Kirby | Ida Scroll |
| 15" Cupid's Key | Stanton |
| Kirby | Mariposa |
| Swan's Neck | Kirby |
| 23" Cupid's Key | 9" x 28-1/4" x 5-1/4" Polyurethane only BL 2942 (Shown Vertical) |
| 9-1/4" x 9-1/4" x 3" Polyurethane only BL 2885 | 9-1/4" x 13" x 3-1/8" Polyurethane only BL 2789 |
| 9-1/4" x 18-3/4" x 3/4" Polyurethane only GB 3309 | Drooping Crescent (Shown Horizontal) |
| Trefoils (Shown Horizontal) | Sawyer (Shown Horizontal) |
| 9-1/2" - 3 Ball Fan | 9-1/2" - 3 Spool Fan |
| 9-1/2" - 4 Spool Fan | Avonlea |
| Beau | Bradie |
| Felicity | Flying Spindle |
| Sun Ray 5 | F.B. 15 (Shown Vertical) |
| Winged Messenger | F.B. 3 |
| F.B. 4 | F.B. 8 |
| 9-1/2" x 17-1/4" x 2" Polyurethane only BL 2596 | Nautilus |
| Jasmine | 9-7/8" x 24" x 1-1/2" Polyurethane only GB 3308B (Shown Vertical) |
| Little Swan (Shown Horizontal) | (Unframed) Shelby |
| 10" x 6-1/16" x 1" Polyurethane only GB 3314 | (Unframed) Tread Bracket 3 |
| Winged Messenger (Shown Horizontal) | 10" x 8" x 3-1/2" Polyurethane only BL 2608 |
| Cockscomb (Shown Horizontal) | Brooks (Shown Horizontal) |
| F.B. 7 | 10" x 10" x 1-1/2" Polyurethane only BL 2893 |
| 10" x 10" x 4" Polyurethane only BL 2601 | F.B. 10 |
| 10" x 14" x 4-1/2" Polyurethane only BL 2863 (Shown Vertical) | The Anatole (Shown Vertical) |
| F.B. 11 | Bailey |
| Almont | Meredith |
| 10-1/4" x 19-1/2" x 2" Polyurethane only GB 3312 (Shown Vertical) |
| Almont (Shown Horizontal) | Jasmine (Shown Horizontal) |
| Stanton (Shown Horizontal) | Footed (Shown Horizontal) |
| Sidney (Shown Horizontal) | Gabrielle |
| 10-1/2" x 12-1/2" x 1" Polyurethane only BL 2430 | Texas Special |
| 10-5/8" x 7-1/2" x 3" Polyurethane only BL 2673 (Shown Horizontal) | Kirby (Shown Horizontal) |
| Haley (Shown Horizontal) | Ida Scroll (Shown Horizontal) |
| Michele (Shown Horizontal) | F.B. 10 (Shown Horizontal) |
| 11" - 8 Ball Fan | 11" - 12 Ball Fan |
| 11" - 4 Spindle Fan | Three Circles |
| The Three Square | Cockscomb |
| F.B. 2 | Olivia |
| 11" x 15" x 3-1/2" Polyurethane only BL 2507 | 11" x 15-1/2" x 2-1/2" Polyurethane only BL 2437 |
| Parrot's Beak | 11" x 17" x 2-7/8" Polyurethane only BL 2645 |
| Gothic Circle | (1-1/2" thick) Sun Ray 3 (Shown Vertical) |
| Bailey (Shown Horizontal) | Mariposa (Shown Horizontal) |
| Olympian (Shown Horizontal) | F.B. 4 (Shown Horizontal) |
| 11-1/2" x 7-3/4" x 1" Polyurethane only GB 3332 | Tread Bracket 2 |
| Tread Bracket 1 | F.B. 1 (Shown Horizontal) |
| Gabrielle (Shown Horizontal) | Cockscomb (Shown Horizontal) |
| Quarter Circle | 11-1/2" x 11-1/2" x 3" Polyurethane only BL 2671 |
| Virginia Creeper | Triangle E w/ Finial |
| 11-7/8" x 16" x 3" Polyurethane only BL 2521 | F.B. 8 (Shown Horizontal) |
| F.B. 15 | Virginia Creeper (Shown Horizontal) |
| 12" - 5 Spindle Fan | 12" - 3 Spool Fan |
| Footed Crescent | Sun Ray 5 |
| 12" x 12" x 1" Polyurethane only BL 2434 | 12" x 12" x 2-1/16" Polyurethane only GB 3333 |
| 12" x 12" x 3-1/2" Polyurethane only BL 2618 | 12" x 13" x 5-1/2" Polyurethane only BL 2533 |
| 12" x 15" - 5 Spindle Fan | Lazy Footed Crescent |
| 12" x 16-1/2" x 3" Polyurethane only BL 2686 | Multi-fleur |
| F.B. 6 | 12" x 28-1/4" x 5-1/4" Polyurethane only BL 2606 |
| 12" x 36-9/16" x 3-1/2" Polyurethane only BL 2543 | F.B. 2 (Shown Horizontal) |
| 12-3/16" x 12-3/16" x 1" Polyurethane only BL 2529 | 12-3/8" x 23" x 2-1/2" Polyurethane only BL 2594 |
| 12-1/2" x 10-1/2" x 1" Polyurethane only BL 2430 (Shown Horizontal) | 12-7/8" x 12-7/8" x 2-3/4" Polyurethane only BL 2720RS |
| (Unframed) 13" Unruffled Swan (Shown Horizontal) | F.B. 9 (Shown Horizontal) |
| F.B. 11 (Shown Horizontal) | Cockatoo (Shown Horizontal) |
| 13" x 9-1/4" x 3-1/8" BL 2789 (Shown Horizontal) | Winged Messenger (Shown Horizontal) |
| 13" x 12" x 5-1/2" BL 2533 (Shown Horizontal) | Gabrielle |
| 13" x 16-7/8" x 4" BL 2664 | Fleur |
| Triangle E | 17" Scroll |
| Arched (Shown Vertical) | 13-1/4" x 5-5/8" x 1-3/4" GB 3310 |
| 13-1/4" x 13-1/4" x 2-1/2" BL 2945 | 13-1/4" x 23-3/4" x 4" BL 2737 |
| Kirby (Shown Horizontal) | (1-1/2" thick) SR 4 |
| 13-1/2" x 13-1/2" x 3-1/2" BL 2446 | 13-1/2" x 15" x 2-1/2" BL 2821 |
| 13-1/2" x 15-1/4" x 3-1/2" BL 2558 (Shown Vertical) | (1-1/2" thick) SR 2 |
| 13-1/2" x 20-1/2" x 1-1/2" GB 3315 (Shown Vertical) | Tufted Scroll (Shown Horizontal) |
| F.B. 13 (Shown Horizontal) | F.B. 3 (Shown Horizontal) |
| F.B. 4 (Shown Horizontal) | F.B. 8 (Shown Horizontal) |
| 13-3/4" - 12 Ball Fan | 13-3/4" - 4 Spindle Fan |
| 13-3/4" - 16 Ball Fan | Agatha |
| Sun Ray 5 | Circle Crescent |
| F.B. 2 | (1-1/2" thick) SR 7 |
| Texas Special | (Unframed) Kirby (Shown Horizontal) |
| 14" x 10" x 4-1/2" BL 2863 | (1-1/2" thick) Shown with 2 Foot pieces) Sun Ray 3 (Shown Vertical) |
| 14" x 24" x 6" BL 2747 | 14-1/2" x 14-1/2" x 1" BL 2506 |
| 14-1/2" x 14-1/2" x 3-1/2" BL 2431 | 14-1/2" x 24" x 4" BL 2721 |
| 14-3/4" x 15-1/2" x 4-3/4" BL 2850 | (Unframed) Dickson (Shown Horizontal) |
| 13" Unruffled Swan (Shown Horizontal) | F.B. 12 (Shown Horizontal) |
| Olivia (Shown Horizontal) | 15" x 11" x 3-1/2" Polyurethane only BL 2507 (Shown Horizontal) |
| 12" x 15" - 5 Spindle Fan (Shown Horizontal) | Lazy Footed Crescent (Shown Horizontal) |
| Gabrielle (Shown Horizontal) | 15" x 13-1/2" x 2-1/2" Polyurethane only BL 2821 (Shown Horizontal) |
| 15" - 5 Spindle Fan | 15" - 3 Spool Fan |
| Flying Circle | Flying Spindle |
| Rosalyn | 15" x 18" x 3-1/2" Polyurethane only BL 2591 |
| 15" x 18" x 6" Polyurethane only BL 2614 | 15" x 19-1/16" x 3-1/2" Polyurethane only BL 2505 |
| Star | 15" x 20" x 3" Polyurethane only BL 2884 (Shown Vertical) |
| 15" x 20" x 5" Polyurethane only BL 2589 | Archredeux (Shown Vertical) |
| 15" x 24" x 3-1/2" Polyurethane only BL 2465-15 | 15-1/4" x 13-1/2" x 3-1/2" Polyurethane only BL 2558 |
| 15-1/4" x 21" x 3" Polyurethane only BL 2478 | (Unframed) 15" Cupid's Key (Shown Horizontal) |
| Kirby (Shown Horizontal) | 15-1/2" x 11" x 2-1/2" BL 2437 (Shown Horizontal) |
| 15-1/2" x 14-3/4" x 4-3/4" BL 2850 (Shown Horizontal) | 15-7/8" x 15-7/8" x 2" BL 2468 |
| 15-7/8" x 15-7/8" x 2" BL 2568 Bracket | Meredith (Shown Horizontal) |
| (Unframed) Kirby (Shown Horizontal) | Kirby (Shown Horizontal) |
| Ida Scroll (Shown Horizontal) | The Anatole |
| Texas Special (Shown Horizontal) | Parrot's Beak (Shown Horizontal) |
| 16" x 11-7/8" x 3" Polyurethane only BL 2521 (Shown Horizontal) | F.B. 2 (Shown Horizontal) |
| Rosalyn (Shown Horizontal) | 16" - 5 Spool Fan |
| 16" x 16" x 4" Polyurethane only BL 2602 | 16" x 17" x 6" Polyurethane only BL 2532 |
| 16" x 18" x 3-1/2" Polyurethane only BL 2675 (Shown Vertical) | 16" x 20" - 5 Spool Fan |
| Stockbridge (Shown Vertical) | (1" thick) Sun Ray 1 (Shown Vertical) |
| 16-1/2" x 12" x 3" Polyurethane only BL 2686 (Shown Horizontal) | (1-1/2" thick) SR 6 |
| 16-1/2" x 18" x 4" Polyurethane only BL 2577 (Shown Vertical) | 16-7/8" x 13" x 4" Polyurethane only BL 2664 (Shown Horizontal) |
| Mariposa (Shown Horizontal) | (Unframed) Stanton (Shown Horizontal) |
| (Unframed) Jasmine (Shown Horizontal) | F.B. 11 (Shown Horizontal) |
| 17" x 11" x 2-7/8" Polyurethane only BL 2645 (Shown Horizontal) | Multi-fleur (Shown Horizontal) |
| 17" x 16" x 6" Polyurethane only BL 2532 (Shown Horizontal) | Wild Cockatoo |
| Arched (Shown Vertical) | 17-1/4" x 9-1/2" x 2" Polyurethane only BL 2596 (Shown Horizontal) |
(1-1/2" thick) Citrus | |
| 17-1/2" x 17-1/2" x 3" Polyurethane only BL 2672 | 17-1/2" x 17-1/2" x 6" Polyurethane only BL 2665 |
| 17-1/2" x 18" x 1-1/4" Polyurethane only GB 3316 | 17-3/4" x 6" x 1" Polyurethane only GB 3307A - UNframed |
| Arched | 15" Cupid's Key (Shown Horizontal) |
| Nautilus (Shown Horizontal) | F.B. 6 (Shown Horizontal) |
| Fleur (Shown Horizontal) | Triangle E (Shown Horizontal) |
| Quarter Circle | 17-3/4" - 28 Ball Fan |
| Virginia Creeper | (Unframed) 18" Unruffled Swan (Shown Horizontal) |
| (Unframed) Haley (Shown Horizontal) | Kirby (Shown Horizontal) |
| (1-1/2" thick) Sun Ray 3 | 18" x 15" x 3-1/2" Polyurethane only BL 2591 (Shown Horizontal) |
| 18" x 15" x 6" Polyurethane only BL 2614 (Shown Horizontal) | 18" x 16" x 3-1/2" Polyurethane only BL 2675 |
| 18" x 16-1/2" x 4" Polyurethane only BL 2577 | 18" x 17-1/2" x 1-1/4" Polyurethane only GB 3316 (Shown Horizontal) |
| 18" x 18" x 5-1/4" Polyurethane only BL 2717 | 18" x 18-1/8" x 6" Polyurethane only BL 2786 |
| 18" x 24" x 5-1/2" Polyurethane only BL 2859 | 18" x 24" x 6" Polyurethane only BL 2745 |
| 18" x 25" x 2" Polyurethane only GB 3330 (Shown Vertical) | 18" x 30" x 4" Polyurethane only BL 2565 |
| 18" x 36" x 6" Polyurethane only BL 2746 | 18-1/16" x 25" x 6" Polyurethane only BL 2723 (Shown Vertical) |
| 18-1/8" x 18" x 6" Polyurethane only BL 2786 (Shown Horizontal) | (1-1/2" thick) Footed Crescent |
| 18-1/4" x 18-3/4" x 2-1/2" Polyurethane only GB 3322 | 18-1/4" x 21-1/2" x 4-1/4" Polyurethane only BL 2562 (Shown Vertical) |
| 18-3/4" x 9-1/4" x 3/4" Polyurethane only GB 3309 (Shown Horizontal) | 18-3/4" x 18-1/4" x 2-1/2" Polyurethane only GB 3322 (Shown Horizontal) |
| (Unframed) Kirby (Shown Horizontal) | 18-5/8" x 24" x 4" Polyurethane only BL 2869 |
| Bird of Paradise (Shown Horizontal) | 19" x 8-1/2" x 1-3/4" Polyurethane only GB 3311 |
| Stanton (Shown Horizontal) | Jasmine (Shown Horizontal) |
| 17" Scroll (Shown Horizontal) | Wild Cockatoo (Shown Horizontal) |
| Virginia Creeper (Shown Horizontal) | (1-1/2" thick) Crescent with Buttons |
| 19-1/16" x 15" x 3-1/2" Polyurethane only BL 2505 (Shown Horizontal) | 19-1/2" x 10-1/4" x 2" Polyurethane only GB 3312 |
| 19-1/2" x 20" x 2" Polyurethane only BL 2810 (Shown Vertical) | 19-1/2" x 31-1/2" x 7-1/4" Polyurethane only BL 2892 |
| 19-3/4" x 7-7/8" x 2" Polyurethane only GB 3331 | (Unframed) Mariposa (Shown Horizontal) |
(Unframed) Bailey (Shown Horizontal) | 18" Unruffled Swan (Shown Horizontal) |
| Texas Special (Shown Horizontal) | Star (Shown Horizontal) |
| 20" x 15" x 3" Polyurethane only BL 2884 | 20" x 15" x 5" Polyurethane only BL 2589 (Shown Horizontal) |
| 16" x 20" - 5 Spool Fan (Shown Horizontal) | Stockbridge |
| 20" x 19-1/2" x 2" Polyurethane only BL 2810 | 20" - 5 Spool Fan |
| (1-1/2" thick) Cupid's Arrow | (1-1/2" thick) Dove's Wing |
| 20-1/16" x 24-7/8" x 1" Polyurethane only GB 3320 | 20-1/4" x 8-1/2" x 1-1/2" Polyurethane only GB 3307B |
| 20-1/2" x 13-1/2" x 1-1/2" Polyurethane only GB 3315 | 20-1/2" x 65-3/4" x 3-3/4" Polyurethane only BL 2894 |
| Kirby (Shown Horizontal) | Gothic Circle (Shown Horizontal) |
| (1-1/2" thick) Shown with 2 Foot pieces) Sun Ray 3 | Archredeux |
| 21" x 15-1/4" x 3" Polyurethane only (Shown Horizontal) BL 2478 | (1-1/2" thick) Andover |
| 21" x 21" x 4" Polyurethane only BL 2793 | Rosalyn |
| 21-1/2" x 18-1/4" x 4-1/4" Polyurethane only BL 2562 | (1-1/2" thick) Citrus |
| 21-1/2" x 21-7/8" x 1" Polyurethane only GB 3321 | 21-5/16" x 7-3/8" x 1" Polyurethane only GB 3308A - UNframed |
| 21-3/4" x 27-1/2" x 3" Polyurethane only BL 2822 (Shown Vertical) | 21-7/16" x 29" x 4" Polyurethane only BL 2520 (Shown Vertical) |
| 21-7/8" x 21-1/2" x 1" Polyurethane only GB 3321 (Shown Horizontal) | Kirby (Shown Horizontal) |
| Mariposa (Shown Horizontal) | Swan's Neck (Shown Horizontal) |
| Bailey (Shown Horizontal) | Rosalyn (Shown Horizontal) |
| 22" x 24" x 2" Polyurethane only BL 2727 (Shown Vertical) | 22" x 24" x 5-1/2" Polyurethane only BL 2957 |
| (1-1/4" thick) Sun Ray 1 (Shown Vertical) | (1" thick) Sun Ray 1 |
| 22-3/4" x 22-3/4" x 6" Polyurethane only BL 2716 | (Unframed - 3" thick) 23" Cupid's Key (Shown Horizontal) |
| (Unframed) Citrus Top (Shown Horizontal) | 23" x 12-3/8" x 2-1/2" Polyurethane only BL 2594 (Shown Horizontal) |
| 23-3/8" x 44-3/4" x 8" Polyurethane only BL 2856 | 23-3/4" x 13-1/4" x 4" Polyurethane only BL 2737 (Shown Horizontal) |
| (Unframed) 24" Ruffled Swan (Shown Horizontal) | (Unframed) Almont (Shown Horizontal) |
| 21" Scroll (Shown Horizontal) | 24" x 9-7/8" x 1-1/2" Polyurethane only GB 3308B |
| 24" x 14" x 6" Polyurethane only BL 2747 (Shown Horizontal | 24" x 14-1/2" x 4" Polyurethane only BL 2721 (Shown Horizontal) |
| 24" x 15" x 3-1/2" Polyurethane only BL 2465-15 (Shown Horizontal) | 24" x 18" x 5-1/2" Polyurethane only BL 2859 (Shown Horizontal) |
| 24" x 18" x 6" Polyurethane only BL 2745 (Shown Horizontal) | 24" x 18-5/8" x 4" Polyurethane only BL 2869 (Shown Horizontal) |
| (1-1/2" thick) Dove's Wing (Shown Horizontal) | 24" x 22" x 2" Polyurethane only BL 2727 |
| 24" x 22" x 5-1/2" Polyurethane only BL 2957 (Shown Horizontal) | 24" x 24" x 3" Polyurethane only GB 3324 |
| 24" x 24" x 5-1/4" Polyurethane only BL 2480 | 24" x 25" x 4" Polyurethane only BL 2831 |
| 24" x 25-1/4" x 2-1/2" Polyurethane only BL 2943 | 24" x 26" x 5-1/2" Polyurethane only BL 2777 |
| 24" x 26" x 12" Polyurethane only BL 2852 | (1-1/4" thick) 30" Spoked Wheel |
| 24" x 30" x 4" Polyurethane only BL 2681 | 24" x 36" x 7-1/4" Polyurethane only BL 2661 |
| Kirby (Shown Horizontal) | 24-7/8" x 20-1/16" x 1" Polyurethane only GB 3320 (Shown Horizontal) |
| 23" Cupid's Key (Shown Horizontal) | Arched |
| 25" x 18" x 2" Polyurethane only GB 3330 | 25" x 18-1/16" x 6" Polyurethane only BL 2723 |
| 25" x 24" x 4" Polyurethane only BL 2831 (Shown Horizontal) | 25" x 25" x 3-1/2" Polyurethane only BL 2701 |
| 25" x 27-1/2" x 3-1/2" Polyurethane only BL 2928 | 25-1/4" x 24" x 2-1/2" Polyurethane only BL 2943 (Shown Horizontal) |
| 25-1/2" x 27-1/4" x 3-1/2" Polyurethane only BL 2559 (Shown Vertical) | 24" Ruffled Swan (Shown Horizontal) |
Almont (Shown Horizontal) | 26" x 24" x 5-1/2" Polyurethane only BL 2777 (Shown Horizontal) |
| 26" x 24" x 12" Polyurethane only BL 2852 (Shown Horizontal) | 26" x 26" x 4" Polyurethane only BL 2561 |
| 26" x 27" x 4-1/2" Polyurethane only BL 2541 | 26" x 46" x 7-1/2" Polyurethane only BL 2879 |
Large Dove's Wing (Shown Vertical) | 27" x 26" x 4-1/2" Polyurethane only BL 2541 (Shown Horizontal) |
| 27" x 27" x 6" Polyurethane only BL 2934 | 27-1/4" x 25-1/2" x 3-1/2" Polyurethane only BL 2559 |
| 27-1/2" x 21-3/4" x 3" Polyurethane only BL 2822 | 27-1/2" x 25" x 3-1/2" Polyurethane only BL 2928 (Shown Horizontal) |
| 27-1/2" x 27-1/2" x 2-1/2" Polyurethane only BL 2700 | 27-1/2" x 30-1/2" x 3-1/2" Polyurethane only BL 2555 (Shown Vertical) |
| 27-1/2" x 30-1/2" x 6" Polyurethane only BL 2844 (Shown Vertical) | (Unframed) Meredith (Shown Horizontal) |
| 28" x 30" x 3-1/2" Polyurethane only BL 2465-28 | 28" x 30" x 3-1/2" Polyurethane only BL 2828 (Shown Vertical) |
| 28" x 30" x 4" Polyurethane only BL 2689 (Shown Vertical) | 28" x 30" x 6" Polyurethane only BL 2650 |
| 28-1/4" x 9" x 5-1/4" Polyurethane only BL 2942 | 28-1/4" x 12" x 5-1/4" Polyurethane only BL 2606 (Shown Horizontal) |
| 29" x 21-7/16" x 4" Polyurethane only BL 2520 | 29" x 29" x 6" Polyurethane only BL 2715 |
| Large Dove's Wing (Shown Vertical) | (Unframed) 30" Ruffled Swan (Shown Horizontal) |
| Meredith (Shown Horizontal) | 30" x 18" x 4" Polyurethane only BL 2565 (Shown Horizontal) |
| (1-1/4" thick) 30" Spoked Wheel (Shown Horizontal) | 30" x 24" x 4" Polyurethane only BL 2681 (Shown Horizontal) |
| (1-1/4" thick) Sun Ray 1 | 30" x 28" x 3-1/2" Polyurethane only BL 2465-28 (Shown Horizontal) |
| 30" x 28" x 3-1/2" Polyurethane only BL 2828 | 30" x 28" x 4" Polyurethane only BL 2689 |
| 30" x 28" x 6" Polyurethane only BL 2650 (Shown Horizontal) | (1-1/2" thick) Footed Crescent |
| 30" x 30" x 6" Polyurethane only BL 2891 | 30" x 30" x 7" Polyurethane only BL 2639 |
| 30" x 32" x 7" Polyurethane only BL 2712 (Shown Vertical) | 30" x 36" x 5" Polyurethane only BL 2688 (Shown Vertical) |
| 30-1/8" x 30-1/8" x 6-1/16" Polyurethane only BL 2503 | 30-1/2" x 27-1/2" x 3-1/2" Polyurethane only BL 2555 |
| 30-1/2" x 27-1/2" x 6" Polyurethane only BL 2844 | 30-3/4" x 30-3/4" x 5" Polyurethane only BL 2703 |
| 30-3/4" x 30-3/4" x 8" Polyurethane only BL 2698 | (Unframed) 31" Cupid's Key (Shown Horizontal) |
| 31-1/2" x 19-1/2" x 7-1/4" Polyurethane only BL 2892 (Shown Horizontal) | 31-1/2" x 31-1/2" x 6" Polyurethane only BL 2598 |
| 32" x 30" x 7" Polyurethane only BL 2712 | 32" x 32" x 4" Polyurethane only BL 2576 |
| 32" x 32" x 6" Polyurethane only BL 2567 | Large Dove's Wing |
| 33" x 33" x 4" Polyurethane only GB 3334 | 33" x 42" x 3-1/2" Polyurethane only BL 2499 |
| Large Dove's Wing | 35" x 65-1/2" x 6" Polyurethane only BL 2832 |
| 35-3/8" x 43-3/4" x 6" Polyurethane only BL 2615 (Shown Vertical) | (Unframed) 36" Cupid's Key Bracket |
| (Unframed) Citrus Top (Shown Horizontal) | 36" x 18" x 6" Polyurethane only BL 2746 (Shown Horizontal) |
| 36" x 24" x 7-1/4" Polyurethane only BL 2661 (Shown Horizontal) | 36" x 30" x 5" Polyurethane only BL 2688 |
| 36" x 36" x 5" Polyurethane only BL 2868 | 36-1/8" x 36-1/8" x 6" Polyurethane only BL 2938 |
| 36-1/4" x 42-1/4" x 3-1/2" Polyurethane only Polyurethane only BL 2735 | 36-9/16" x 12" x 3-1/2" Polyurethane only BL 2543 (Shown Horizontal) |
| 37" x 38" x 3-1/2" Polyurethane only BL 2917 | Arched |
| 38" x 37" x 3-1/2" Polyurethane only BL 2917 (Shown Horizontal) | 40" x 40" x 4" Polyurethane only BL 2962 |
| 41-1/2" x 48" x 7-1/4" Polyurethane only BL 2775 | 42" x 33" x 3-1/2" Polyurethane only BL 2499 (Shown Horizontal) |
| 42-1/4" x 36-1/4" x 3-1/2" Polyurethane only BL 2735 (Shown Horizontal) | 43-3/4" x 35-3/8" x 6" Polyurethane only BL 2615 |
| 44" x 44" x 10" Polyurethane only BL 2713 | 44-3/4" x 23-3/8" x 8" Polyurethane only BL 2856 (Shown Horizontal) |
| 46" x 26" x 7-1/2" Polyurethane only BL 2879 (Shown Horizontal) | 48" x 41-1/2" x 7-1/4" Polyurethane only BL 2775 (Shown Horizontal) |
| 65-1/2" x 35" x 6" Polyurethane only BL 2832 (Shown Horizontal) | 65-3/4" x 20-1/2" x 3-3/4" Polyurethane only BL 2894 (Shown Horizontal) |


 WARNING: Drilling, sawing, sanding or machining wood products can expose you to wood dust, a substance known to the State of California to cause cancer. Avoid inhaling wood dust or use a dust mask or other safeguards for personal protection. For more information go to www.P65Warnings.ca.gov/wood
  WARNING: This product contains NMP, a chemical known to the State of California to cause birth defects or other reproductive harm. For more information go to www.P65Warnings.ca.gov

| 4" Cedar Newels | ||||||
|---|---|---|---|---|---|---|
Top | Area | Bottom | Height | |||
| Designer | 4" x 48" | 3-9/16" | 9-5/16" | 16-1/16" | 18-15/16" | 47-7/8" |
| Designer | 4" x 54" | 3-1/2" | 9-1/4" | 16-1/16" | 24-11/16" | 53-1/2" |
| Boise | 4" x 48" | 5-3/4" | 47-3/4" | |||
| Boise | 4" x 54" | 5-3/4" | 24-1/4" | 53-3/4" | ||
| Plain | 4" x 48" | | | | 47-1/2" | |
| Plain | 4" x 54" | | | | 53-1/2" | |
| Single V Groove | 4" x 48" | | 4-3/4" | | 47-3/4" | |
| Single V Groove | 4" x 54" | | 4-3/4" | | 53-7/8" | |
| 6" Cedar Newels | ||||||
|---|---|---|---|---|---|---|
Top | Area | Bottom | Height | |||
| Designer | 6" x 48" | 3-7/8" | 8-5/8" | 16-3/4" | 18-1/2" | 47-3/4" |
| Designer | 6" x 60" | 3-7/8" | 8-1/4" | 16-3/8" | 31-7/16" | 59-15/16" |
| Horizon | 6" x 48" | 6-3/4" | 20-3/4" | 15-1/2" | ||
| Horizon | 6" x 60" | 6-5/8" | 4-1/16" | 20-3/4" | 27-3/4" | 59-3/16" |
| San Francisco Plain/Fluted | 6" x 48" | 5-13/16" | 4-3/4" | | | 47-9/16" |
| San Francisco Plain/Fluted | 6" x 60" | | 5-3/16 | 20-9/16 | | 59-3/4" |
| Empire Plain/Rope/Fluted | 6" x 48" | 5-3/4" | 5-1/8" | 20-1/8" | 16-1/8" | 47-7/16" |
| Empire Plain/Rope/Fluted | 6" x 60" | 6" | 5" | 20" | 28" | 59" |

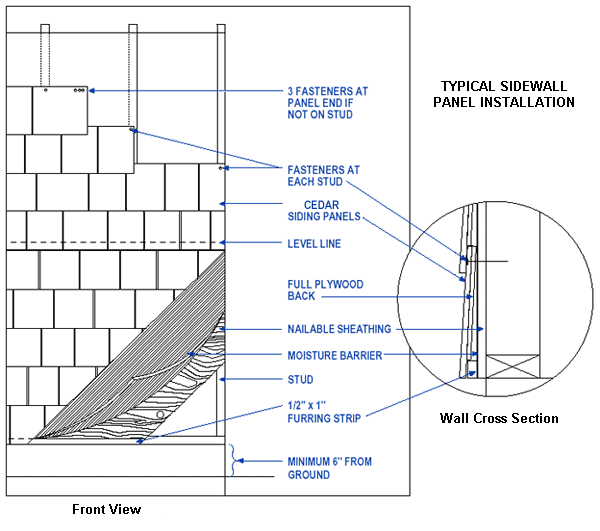
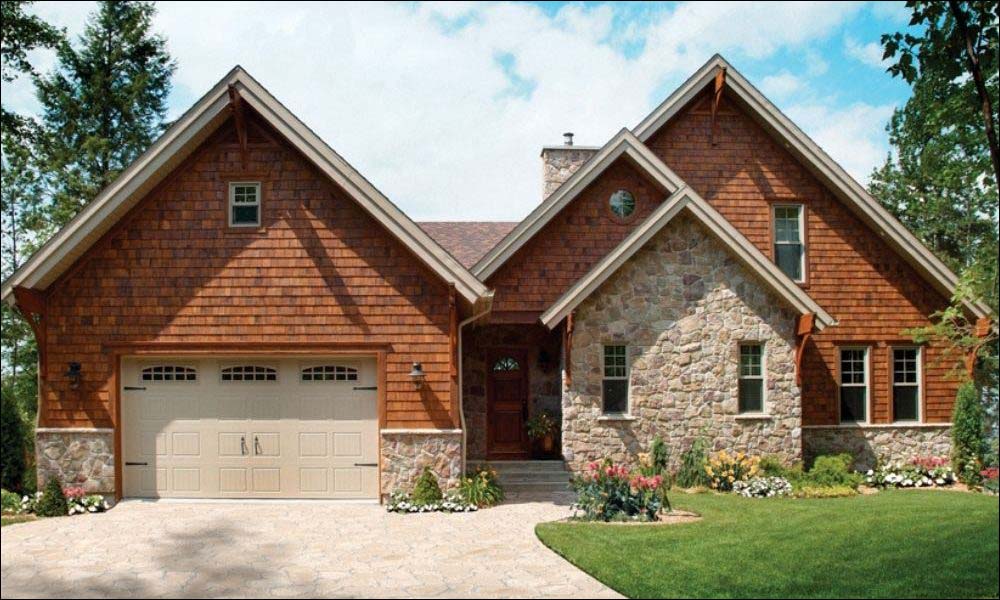
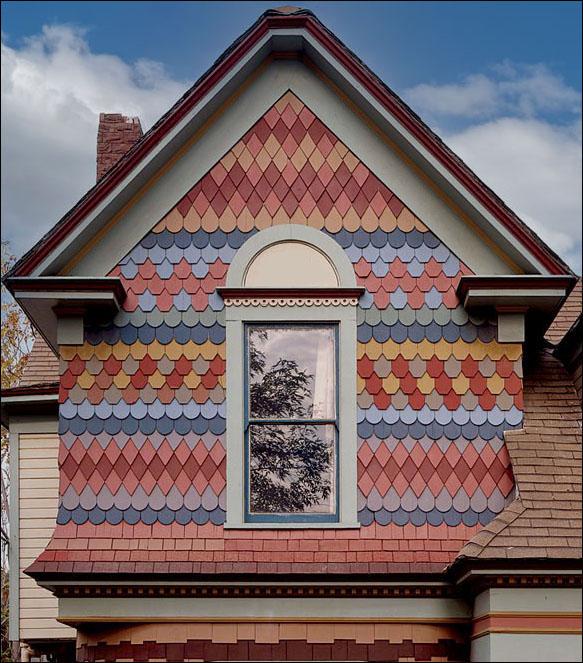
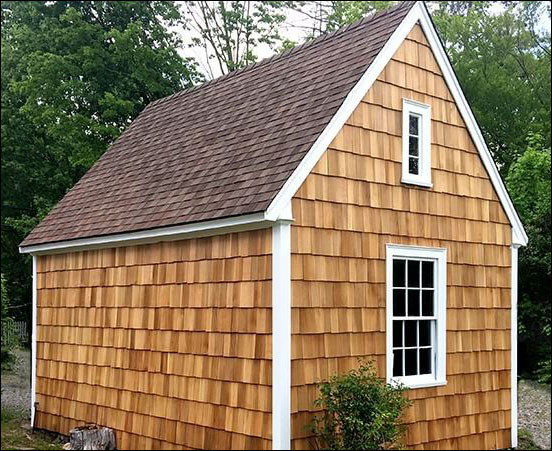
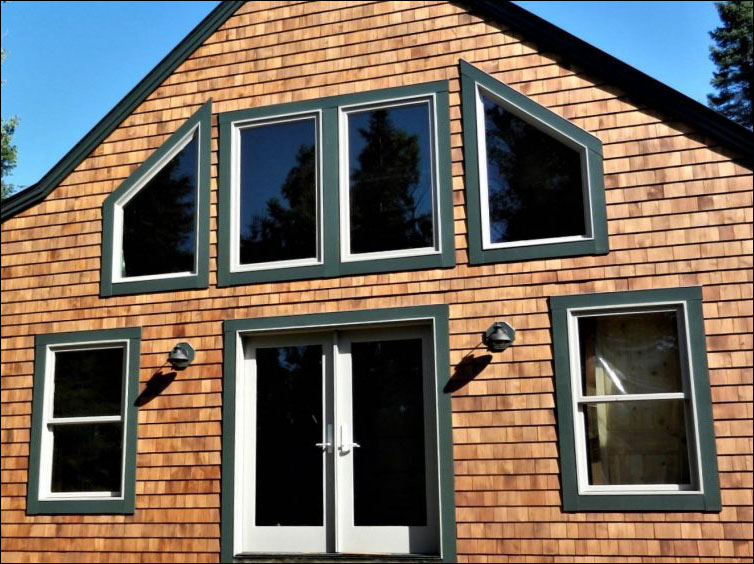
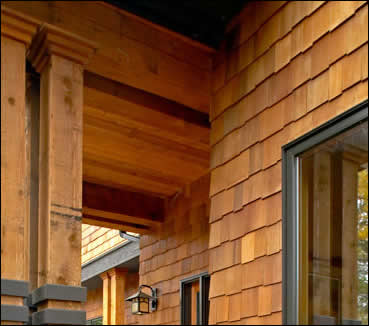
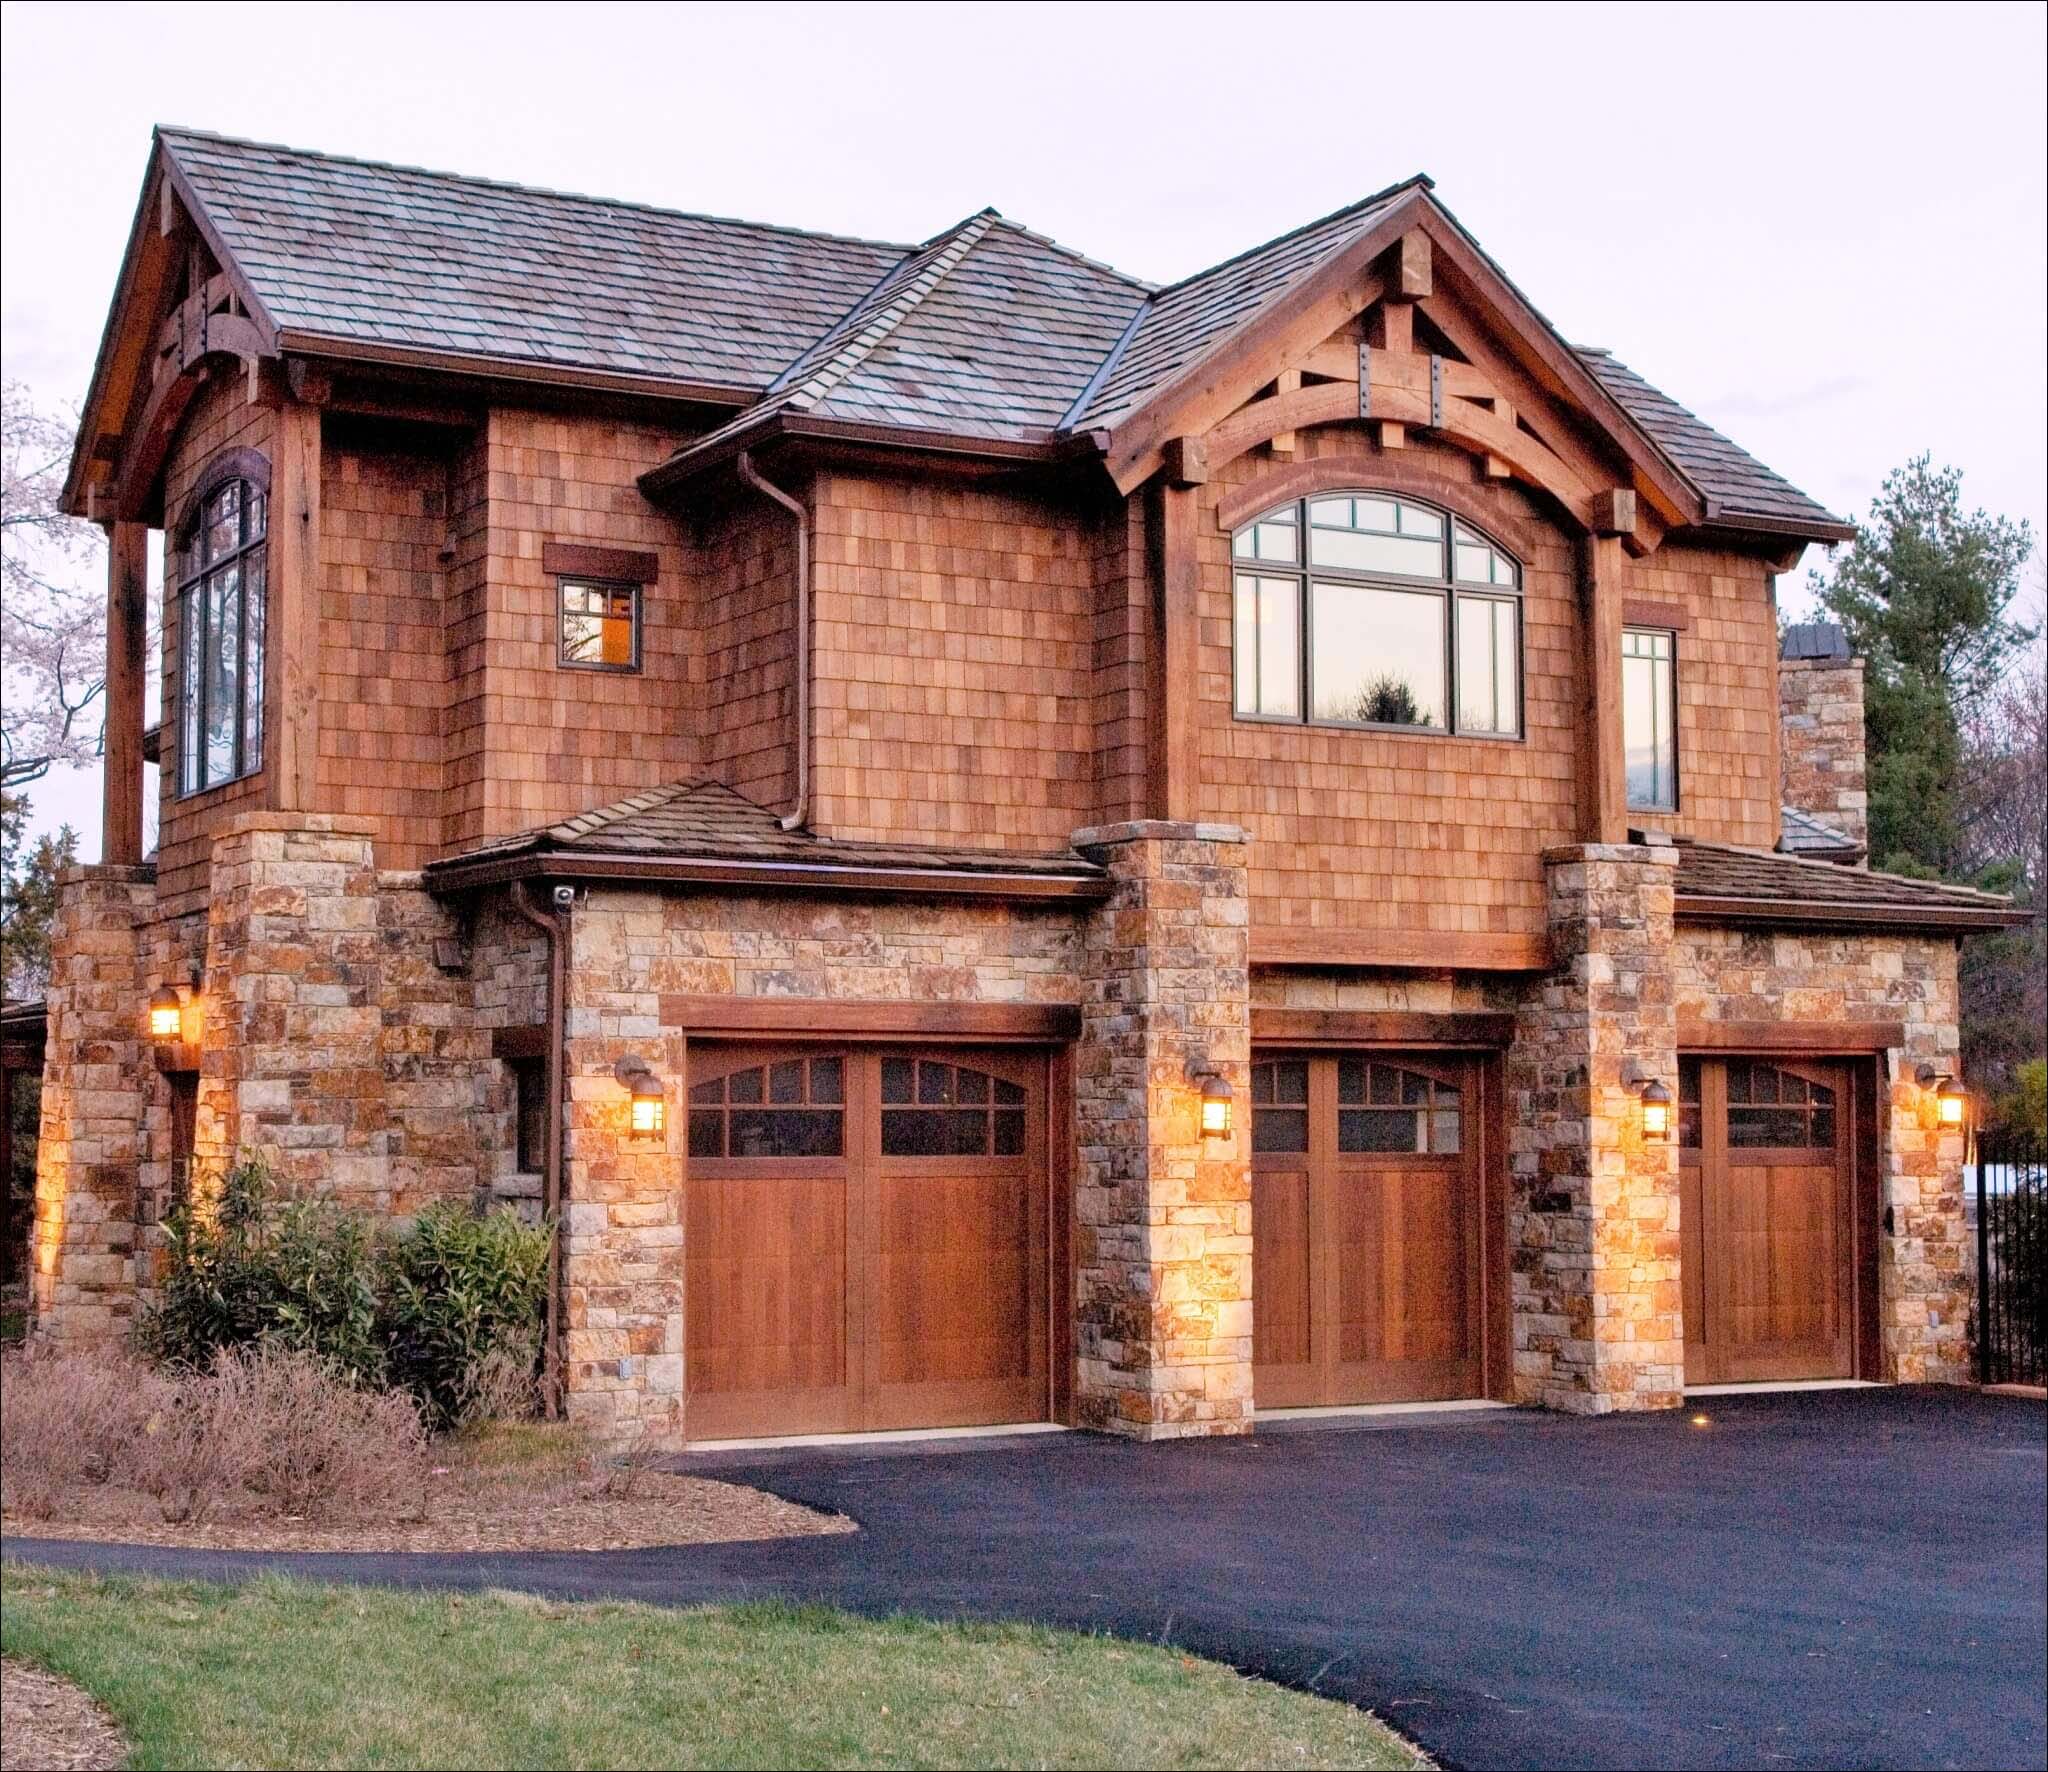
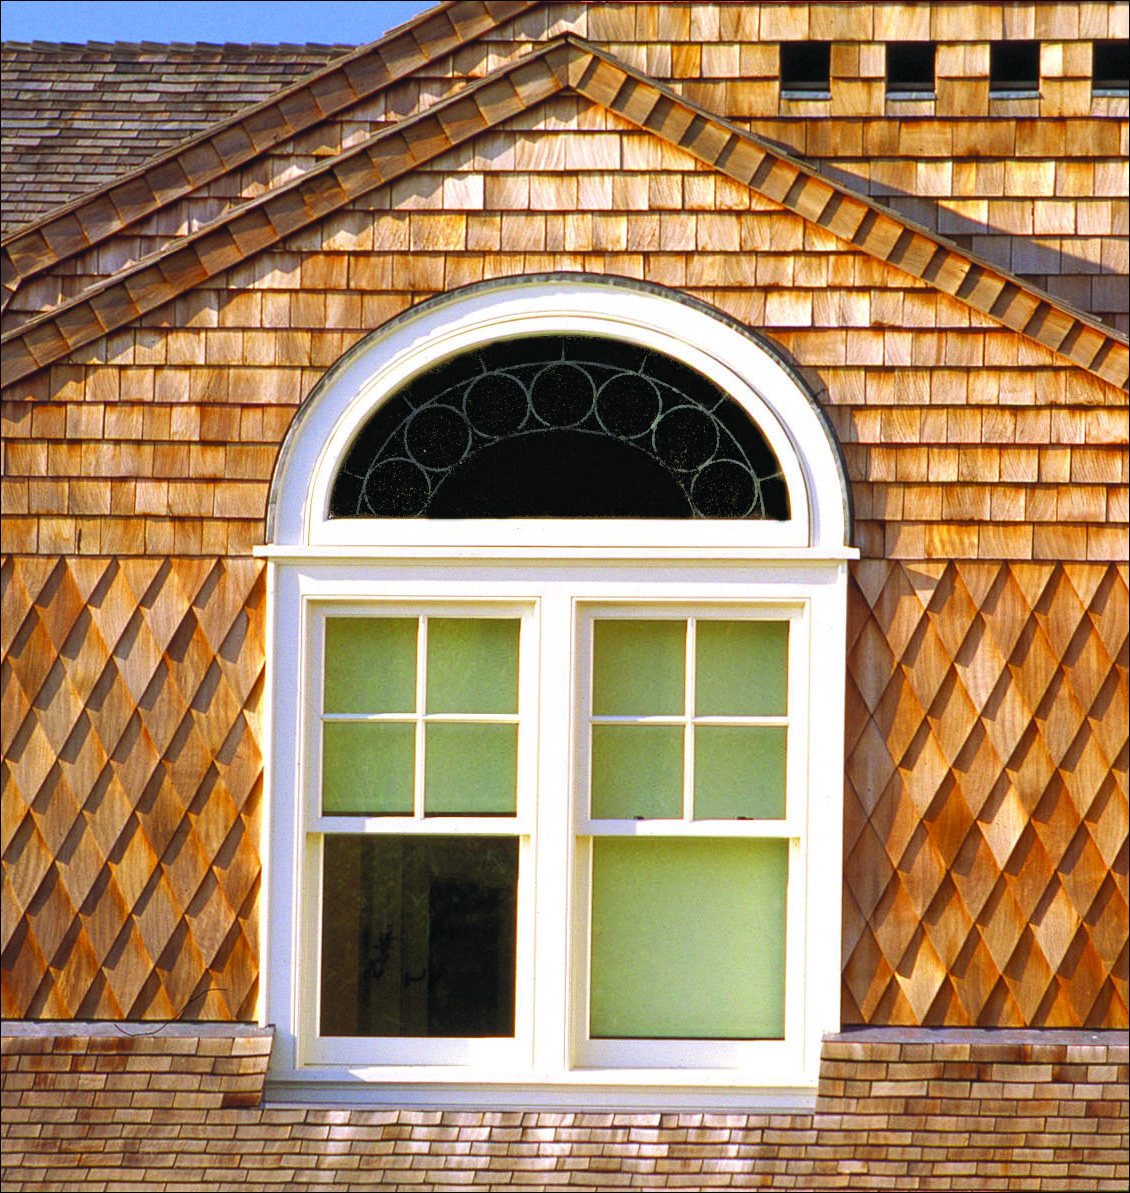
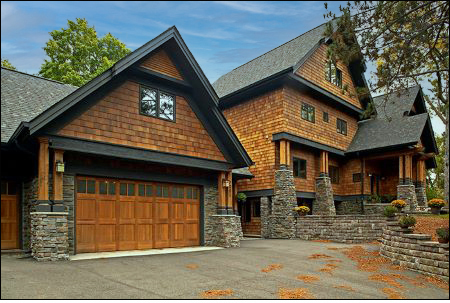
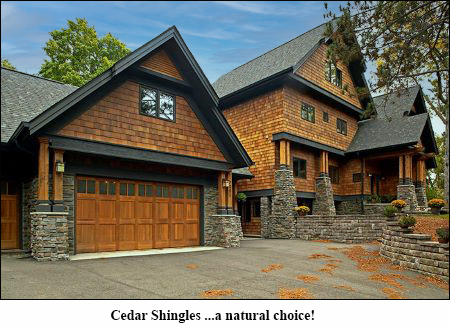
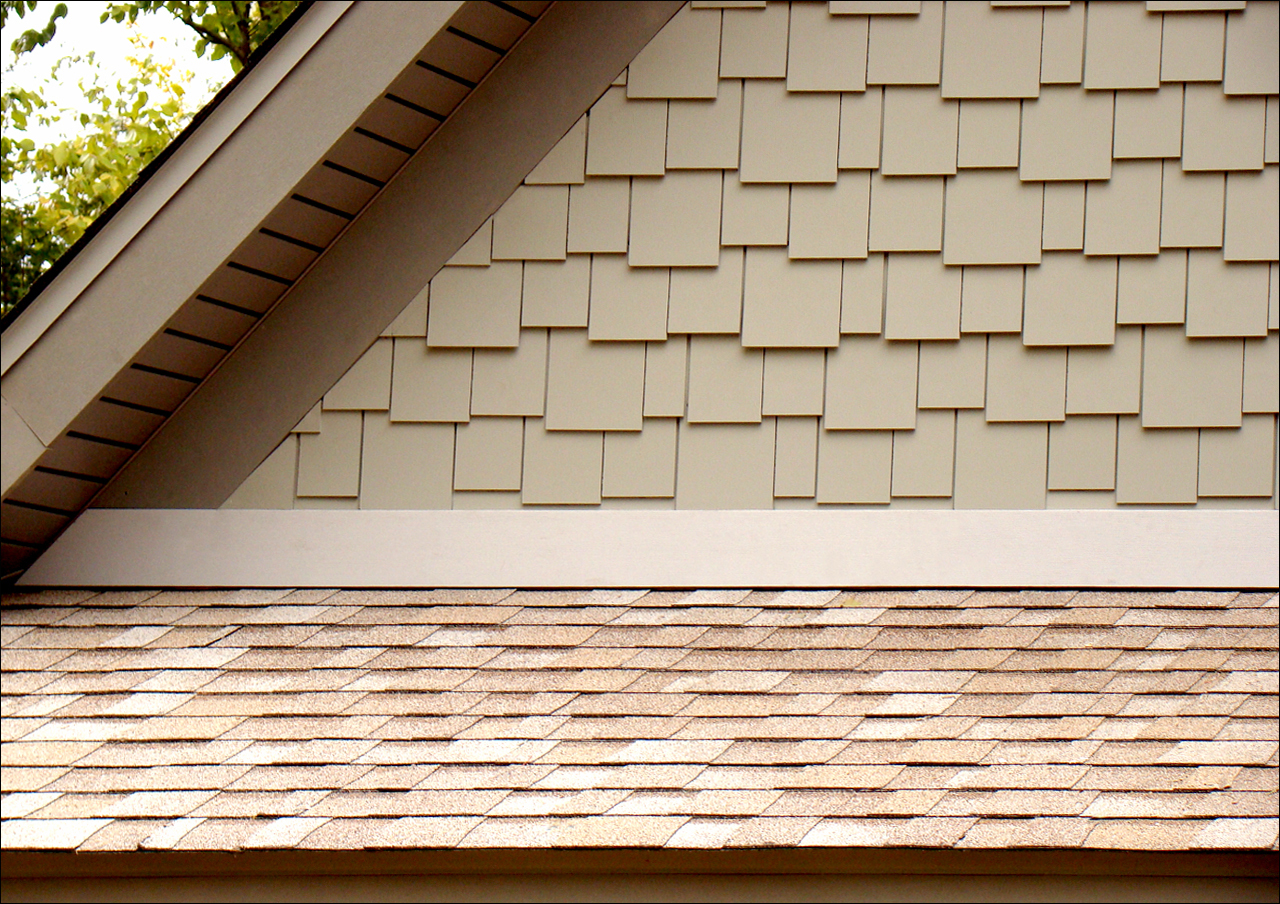
 that outlasts style trends and most other siding materials. Western Red Cedar Shingles are renowned for their natural resistance to the effects of rain, sun, pests, and time. They provide excellent insulation from both heat and cold.
| | | | | POUNDS |
| | | ||
| | | ||
| | | ||
| | | ||
| | | ||
| | | ||
| | | ||
| | | ||
| (Plain & Fluted) & Empire (Plain, Fluted, & Roped) | | ||
| | | ||
| | | ||
| | | ||
| | | ||
| | | ||
| | | ||
| | |
| | |||||
Length | Top | ||||
In contrast, our smaller Quarter Circle. (1104n7) totals only 18 inches. If viewed from a distance, it won’t show very well. Its smaller size could disappoint if used outside. To be sure, use this little trick of the trade: Just cut cardboard triangles to the same length and width as the Brackets you’re considering. First, cut one or more cardboard rectangles to the same length and width as the brackets under consideration. Cut each diagonally. Tape these cardboard “brackets” into place. View the effect from the street. (Actual wood Brackets may appear a bit smaller if they have open areas to the design.)
Interior
Inside, Brackets should be large enough never to appear as an afterthought, but not so large that they overwhelm your room. Let your own sense of proportion be your best guide. And again, cardboard “brackets” may prove helpful.
If used in an open doorway, you’ll want to plan for adequate headroom. Unless you have a very tall family member, 78" should be sufficient.
You can turn Brackets horizontally to increase available headroom, or if you just prefer this orientation.
Material Type
Brackets (except 1-1/2" thickness) are available in AZEK Brand Cellular PVC and High Density Polyurethane. These synthetic woods are impervious to moisture, salt, and insects - perfect for exterior use!
Poplar is a good choice for interior painted wood. It’s economical and stronger than Pine. However, some feel it's not as good for staining, due to color variations within a given board. Oak is great inside, particularly if you’re matching Oak you already have, but is not recommended for exterior use.
Thickness
We strongly recommend at least 1" thick Brackets for most applications. Although we’ve sold hundreds of thousands at 3/4", one inch or more in thickness really is nicer. Extra thickness costs a little more now, but isn’t your added pleasure and satisfaction over the years worth the difference?
Here’s our guideline for thickness of larger Brackets: If combined length and width of your Bracket exceeds 25", it will be nicer at 1-1/4" or 1-1/2" thickness.
Framing
Most of our Brackets are shown, priced, and sized with attached frames. A frame compliments the design and makes installation easier. Listed dimensions include the frame, and are correct for both 3/4" and 1" thick Brackets. For 1-1/4" or 1-1/2" thick framed Brackets, please add 1/2" to the listed dimensions.
On special request, we’ll frame 1-1/4" or 1-1/2" thick Brackets with moulded frames. These are 3/4" thick by 2" or 2-1/4" wide, respectively. Please add $4.01 to the standard framed price for Poplar and Pine Brackets. Other frame wood types carry the same percentage upcharge for wood type as the Brackets themselves.
To be correct, the frames of Brackets used beneath Spandrels should be no wider than the Spandrel rail.


 Brackets can be used to in conjunction with CONCEALoc® Hidden Fastener System to fasten open edges of first and last boards. See installation video below.
| Shipping Method | Book Price | Shipping Added at Checkout | Total Price |
|---|---|---|---|
| US - Bound Printed Matter (up to 2 weeks) | $18.20 | $9.99 | $28.19 |
| US - Priority Mail (2 - 3 business days) | $21.41 | $9.99 | $31.40 |
| Canada - First Class Mail (US$, 4 - 7 days) | $38.15 | $0.00 | $38.15 |
| Canada - Priority Mail (US$, 4 - 7 days) | $48.90 | $0.00 | $48.90 |


| Square foot coverage per carton at indicated exposure. | |||
| | | 7-1/2" | |
| | | | |

Important Shipping Info ||||||||||||||||0||||||||||New||||||||||||||0||~~|^^|azcolors-dark-hickory||item.||popup||azek174colors||||||||Dark Hickory||||popup-pages > azprpo > azek174colors > ||Pop-up Windows (Pages) > AZEK Product pop-ups > AZEK ® Colors > ||||||||||||||||0||1||0||0|||||||| Dark Hickory “Contents” button > “Fastpivot-data-export” (click that & wait for it to load) > Select All” in the box it displays > Copy & Paste to an Excel SS. This is “all” of our data in YS. We then have to sort out which are items, etc depending on the sort you are doing. But, EF is not guaranteeing that this is built to get 100% data, but basically. We used it in May 2012 to build our Amazon Product Feed.||||||||||||||||0||||||||||New||||||||||||||0||~~|^^|fastpivot-data-export||raw-html.||fastpivot-data-export||||||||||Data Export||||||||||||||||||||||0||0||0||0||||||||||||||||||||||||0||||||||||New||||||||||||||0||~~|^^|gfporchflooring||item.||fastpivot-2007||gf||||||||Deck & Porch Boards||||landing-pages > gf > ||Alternate Landing Pages > Google Feed ALT. Pages > ||||||||||||||||1||1||0||0||||azekdeckboards-2 azekdeckboards-5 azekdeckboards-4 azekporchboards-2 azekporchboards-3 |||| (nsnf)||||||||||||||||0||||||||||New||||||||||||||0||~~|^^|deckcomponents||item.||fastpivot-2007||products||||https://s.turbifycdn.com/aah/vintagewoodworks/deck-components-18.jpg||||Deck Boards, Etc||||products > ||Products > ||||||||||||||||0||1||0||0||||tb-capped-deck-boards azekdeckboards link-newel-posts link-balusters link-rails ||including the incomparable AZEK® Deck Board|| You have choices! Whether you're building a simple backyard deck, creating a luxurious outdoor living area, or resurfacing your existing deck, we offer lots of choices! 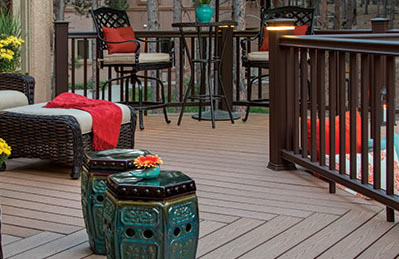  1. Capped Composite Deck Boards 1. Capped Composite Deck Boards Want to avoid almost all the routine maintenance of wood decks (including initial staining and/or water repellant treatment)... don't like cracks, warps, splinters, rot, or insect damage... but DO want great scratch and stain resistance and gorgeous built-in colors... AND you want ALL this at a great price, then... TimberTech® Capped Composite Deck Boards deserve your consideration. This great alternative to regular composite decking offers minimal color fading, superior resistance to mold and mildew, and TimberTech's standard 25-year limited warranty plus separate 25-year fade and stain warranty to keep you happy for a long time. We know you're going to be very pleased with TimberTech® Capped Composite Deck Boards. This is good stuff! 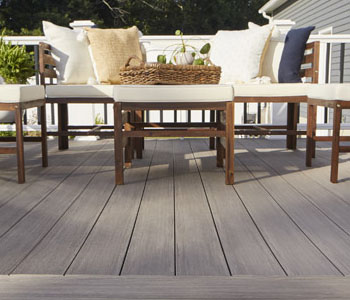 2. AZEK® Advanced PVC Deck Boards 2. AZEK® Advanced PVC Deck Boards If all the advantages of Capped Composites sound great, but you like the idea of a Lifetime Limited Warranty, AZEK® Advanced PVC Deck Boards are your obvious choice. Made of 100% Cellular PVC with NO wood fiber. AZEK® Deck Boards have the look, feel, and sound of premium wood decking and that lifetime limited warranty sure will provide great peace of mind! This is great stuff! Because each of the above decks are the very best in their category, we're pretty sure one will be perfect for your deck! So whether you're installing a surround for your pool, building an elevated deck for your hot tub, or need to put decking under your grill which won't show a stain every time someone drops a burger, we have the answers! Newel Posts, Balusters, Railing, and Decorative Items We also have a great selection of Newel Posts, Balusters, Railing, and decorative items for your deck in a variety of woods and synthetic materials. Your Next Step Review the deck product categories listed below. If you're building a new deck, or need to replace your existing decking, order Deck Board samples from the Deck Board pages below to see for yourself just how good looking and durable our Deck Boards really are! The first and most critical step is laying out your design. If you have not already planned your design and estimated the number of Cut Cedar Shingles, please go to Cut Cedar Shingle Layout and complete the steps for designing your Cut Cedar Shingle installation first. Coverage - Individual Shingles • For roofs, do not exceed 5" of exposed Shingle. At 5" exposure coverage is 16-2/3 square feet per carton. • For Exterior Sidewalls maximum exposure is 7-1/2" which will cover 25 square feet per carton. • For Interior applications only, exposure may be up to 10" and a carton will cover 33-1/3 square feet. Wall Preparation Cut Cedar Shingles must be applied to nailable sheathing, solid or spaced (furring strips), in conformance with local building code requirements. Apply a suitable weather-resistive barrier, such as Type 15 felt or better, over the sheathing. A minimum two-inch head lap and six-inch end lap is required when fastening the building paper or weather barrier. Fasteners Use a 5D hot-dipped galvanized box nail or equivalent rust-resistant fastener. Fasteners shall penetrate the sheathing a minimum of 1/2". Installing Cut Cedar Shingles Important! Install your Cut Cedar Shingles carefully. An attractive finished job depends on the accurate placement of these precisely cut Shingles. The high quality sanded side of of the Shingle should be the exposed side. 1. Alignment Cut Cedar Shingles must be placed approximately 1/8" apart to maintain uniform 5" centering. Use the end of a wooden matchstick or a piece of cardboard or other material 1/8" thick as a guide. Each shingle must be exactly centered on the crack between the two shingles below it. Each piece must be truly vertical; crooked lines will spoil the finished look. 2. Starter Course Take enough Cut Cedar Shingles to go across one row, and cut them in two crosswise, to the length needed for the top row. Keep the cut off pieces to one side. These squared off pieces will be used as your “starter row”, at the bottom of your job. Install your starter row, using two nails per shingle, placed 3/4" in from the edge and 1" above subsequent course shingle butts. To avoid splitting narrow pieces, you can drill a pilot hole for the nail. If your job requires narrow end pieces, start using them in this bottom row. 3. The Guide Strip Measure up the starter Shingles the distance you have chosen for the bottom course, remembering that this may be your only narrow course. Mark with pencil at 4-foot intervals. Tack a straight length of 1" x 2" or plywood along this line as a guide, with the top edge at the pencil marks. This guide must be level, even if it is not parallel to the floor. If the floor is slanted and you use it for a guide, your finished Cut Cedar Shingles job might look crooked. 4. Nail Up Your Courses Place the shaped ends of your Cut Cedar Shingles against this guide strip as you nail your second row in place, nailing into the nailable sheathing or the next furring strip up from the bottom of the Shingles. Continue in this manner up the wall, raising your guide strip for each row, and nailing only into the next higher furring strip. Check frequently for squareness and precise centering. Every other row will have a half shingle at each end. Cut your end pieces carefully up the center of the shingle, drawing a straight line for your saw to follow. Use a crosscut or fine toothed saw. The pieces for the top row have already been cut to length when you used the cut off portion for your starter row, but they may require some trimming to provide a snug fit. The easiest way to finish at the top is to make a rough fit, nailing as high as possible, and then trim off with a strip of molding at the ceiling line. If you can't use molding, use colored nails or small headed nails, for maximum concealment. 5. Corners If Cut Cedar Shingles are to go around an outside corner, they must be mitered. The alternative is to place vertical Western Redcedar boards at the corner, and bring the Shingles flush with them. Corner boards must be installed first, and their width deducted in calculating the width of your shingle rows. See Making Cedar Shingle Corners for more information on corners. 6. Finishing Western Red Cedar is a very durable and weather-resistant wood, and your Decorative Cut Cedar Shingles may be left unfinished. They will darken or change color at different rates, depending on the amount of direct sun they receive. On an interior wall, any section exposed to sunlight will change color, just as wood furniture, wallpaper or paint will. Vintage Woodworks recommends finishing with a quality oil-based stain to maximize the product life in outdoor sidewall applications. See Staining and Finishing Cedar Shingles for more information. ||||||||||||||||0||||||||||New||||||||||||||0||~~|^^|cutcedcart||item.||fastpivot-2007||cutcedshin||||https://s.turbifycdn.com/aah/vintagewoodworks/individual-cut-cedar-shingles-33.jpg||||Decorative Cut Cedar Shingles||vww||products > shingles > cutcedshin > ||Products > Shingle Siding > Cedar Shingles > ||0.000||0.000 ||||||||||||1||1||0||0||||||||Decorative Cut Cedar Shingles 361025 361010 361005 361040 361030 361035 361015 361020 361026 361011 361006 361041 361031 361036 361016 361021||"Package Size and Pattern" "Select one:" "Carton of Fishscale (361025) (+$558.23)" "Carton of Round (361010) (+$558.23)" "Carton of Octagonal (361005) (+$558.23)" "Carton of Halfcove (361040) (+$558.23)" "Carton of Square (361030) (+$558.23)" "Carton of Diamond (361035) (+$558.23)" "Carton of Arrow (361015) (+$558.23)" "Carton of Hexagonal (361020) (+$558.23)" "--------------------------------" "Individual Shingles - Fishscale (361026) (+$8.61)" "Individual Shingles - Round (361011) (+$8.61)" "Individual Shingles - Octagonal (361006) (+$8.61)" "Individual Shingles - Halfcove (361041) (+$8.61)" "Individual Shingles - Square (361031) (+$8.61)" "Individual Shingles - Diamond (361036) (+$8.61)" "Individual Shingles - Arrow (361016) (+$8.61)" "Individual Shingles - Hexagonal (361021) (+$8.61)"|^|"Quantity Based Pricing" "Select one:" "Ordering by the CARTON - no extra charge" "Ordering 7 or more identical items - no extra charge" "Ordering 3 to 6 identical items !1" "Ordering 2 identical items !1" "Ordering only 1 identical item !1"||||||||||||||0||||||||||New||||||||||||||0||~~|^^|deitpatosina||item.||fastpivot-2007||porch-photos-cross-ref||||https://s.turbifycdn.com/aah/vintagewoodworks/decorative-items-painted-to-simulate-natural-wood-16.jpg||||Decorative Items, painted to simulate natural wood||||webmaster-pages > sarepin > nonpublic > porch-photos-cross-ref > ||Webmaster Pages > * Reps' Info * > Customer Special Access > Porch Features > ||||||||||||||||0||1||0||0|||||||| type of decorative porch part... ... and we will explore how each of these items relate to one another and to the overall design of your porch. Please also see Ordering Materials for additional information on each type of decorative component. (That section's organization follows the outline used in this section.) • Newel Posts • Balustrade (Rails and Balusters) • Post Top Items • Porch Eave Decorations See Porch Eave Decorations. Wood Screws We prefer the use of wood screws for mounting all Decorative Trim. Predrilling screw holes entirely through the item and then fastening into place with slender wood screws is the most professional approach. Brass or plated screws will avoid rust stains. Use of a pan head screw allows the screw head to be left permanently exposed. This avoids the need to countersink and to fill screw holes. Also, the screw head is readily accessible for future removal of items for painting or repair. A Test Hole Use an electric drill (inexpensive models are available at any discount or hardware store). Select a drill bit size that will just permit the screw to pass through a test hole (in a scrap of wood) without using a screwdriver. This avoids placing stress on the item to be installed. If you're using Spandrels above corner Brackets, the Spandrels should be installed first. Spandrels Check for Fit Hold each Spandrel into its intended position, verifying that it fits properly. Do not force your Spandrels into position. This is particularly important for our Fretwork Spandrels (those styles with integral cutwork.) As we discussed previously, it is natural for wood to expand or contract. Fortunately, the length is the least affected dimension, due to the internal cell structure. Therefore, the overall length should be very close to what you ordered. If, using a steel tape, your received measurement is off appreciably from what you ordered, we've made an error. In that case, please call us immediately! Simple Adjustments However, minor fitting problems can be easily corrected. If slightly short, it's quite simple to cut shims of scrap wood. These should be the same length and width as the end of the Spandrel. Call if you need us to send appropriate material for making your shims. Use a shim at both ends to minimize the thickness required. If your Spandrel is slightly long, you can try using very rough sandpaper on the ends. Also, if a Spandrel has been subjected to excess humidity, it will expand in length! You will find that several days storage in a warm, dry place will shorten it noticeably. Predrilling Using a properly sized drill bit, as discussed previously, drill holes entirely through the top frame of the Spandrel. Holes should be several inches from each end, and approximately every three feet along the length of the Spandrel. It may be necessary to drill these holes at an angle, particularly when the Spandrel frames are moulded. Typically, a single screw close to the lower end of each end frame (if your Spandrels have end frames) will be adequate fastening along the sides. Drill these holes now. Spandrels without end framing do not readily permit use of a screw in the ends of the bottom frame. Rather, you can place a spot of glue on the ends of these bottom frame ends during installation. Usually this suffices. If an occasional end of a bottom frame insists on warping out of line, use a very small screw here, predrilling from the bottom of the frame at an angle and screwing it to the Porch Post (or building wall.) Installing Typically, Spandrels are centered front to back on the unturned faces of the Posts. After predrilling, screw Spandrels into position, working from one end of each spandrel to the other. This allows you to straighten the Spandrel if it is slightly bowed. Again, do not force your Spandrels into position, as damage may result. If you are installing Brackets, you should predrill them. Framed Brackets For Framed Brackets, one screw near the ends of both top and side frames is usually sufficient. A spot of glue, applied to the back of the frame near the corner will keep the Bracket stabilized. If mounted below the Spandrels, the Bracket's top frame screw should go up into the bottom frame of the Spandrel. Drill your Framed Bracket holes now, and install all of your Brackets. Unframed Brackets For unframed Brackets, hold one into position. Also, hold a screw in front of the Bracket, sighting the line the screw must take to adequately penetrate the Post or wall. Mark with a pencil the angle that your hole must follow to allow proper screw placement. Repeat for each screw required. Usually, one screw at each end is sufficient, with a spot or two of glue to hold the Bracket firmly into the corner. Carefully predrill one unframed Bracket. This drilling will be much easier and more accurate if the Bracket is held in a vice, but be sure to protect the Bracket from vice marks. After predrilling, screw the first Bracket into place. If all appears well, proceed to predrill and install your other unframed Brackets. Running Trims Normally, Running Trims are predrilled and screwed directly into place. Running Trims can be butted end to end and/or trimmed to fit. See Meta Tags (SEO)|| See Meta Tags (SEO)||||||||||||||||0||||||||||New||||||||||||||0||~~|^^|design-porch||item.||fastpivot-2007||porches1||||||||Design Porch||||landing-pages > porches1 > ||Alternate Landing Pages > Porches > ||||||||||||||||0||1||0||0||||link-porch-item link-porch-book ||(nsnf/ckd)|| Free assistance! We will design porch additions to complement your house. 30 years experience. 100's of photos with helpful tips. Buy direct & save on 1000's of wood and synthetic parts to design porch features that are perfectly suited to your home. Get inspired! Review our photos to design porch features with great curb appeal. Keep in mind there's really no such thing as one-size-fits-all porch design. Porches should be as individual as their houses and the people who live in them! Browse examples (photos, drawings, & floorplans). Study anatomy and construction. Plan and design porch layout. Find the best decorative elements and learn proper installation techniques. From Flooring Boards to the decorative items at the top of the Posts, our vast selection includes everything to design porch features you'll love! Our professional, easy to install Railing system and Third Dimension approach blend style, substance and authenticity. Extensive selection includes Brackets, Spandrels, Balusters, Rails, and much more in weather-resistant woods and AZEK Brand Cellular PVC. We are available for free personalized consultation by phone or email. We can help design new porch additions or remodel what you already have... and answer your related questions. We have long believed that planning, designing, building, and decorating porches is a most worthwhile endeavor. We still do! Porches are our passion! During the past 30 years we've helped thousands design porch projects. Handrail Height Please enter the height above the floor you want the TOP of your installed handrail. A pleasing height for most first floor porch handrails is 30" - 32". For second story porches and balconies, at least 36" is necessary for safety. Local building codes should, of course, always be followed. - see Links|| nsnf - See Links||||||||||||||||0||||||||||New||||||||||||||0||~~|^^|detailphotos||link.||storetemplate.||screendooror||||||||Detail Photos||||products > screenstordo > screendooror > ||Products > Screen/Storm Doors > Info - Screen & Storm Doors > ||||||||||||||||0||0||0||0||||||Click to browse photos||||||||||||||||||0||||||||||New||||||||||||||0||~~|^^|scsdodeph||item.||fastpivot-2007||screendoors||||https://s.turbifycdn.com/aah/vintagewoodworks/detail-photos-19.jpg||||Detail Photos||||products > screenstordo > screendoors > ||Products > Screen/Storm Doors > Usage & Detail Photos - Screen Doors > ||||||||||||||||0||1||0||0||||front back noname18 63 64 baofdoglpain baofdobamore baofdobamore1 ||Click to browse photos|| The Door shown in these photos is Poplar. Click on a photo to enlarge. Click to enlarge||Front||||||||||||||||0||||||||||New||||||||||||||0||~~|^^|back||item.||fastpivot-2007||scsdodeph||https://s.turbifycdn.com/aah/vintagewoodworks/detailed-photo-2-30.jpg||||||Detailed Photo 2||||products > screenstordo > screendoors > scsdodeph > ||Products > Screen/Storm Doors > Usage & Detail Photos - Screen Doors > Detail Photos > ||||||||||||||||0||1||0||0||||||Back Click to enlarge||Back||||||||||||||||0||||||||||New||||||||||||||0||~~|^^|noname18||item.||fastpivot-2007||scsdodeph||https://s.turbifycdn.com/aah/vintagewoodworks/detailed-photo-3-28.jpg||||||Detailed Photo 3||||products > screenstordo > screendoors > scsdodeph > ||Products > Screen/Storm Doors > Usage & Detail Photos - Screen Doors > Detail Photos > ||||||||||||||||0||1||0||0||||||Front panel moulding Click to enlarge||Front of door, close-up of our elegant front panel moulding.||||||||||||||||0||||||||||New||||||||||||||0||~~|^^|63||item.||fastpivot-2007||scsdodeph||https://s.turbifycdn.com/aah/vintagewoodworks/detailed-photo-4-28.jpg||||||Detailed Photo 4 ||||products > screenstordo > screendoors > scsdodeph > ||Products > Screen/Storm Doors > Usage & Detail Photos - Screen Doors > Detail Photos > ||||||||||||||||0||1||0||0||||||Back of door, moulding removed Click to enlarge||Back of door, moulding removed. Glass panel installation in progress, black edge is weather stripping.||||||||||||||||0||||||||||New||||||||||||||0||~~|^^|64||item.||fastpivot-2007||scsdodeph||https://s.turbifycdn.com/aah/vintagewoodworks/detailed-photo-5-30.jpg||||||Detailed Photo 5||||products > screenstordo > screendoors > scsdodeph > ||Products > Screen/Storm Doors > Usage & Detail Photos - Screen Doors > Detail Photos > ||||||||||||||||0||1||0||0||||||Front of door, glass panel installed Click to enlarge||Front of door, glass panel installed.||||||||||||||||0||||||||||New||||||||||||||0||~~|^^|baofdoglpain||item.||fastpivot-2007||scsdodeph||https://s.turbifycdn.com/aah/vintagewoodworks/detailed-photo-6-30.jpg||||||Detailed Photo 6||||products > screenstordo > screendoors > scsdodeph > ||Products > Screen/Storm Doors > Usage & Detail Photos - Screen Doors > Detail Photos > ||||||||||||||||0||1||0||0||||||Back of door, glass panel installed Click to enlarge||Back of door, glass panel installed.||||||||||||||||0||||||||||New||||||||||||||0||~~|^^|baofdobamore||item.||fastpivot-2007||scsdodeph||https://s.turbifycdn.com/aah/vintagewoodworks/detailed-photo-7-30.jpg||||||Detailed Photo 7||||products > screenstordo > screendoors > scsdodeph > ||Products > Screen/Storm Doors > Usage & Detail Photos - Screen Doors > Detail Photos > ||||||||||||||||0||1||0||0||||||Back of door, back moulding removed Click to enlarge||Back of door, back moulding removed. Glass panel installed, black edges on glass are weather stripping.||||||||||||||||0||||||||||New||||||||||||||0||~~|^^|baofdobamore1||item.||fastpivot-2007||scsdodeph||https://s.turbifycdn.com/aah/vintagewoodworks/detailed-photo-8-30.jpg||||||Detailed Photo 8||||products > screenstordo > screendoors > scsdodeph > ||Products > Screen/Storm Doors > Usage & Detail Photos - Screen Doors > Detail Photos > ||||||||||||||||0||1||0||0||||||Back of door, back moulding removed Click to enlarge||Back of door, back moulding removed. Charcoal screen with white frame shown.||||||||||||||||0||||||||||New||||||||||||||0||~~|^^|desdecpor||item.||fastpivot-2007||porin||||||||Determining Your Needs||||products > porches > porin > ||Products > Porches - START HERE! > ONLINE PORCH GUIDE > ||||||||||||||||0||1||1||0||||whsiandstpow whstofdeitdo ourpoph |||| The thoughtful design and skillful construction of even a modest porch almost became a lost art... but over many decades we've helped change that. New Porch? If you're building a new porch, follow these three steps to achieve the porch of your dreams: 1. Determine which porch will work for your house and best complement it with our photo guide. Height of house front eave is a key factor in making this determination. Likewise, available wall height between first and second floor windows on 2-story houses influences what type porch you should build. 2. Consider how you will use your porch and what size porch you need. 3. Decide what style decorative trim will best suit you and your home. Existing Porch? If your porch already exists, use the above links to determine if you want to remodel your porch and/or what decorative trim you want to add. Should I consider synthetic materials? Yes, you really should! We offer a range of synthetic wood products that look, feel and sound like painted wood... but that's where the similarities end. Read more... Overview Roof Pitch is defined as the number of feet the roof rises vertically for each 12 feet of horizontal measure. All of our Gable Decorations except 4208 can be slightly modified by us to fit most roof pitches. We do this at no additional charge. Close estimate of roof pitch OK for most designs To insure proper fit, we need to know the pitch of your roof at the gable. However, all designs except 4208 and 4210 permit some adjustment during installation. Therefore, a close estimate of your gable roof pitch will suffice for all except 4208 and 4210. There are two easy methods to determine roof pitch: Method 1 - using our Pitch Guide (Does NOT require ladder!) 1. Print a Pitch Guide Determine which set of pitch guides below best matches your roof line. Click on the chosen image to enlarge the drawing and then print it. (You may want to print both if the slope of your roof appears to be near 10/12 or 12/12.)
2. View Your Gable From a Distance With printed drawing in hand, and at some distance from the actual gable, try to position yourself directly in front of the gable. (This may be a second floor window of your neighbors home!) If you're not able to get high enough, that's ok as long as you're directly in front of your gable. With printed pitch guide at arm's length, select the pitch lines that closest match your gable's roof pitch. 3. Cut Along Selected Pitch Lines Cut along the edge of the selected pitch lines. From your vantage point, see if you can visually fit this 'peak' into the actual peak of your gable roof. 4. Order That Pitch If the cut pitch guide matches the slope of your gable roof, then the numbers on the left side indicate the pitch of your roof. If you cannot perfectly match your actual gable that's ok for all of our designs except 4208 and 4210. Method 2 - horizontal measurement 2. Using a metal measuring tape, measure the distance horizontally (across) from mark to mark. Use the online Roof Pitch/closest Horizontal Measurement pop-down at your chosen Gable Decoration listing to indicate your Horizontal Measurement for each gable you're ordering. We'll take it from there! Please contact us if you need assistance. We're always eager to help! ||||||||||||||||0||||||||||New||||||||||||||0||~~|^^|diagonal||item.||popup||popup-pages||||||||Diagonal (Discontinued Design)||||popup-pages > ||Pop-up Windows (Pages) > ||||||||||||||||0||1||0||0||||||(nsnf/ckd)|| Diagonal  Save Now. Decide later. Purchase Discounted Dollars for 15% off! Use them anytime in the next 12 months to pay for any product we sell. Example: Buy $1000 Merchandise Value for only $850. Then use your $1000 Discounted Dollars anytime in the next year to buy $1000 of any products we sell... the perfect way to lock in savings but finalize your merchandise order at your convenience! And you don't have to spend your Discounted Dollars all at once. Just think of them as a Savings Account paying 15% interest! But hurry! Discounted Dollars are only available now through Monday, December 1, 2025. You'll receive a confirmation email containing your Discounted Dollars Certificate Number. Want to order your merchandise before then? Just mention the number of Discounted Dollars you've bought (Comments Box at Online Checkout or by phone) to use them immediately. Cannot be combined with any other discount offer except Bargain Room items. ||||||||||||||||0||||||||||New||||||||||||||0||~~|^^|discounted-dollars||item.||fastpivot-2007||misc-floating-pages||||||||Discounted Dollars||discount$||misc-floating-pages > ||Misc FLOATING Pages > ||0.000||0.000 ||||||||||||1||0||0||0||||||Orderable Page & Linked from Home, Emails, etc (nsnf/ckd)||  Save Now. Decide later. Purchase Discounted Dollars below for 15% off! Use them anytime in the next 12 months to pay for any product we sell. Example: Buy $1000 Merchandise Value below for only $850. Then use your $1000 Discounted Dollars anytime in the next year to buy $1000 of any product we sell... the perfect way to lock in savings but finalize your merchandise order at your convenience! And you don't have to spend your Discounted Dollars all at once. Just think of them as a Savings Account paying 15% interest! But hurry! Discounted Dollars are only available now through Monday, December 1, 2025. You'll receive a confirmation email containing your Discounted Dollars Certificate Number. Want to order your merchandise before then? Just mention the number of Discounted Dollars you've bought (Comments Box at Online Checkout or by phone) to use them immediately. Cannot be combined with any other discount offer except Bargain Room items. See Using Your Discounted Dollars. ||"Choose Your Savings" "Select One" "$1,000 Merchandise Value - Buy Now for only $850 (+$850)" "$1,250 Merchandise Value - Buy Now for only $1,062 (+$1062)" "$1,500 Merchandise Value - Buy Now for only $1,275 (+$1275)" "$1,750 Merchandise Value - Buy Now for only $1,487 (+$1487)" "$2,000 Merchandise Value - Buy Now for only $1,700 (+$1700)" "$2,500 Merchandise Value - Buy Now for only $2,125 (+$2125)" "$3,000 Merchandise Value - Buy Now for only $2,550 (+$2550)" "$3,500 Merchandise Value - Buy Now for only $2,975 (+$2975)" "$4,000 Merchandise Value - Buy Now for only $3,400 (+$3400)" "$5,000 Merchandise Value - Buy Now for only $4,250 (+$4250)" "$6,000 Merchandise Value - Buy Now for only $5,100 (+$5100)" "$7,000 Merchandise Value - Buy Now for only $5,950 (+$5950)" "$8,000 Merchandise Value - Buy Now for only $6,800 (+$6800)" "$9,000 Merchandise Value - Buy Now for only $7,650 (+$7650)" "$10,000 Merchandise Value - Buy Now for only $8,500 (+$8500)"||||||||||||||0||||||||||New||||||||||||||0||~~|^^|dd-banners||item.||fastpivot-2007||sales-temp||||||||Discounted Dollars - Banners||||webmaster-pages > indevelopment > sales-temp > ||Webmaster Pages > Store Work > Sales > ||||||||||||||||0||1||0||0|||||||| Use this one for home page:  Use this one for Product Pages:  ||||||||||||||||0||||||||||New||||||||||||||0||~~|^^|dd-using||item.||fastpivot-2007||misc-floating-pages||||||||Discounted Dollars, Using||||misc-floating-pages > ||Misc FLOATING Pages > ||||||||||||||||1||1||0||0||||||See Using Your Discounted Dollars. (nsnf)||See Using Your Discounted Dollars.||||||||||||||||0||||||||||New||||||||||||||0||~~|^^|div||item.||fastpivot-2007||references||||||||DIV Tag||||webmaster-pages > references > ||Webmaster Pages > YS How-To > ||||||||||||||||1||1||0||0||||||(nsnf/ckd)|| (approved 5.23.13/gt) The <div> tag defines a division or a section in an HTML document and is used to group block-elements to format them with CSS. NOTE: By default, browsers always place a line break before and after the <div> element. Therefore, we chose to use the SPAN Tag to identify a section we want to have modified with specific HTML provided in the Style Type.||||||||||||||||0||||||||||New||||||||||||||0||~~|^^|diy-porch1||item.||fastpivot-2007||porches1||||||||DIY Porch||||landing-pages > porches1 > ||Alternate Landing Pages > Porches > ||||||||||||||||0||1||0||0||||link-porch-item link-porch-book ||(nsnf/ckd)|| Free assistance! Over 40 years of DIY porch experience. Hundreds of photos with helpful tips. Buy direct & save on 1000's of wood and synthetic parts for your DIY porch. Get inspired! Review our photos to kindle great DIY porch ideas. Keep in mind that your house doesn't need to be an exact match to create the same look and feel. Browse examples (photos, drawings, and floorplans), study anatomy and construction, design and draw your dreams (no art skills required), identify the best decorative elements, and learn proper installation techniques for the DIY porch. From Flooring Boards to the decorative items at the top of the Posts, we have what your DIY porch will need! Our professional, easy to install Railing system and Third Dimension approach blend style, substance and authenticity. Extensive selection includes Brackets, Spandrels, Balusters, Rails, and much more in weather-resistant woods and AZEK Brand Cellular PVC. We are available by phone or email for a free personalized consultation, help with choice of components, and all related questions. We have long believed that planning, designing, building, and decorating the DIY porch is a most worthwhile endeavor. We still do! Porches are our passion! Over the past 30 years we've been involved with many thousands of DIY porch customers. Bringing Back Yesterday in Quality & Service! Vintage Woodworks was founded in 1978 to reproduce old-fashioned, solid wood, handcrafted millwork including decorative items for your DIY porch. We are the largest manufacturer of solid wood traditional millwork for your DIY porch for sale directly to the public. Since 1978, we've been ‘Bringing Back Yesterday in Quality and Service!’ Our solid wood products are equally effective for both interior and exterior decoration. And, our expert shipping and small-town, friendly services are sure to please! If after looking over our offerings for your DIY porch in our products section you still have questions, feel free to give us a call at 903-356-2158. We would love to assist you with your questions on decorative items for a DIY porch.||||||||||||||||0||||||||||New||||||||||||||0||~~|^^|door71011||item.||fastpivot-2007||doorbargains||https://s.turbifycdn.com/aah/vintagewoodworks/door-7101-32.jpg||||||Door #7101||||webmaster-pages > q-storage > barostar > doorbargains > ||Webmaster Pages > Storage Area > Bargain Room Storage > Doors (discontinued) > ||||||||||||||||0||1||0||0||Home, Garden and Garage||||DISCONTINUED. (nsnf/ckd)|| In order to view page properly we must switch it back to an item page. Click 'Edit' then Click on 'Show Product' Enter "7101" in the Code field Enter "459.99" in the Price field Change 'Orderable' to YES Click "UPDATE" NOTE - We do not presently have any of this style door available. Due to UPS size limitations your door will ship by Motor Freight. A shipping surcharge will probably be required. We will advise before finalizing your order. Base price below is for standard sizes in Poplar with Screen. NOTE - This Door is now DISCONTINUED. ||Size "Select one" "32'' x 80'' - standard""32'' x 81'' - standard" "36'' x 80'' - standard" "36'' x 81'' - standard" "Custom Size (+$45.99)" "(Specify a custom size in the 'Comments' section" "at order checkout or send us a separate email" "listing your Door's width and height.)"|^|"Wood Type" "Select one" "Poplar (BASE PRICE of $459.99)" "Pine (same $459.99 base price)" "Cypress - base price plus (+$92.00)" "Oak (+$184.00)" "Cedar (+$92.00)" "Redwood (+$184.00)" "Mahogany (+$184.00)" "Other - Let us know"|^| "Screen and/or Tempered Glass" "Select one" "Screen only (included in base price)" "Tempered Glass AND Screen (+$57.49)" "Tempered Glass only (+$37.49)"|^|"Screening Color/Material" "Select one" "Charcoal-colored fiberglass (standard)" "Grey-colored fiberglass" "Natural aluminum wire" "Not ordering screen"|^|"Screen Frame Color" "Select one" "Charcoal-colored screen frame (standard)" "White-colored screen frame" "Natural aluminum finish screen frame" "Not ordering screen"|^| "Special Packaging" "Required for safe shipment. (+$12.00)"|^|"Your instructions to us" "Select one" "After I order, please contact me to finalize my order" "After I order, I'll contact you to finalize my order"||||||||||||||0||||||||||New||||||||||||||0||~~|^^|7104||item.||fastpivot-2007||doorbargains||https://s.turbifycdn.com/aah/vintagewoodworks/door-7104-32.jpg||||||Door #7104||7104||webmaster-pages > q-storage > barostar > doorbargains > ||Webmaster Pages > Storage Area > Bargain Room Storage > Doors (discontinued) > ||||||||||||||||0||1||0||0||||||DISCONTINUED. (nsnf/ckd)|| NOTE - We do not presently have any of this style door available. Due to UPS size limitations your door will ship by Motor Freight. A shipping surcharge will probably be required. We will advise before finalizing your order. Base price below is for standard sizes in Poplar with Screen. NOTE - This Door is now DISCONTINUED. ||Size "32'' x 80'' - standard""32'' x 81'' - standard" "36'' x 80'' - standard" "36'' x 81'' - standard" "Custom Size (+$45.99)" "(Specify a custom size in the 'Comments' section" "at order checkout or send us a separate email" "listing your Door's width and height.)"|^|"Wood Type" "Poplar (BASE PRICE of $574.99)" "Pine (same $574.99 base price)" "Cypress - base price plus (+$115.00)" "Oak (+$230.00)" "Cedar (+$115.00)" "Redwood (+$230.00)" "Mahogany (+$230.00)" "Other - let us know"|^| "Screen and/or Tempered Glass" "Screen only (included in base price)" "Tempered Glass AND Screen (+$57.49)" "Tempered Glass only (+$37.49)"|^|"Screening Color/Material" "Charcoal-colored fiberglass (standard)" "Grey-colored fiberglass" "Natural aluminum wire" "Not ordering screen"|^|"Screen Frame Color" "Charcoal-colored screen frame (standard)" "White-colored screen frame" "Natural aluminum finish screen frame" "Not ordering screen"|^|"Special Packaging" "Required for safe shipment. (+$12.00)"|^|"Your instructions to us" "After I order, please contact me to finalize my order" "After I order, I'll contact you to finalize my order"||||||||||||||0||||||||||New||||||||||||||0||~~|^^|7119||item.||fastpivot-2007||doorbargains||https://s.turbifycdn.com/aah/vintagewoodworks/door-7119-34.jpg||||||Door #7119||7119||webmaster-pages > q-storage > barostar > doorbargains > ||Webmaster Pages > Storage Area > Bargain Room Storage > Doors (discontinued) > ||||||||||||||||0||1||1||0||||||DISCONTINUED. (nsnf/ckd)|| NOTE - We do not presently have any of this style door available. Due to UPS size limitations your door will ship by Motor Freight. A shipping surcharge will probably be required. We will advise before finalizing your order. Base price below is for standard sizes in Poplar with Screen. NOTE - This Door is now DISCONTINUED. ||Size "32'' x 80'' - standard""32'' x 81'' - standard" "36'' x 80'' - standard" "36'' x 81'' - standard" "Custom Size (+$45.99)" "(Specify a custom size in the 'Comments' section" "at order checkout or send us a separate email" "listing your Door's width and height.)"|^|"Wood Type" "Poplar (BASE PRICE of $436.99)" "Pine (same $436.99 base price)" "Cypress - base price plus (+$87.40)" "Oak (+$174.80)" "Cedar (+$87.40)" "Redwood (+$174.80)" "Mahogany (+$174.80)" "Other - let us know"|^|"Screen and/or Tempered Glass" "Screen only (included in base price)" "Tempered Glass AND Screen (+$57.49)" "Tempered Glass only (+$37.49)"|^|"Screening Color/Material" "Charcoal-colored fiberglass (standard)" "Grey-colored fiberglass" "Natural aluminum wire" "Not ordering screen"|^|"Screen Frame Color" "Charcoal-colored screen frame (standard)" "White-colored screen frame" "Natural aluminum finish screen frame" "Not ordering screen"|^|"Special Packaging" "Required for safe shipment. (+$12.00)"|^|"Your instructions to us" "After I order, please contact me to finalize my order" "After I order, I'll contact you to finalize my order"||||||||||||||0||||||||||New||||||||||||||0||~~|^^|7136||item.||fastpivot-2007||doorbargains||https://s.turbifycdn.com/aah/vintagewoodworks/door-7136-34.jpg||||||Door #7136||7136||webmaster-pages > q-storage > barostar > doorbargains > ||Webmaster Pages > Storage Area > Bargain Room Storage > Doors (discontinued) > ||||||||||||||||0||1||1||0||||||DISCONTINUED. (nsnf/ckd)|| NOTE - We do not presently have any of this style door available. Due to UPS size limitations your door will ship by Motor Freight. A shipping surcharge will probably be required. We will advise before finalizing your order. Base price below is for standard sizes in Poplar with Screen. NOTE - This Door is now DISCONTINUED. ||Size "32'' x 80'' - standard""32'' x 81'' - standard" "36'' x 80'' - standard" "36'' x 81'' - standard" "Custom Size (+$45.99)" "(Specify a custom size in the 'Comments' section" "at order checkout or send us a separate email" "listing your Door's width and height.)"|^|"Wood Type" "Poplar (BASE PRICE of $413.99)" "Pine (same $413.99 base price)" "Cypress - base price plus (+$82.80)" "Oak (+$165.60)" "Cedar (+$82.80)" "Redwood (+$165.60)" "Mahogany (+$165.60)" "Other - let us know"|^|"Screen and/or Tempered Glass" "Screen only (included in base price)" "Tempered Glass AND Screen (+$57.49)" "Tempered Glass only (+$37.49)"|^|"Screening Color/Material" "Charcoal-colored fiberglass (standard)" "Grey-colored fiberglass" "Natural aluminum wire" "Not ordering screen"|^|"Screen Frame Color" "Charcoal-colored screen frame (standard)" "White-colored screen frame" "Natural aluminum finish screen frame" "Not ordering screen"|^|"Special Packaging" "Required for safe shipment. (+$12.00)"|^|"Your instructions to us" "After I order, please contact me to finalize my order" "After I order, I'll contact you to finalize my order"||||||||||||||0||||||||||New||||||||||||||0||~~|^^|door71511||item.||fastpivot-2007||doorbargains||https://s.turbifycdn.com/aah/vintagewoodworks/door-7151n101-34.jpg||||||Door #7151n101||i7151n101||webmaster-pages > q-storage > barostar > doorbargains > ||Webmaster Pages > Storage Area > Bargain Room Storage > Doors (discontinued) > ||359.000||649.900 ||359.000 ||||||||||0||1||1||0|||||| 34-3/4" x 92-7/16" (nsnf/ckd)|| 34-3/4" x 92-7/16" x 1-3/8" thick instead of the standard 1-1/8". First Quality Cypress. Although not clear on the photo at left, Door is produced with our 1/2" x 2-1/4" Casing Design 74 and our 5/8" x 2-1/2" Corner Blocks Design 6 applied on the face of the Door. See drawing. NOTE: We can add optional Brackets, Spandrels, etc to this basic Door if you wish. Only one available at this sale price.||"Screen and/or Tempered Glass" "Select one" "Screen only (included in base price)" "Tempered Glass AND Screen (+$57.49)" "Tempered Glass only (+$37.49)"|^|"Screening Color/Material" "Select one" "Charcoal-colored fiberglass (standard)" "Grey-colored fiberglass" "Natural aluminum wire" "Not ordering screen"|^|"Screen Frame Color" "Select one" "Charcoal-colored screen frame (standard)" "White-colored screen frame" "Natural aluminum finish screen frame" "Not ordering screen"|^|"Shipping Surcharge May Be Required" "Select one" "Contact me to finalize my order" "I will contact you to finalize my order"|^|"Special Packaging" "Required for safe shipment !12"||||||||||||||0||||||||||New||||||||||||||0||~~|^^|dooe7190||item.||fastpivot-2007||screendoorin||https://s.turbifycdn.com/aah/vintagewoodworks/door-7190n127-32.jpg||||||Door #7190n127||i7190n127||webmaster-pages > q-storage > barostar > screendoorin > ||Webmaster Pages > Storage Area > Bargain Room Storage > Screen/Storm Door Bargains > ||149.000||356.490 ||149.000 ||||||||||0||1||1||0|||||| 25-1/4" x 85"|| 25-1/4" x 85". Paint Grade Poplar. None available CA Resident WARNING ||"Screen and/or Tempered Glass" "Select one:" "Screen only (included in base price)" "Tempered Glass AND Screen (+$57.49)" "Tempered Glass only (+$37.49)"|^|"Screening Color/Material" "Select one:" "Charcoal-colored fiberglass (standard)" "Grey-colored fiberglass" "Natural aluminum wire" "Not ordering screen"|^|"Screen Frame Color" "Select one:" "Charcoal-colored screen frame (standard)" "White-colored screen frame" "Natural aluminum finish screen frame" "Not ordering screen"|^|"Shipping Surcharge May Be Required" "Select one:" "Contact me to finalize my order" "I will contact you to finalize my order"|^|"Special Packaging" "Required for safe shipment !12"||||||||||||||0||||||||||New||||||||||||||0||~~|^^|link-br-caps||link.||storetemplate.||content-links||https://s.turbifycdn.com/aah/vintagewoodworks/door-window-cap-bargains-24.jpg||||||Door & Window Cap Bargains||||webmaster-pages > misc > content-links > ||Webmaster Pages > Misc Pgs @ WM > Content Links > ||||||||||||||||0||0||0||0||||||Click to browse||||||||||||||||||0||||||||||New||||||||||||||0||~~|^^|link-caps||link.||storetemplate.||mouldings-item||https://s.turbifycdn.com/aah/vintagewoodworks/door-window-caps-21.jpg||||||Door & Window Caps||||products > mouldings > mouldings-item > ||Products > Mouldings > Moulding Product Listings > ||||||||||||||||0||0||0||0||||||Click for Wood, PVC, and Poly Designs||||||||||||||||||0||||||||||New||||||||||||||0||~~|^^|noname17||item.||fastpivot-2007||scdous||||https://s.turbifycdn.com/aah/vintagewoodworks/door-photo-1-32.jpg||||Door 7102||||products > screenstordo > screendoors > scdous > ||Products > Screen/Storm Doors > Usage & Detail Photos - Screen Doors > Screen Door Usage Photos > ||||||||||||||||0||1||0||0|||||| Click for more views|| 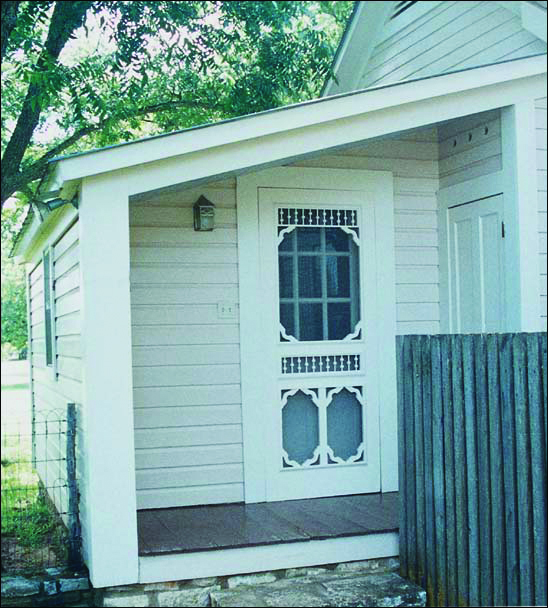 Door 7102 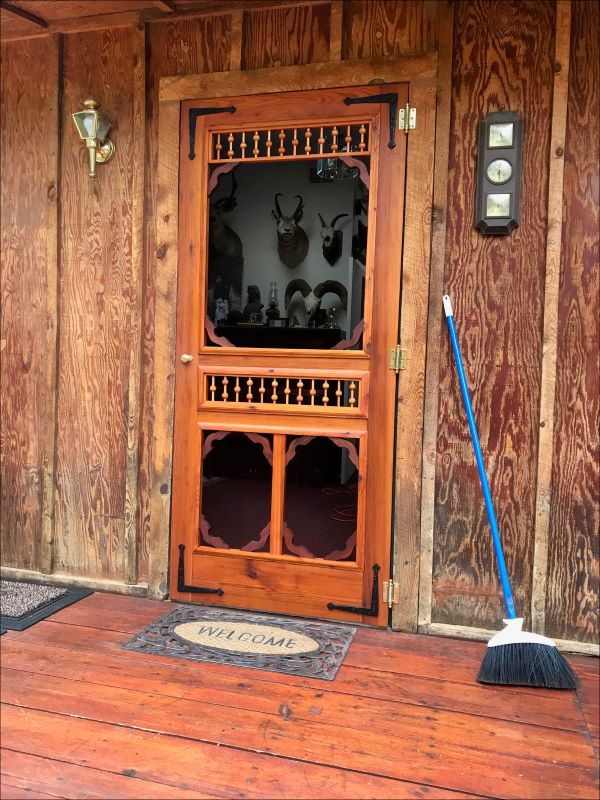 Door 7102 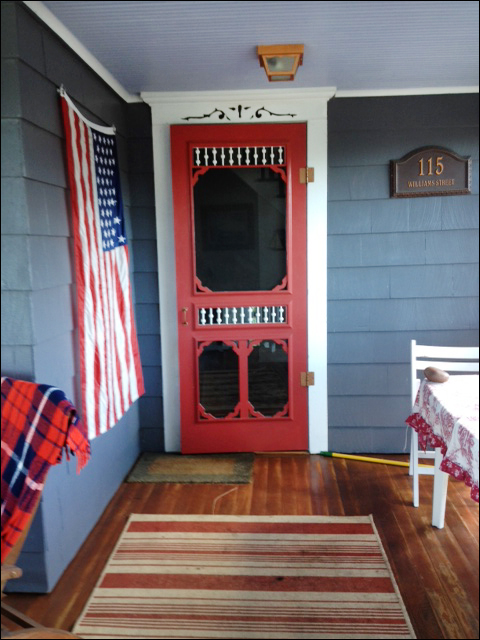 Door 7102 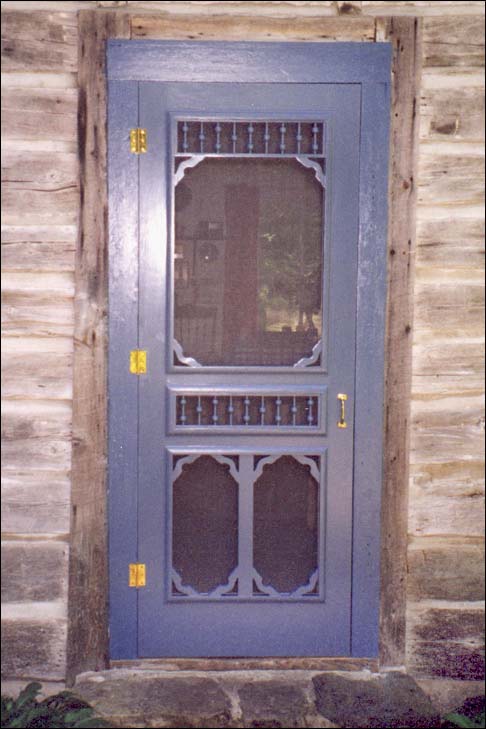 Door 7102 Return to previous page Click for larger and more views|| 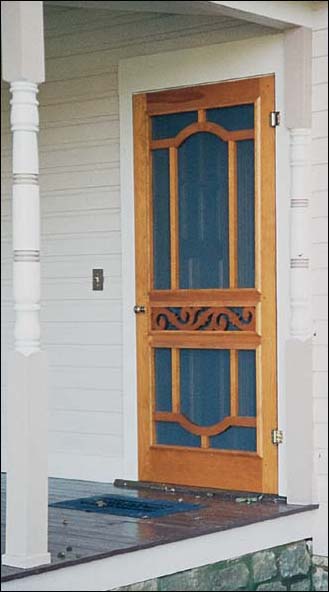 Screen Door 7110 allows cool breezes into the kitchen. Turned Posts are freshly painted and ready for Gingerbread. 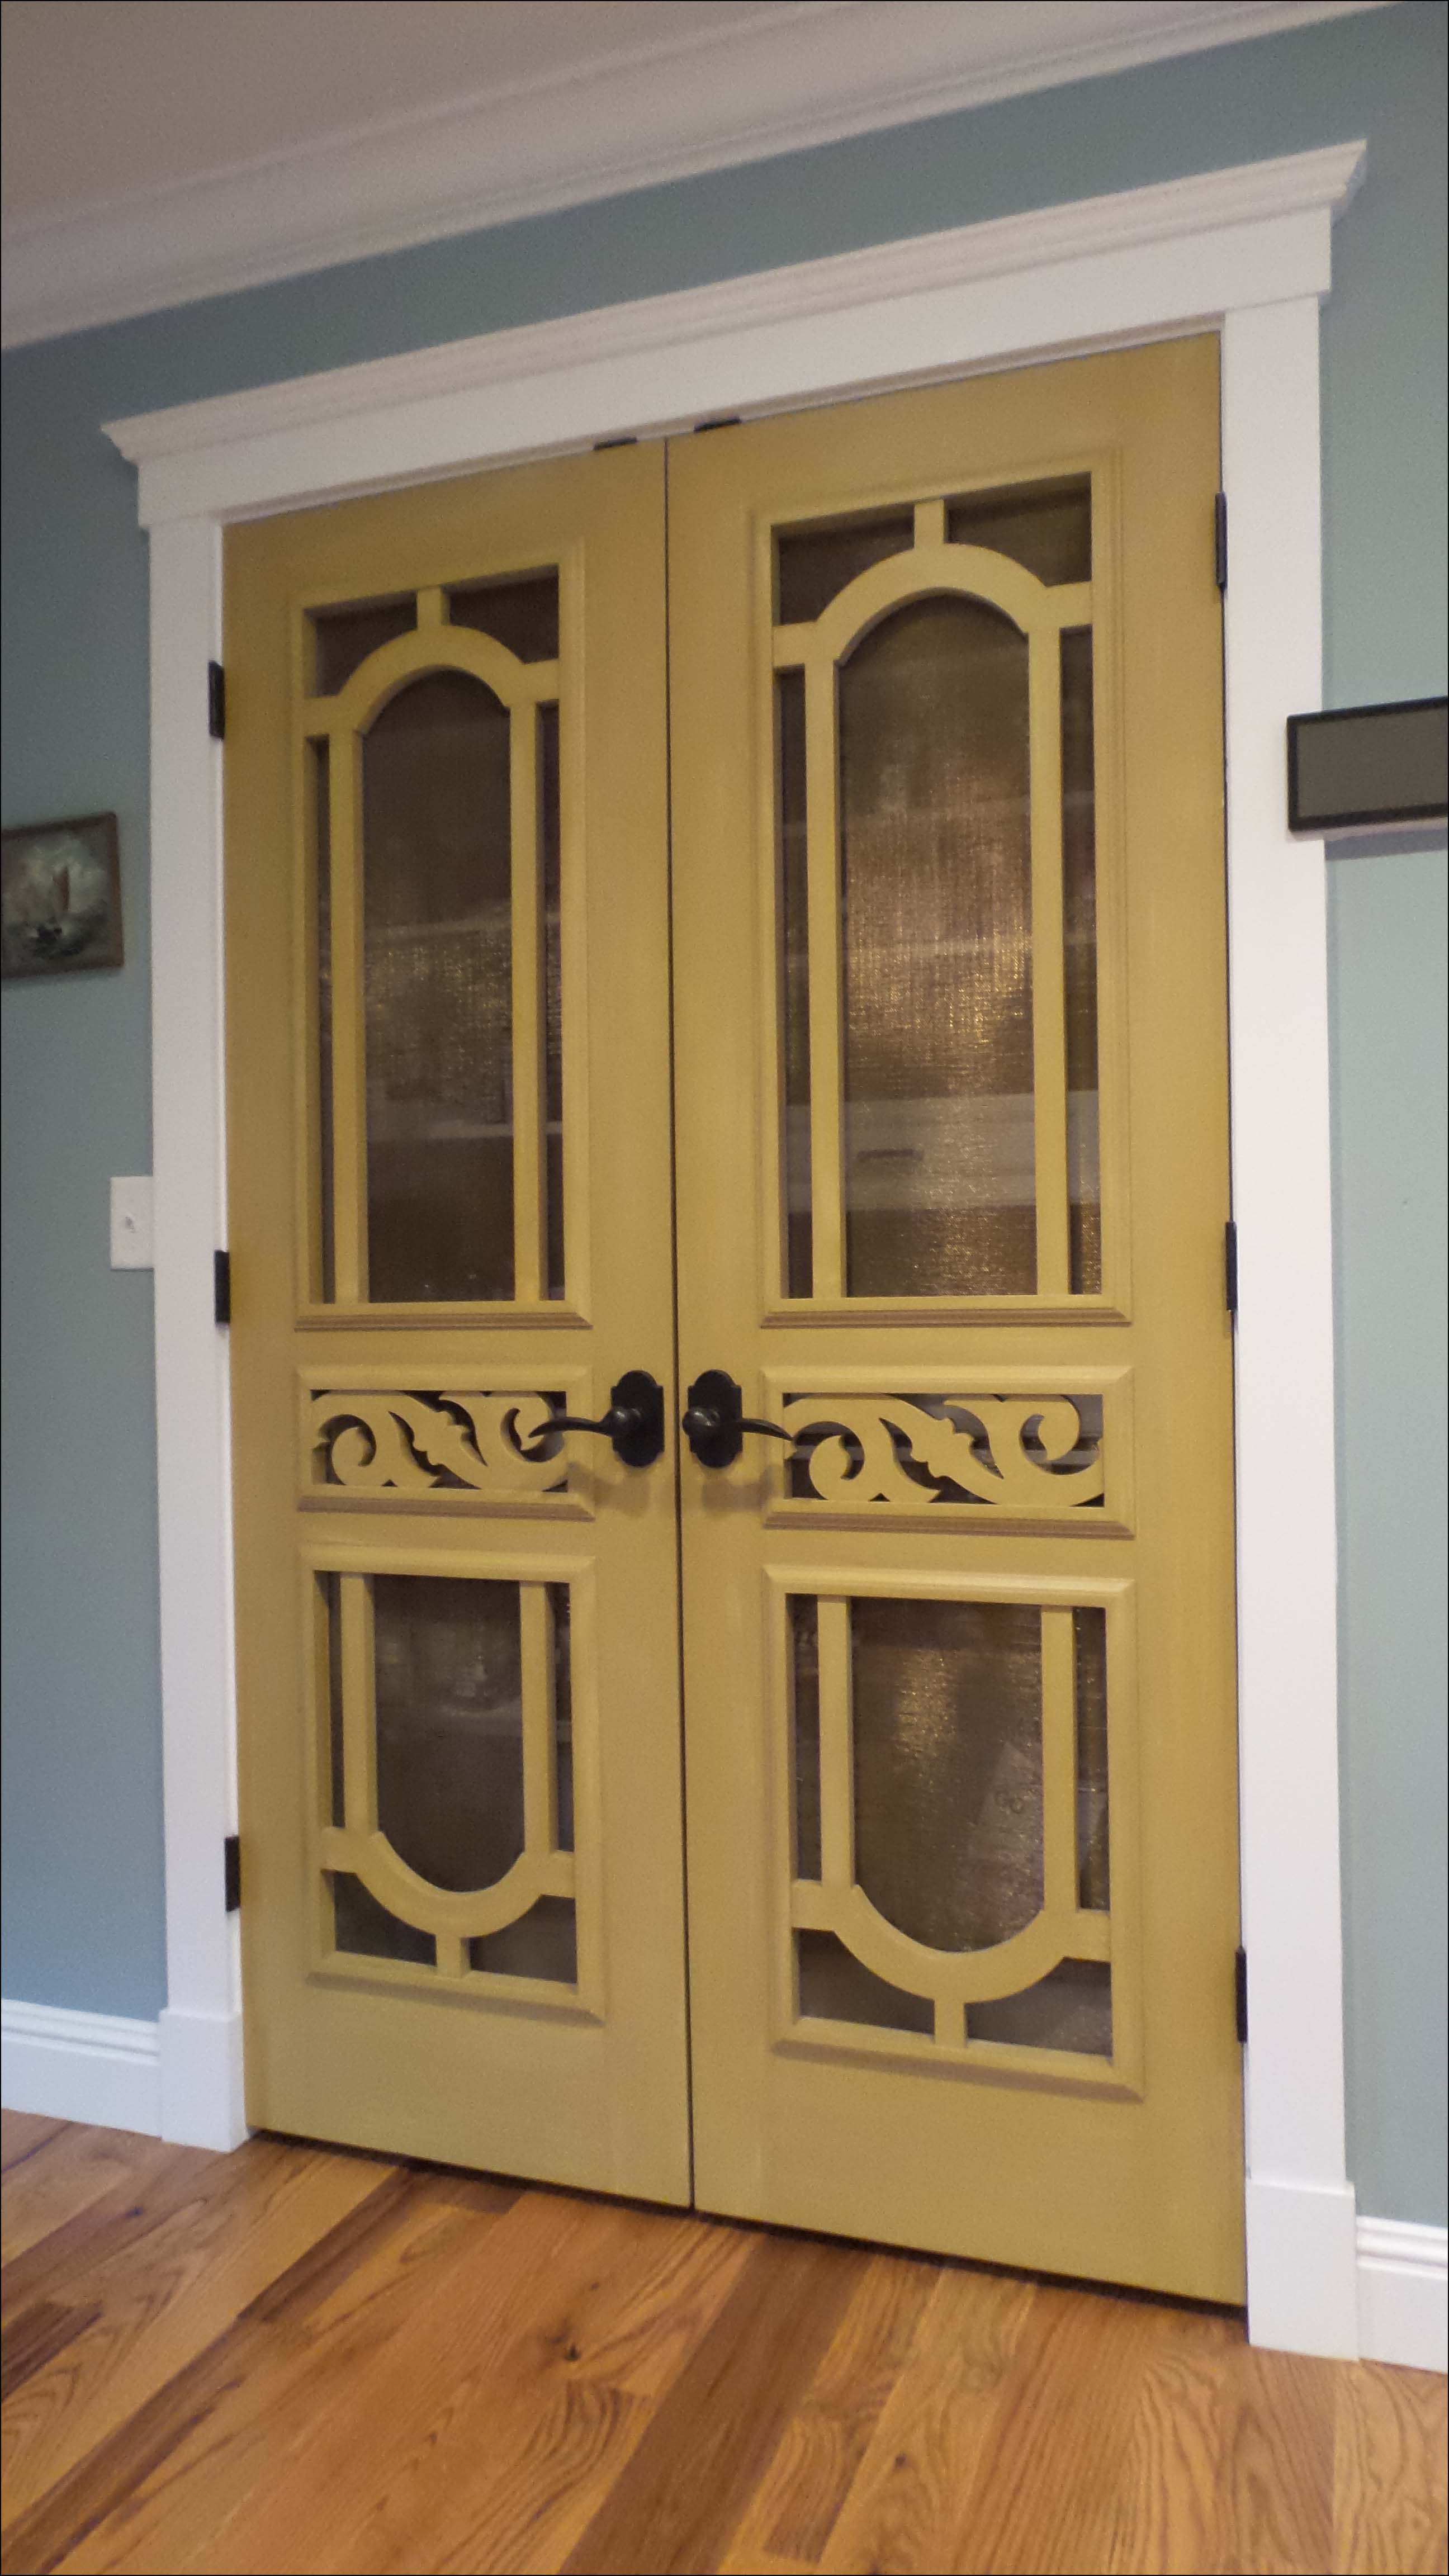 Screen Door 7110 Return to previous page Click for larger view|| 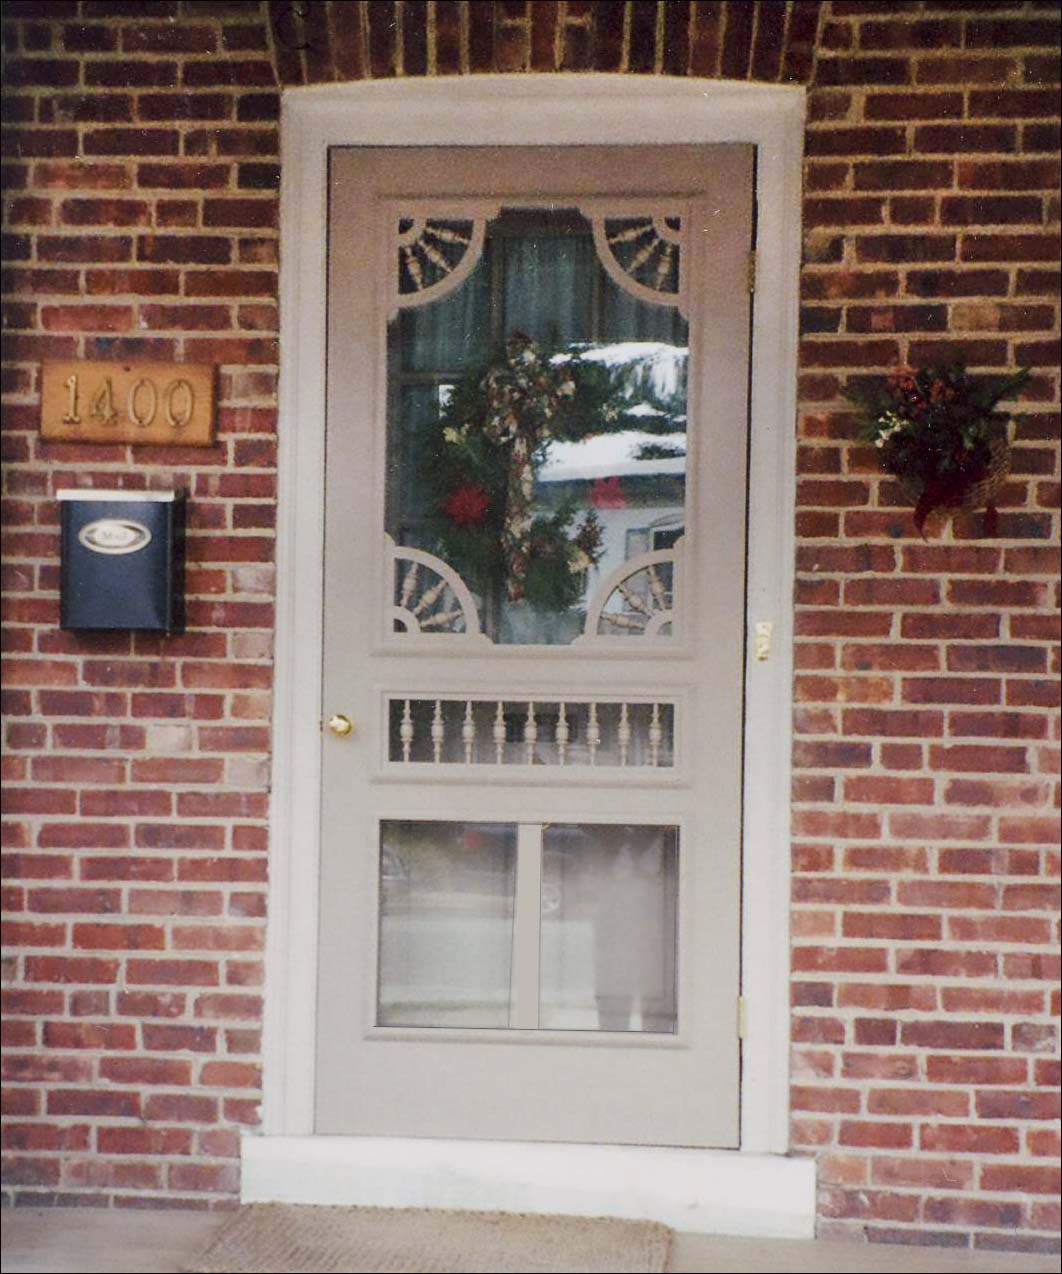 Door 7116 Return to previous page Click for larger and more views|| 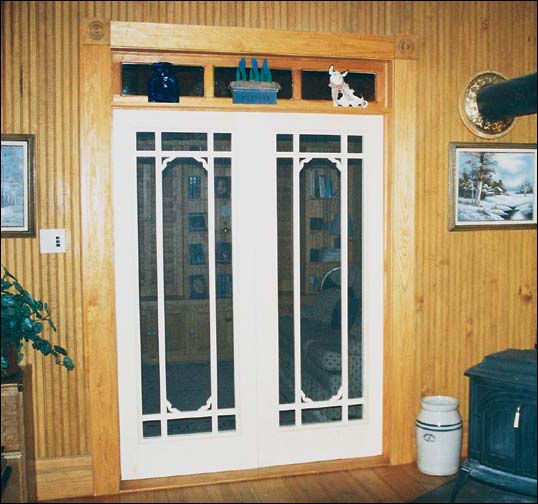 Above a pair of our 7117 Screen Doors with optional glass panels and 1161 Angel Wing Brackets separate the den beyond from the often noisy family room while retaining an open feel. Beadboard covers the walls.  Another pair of 7117 Screen Doors, except that top and bottom center cross bars were removed at customer's request. Return to previous page Click for larger and more views|| 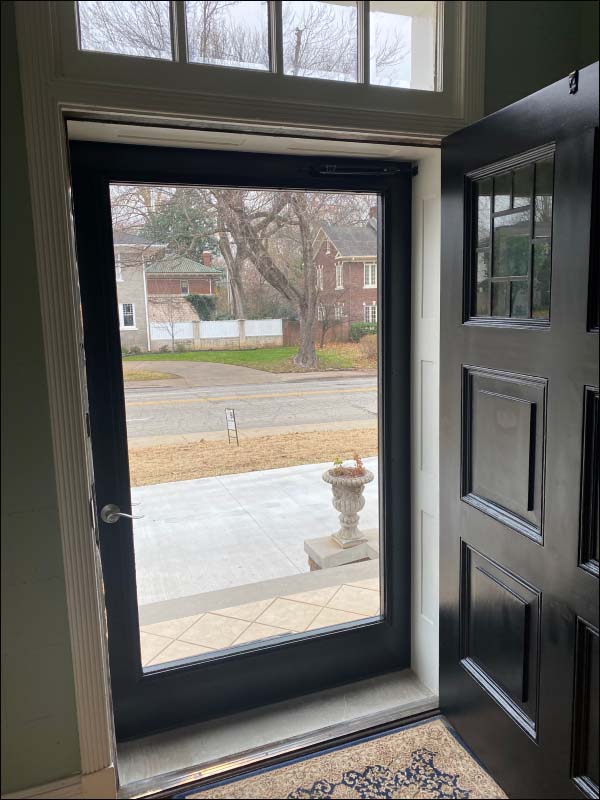 Door 7123 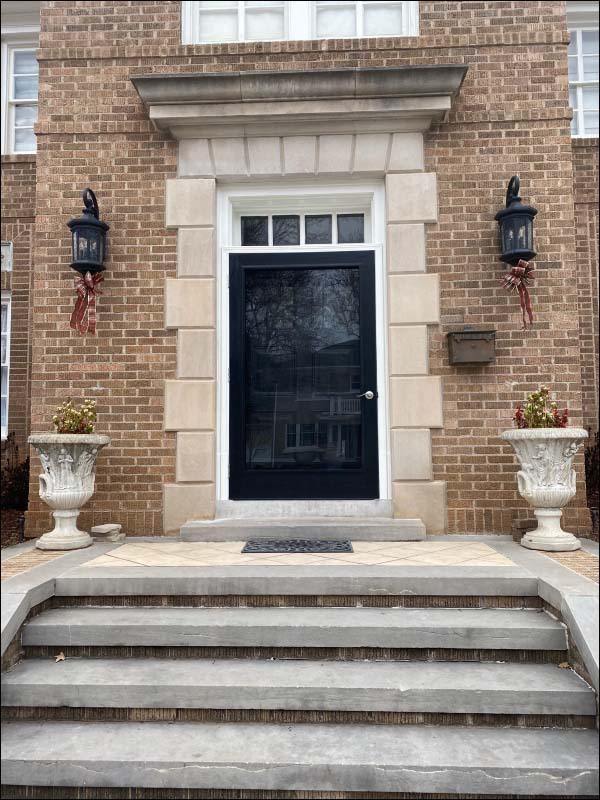 Door 7123 Return to previous page Click for larger view|| 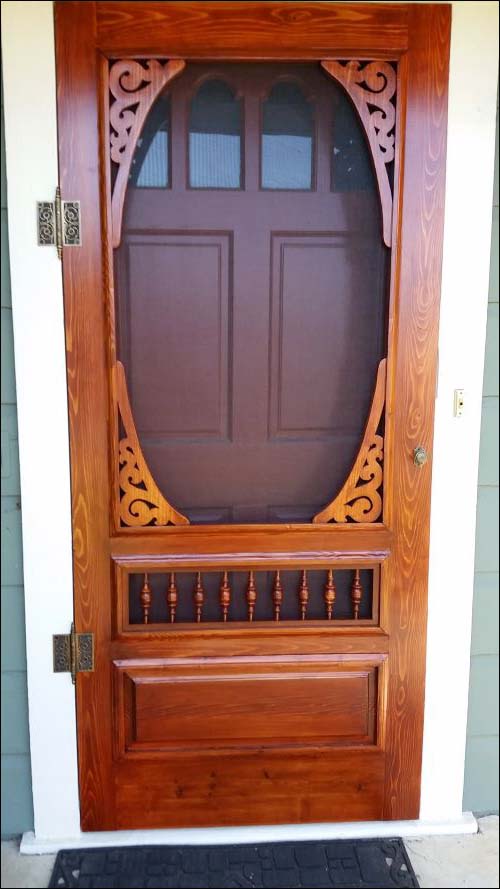 Door 7130 Return to previous page Click for larger and more views|| 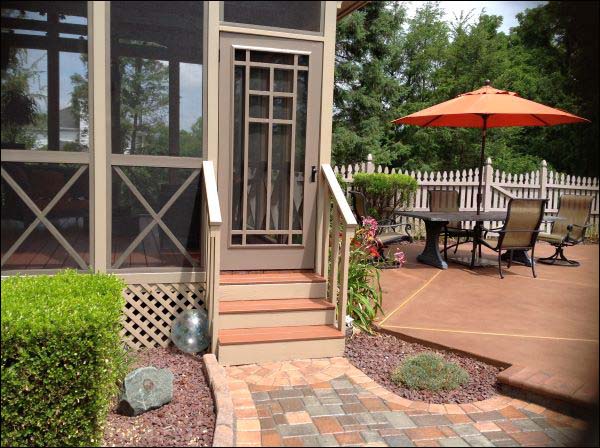 Door 7137 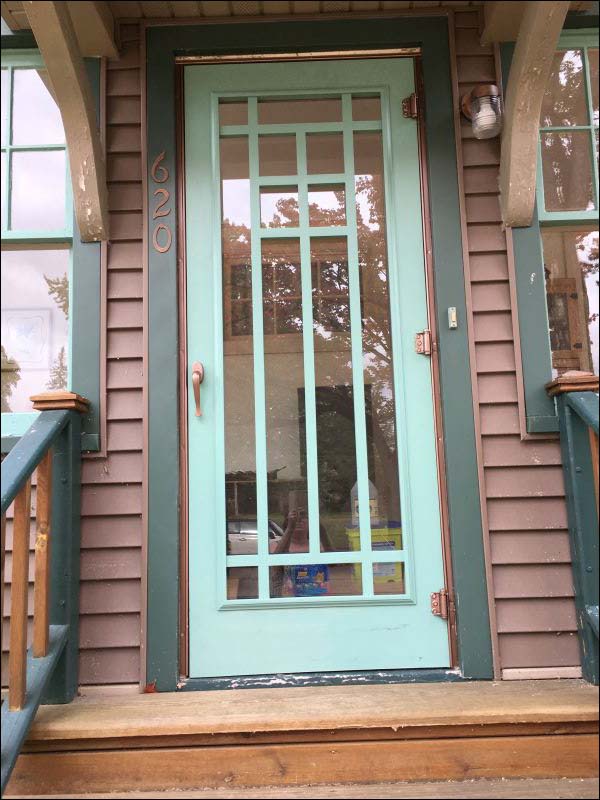 Door 7137 Return to previous page Click for larger view|| 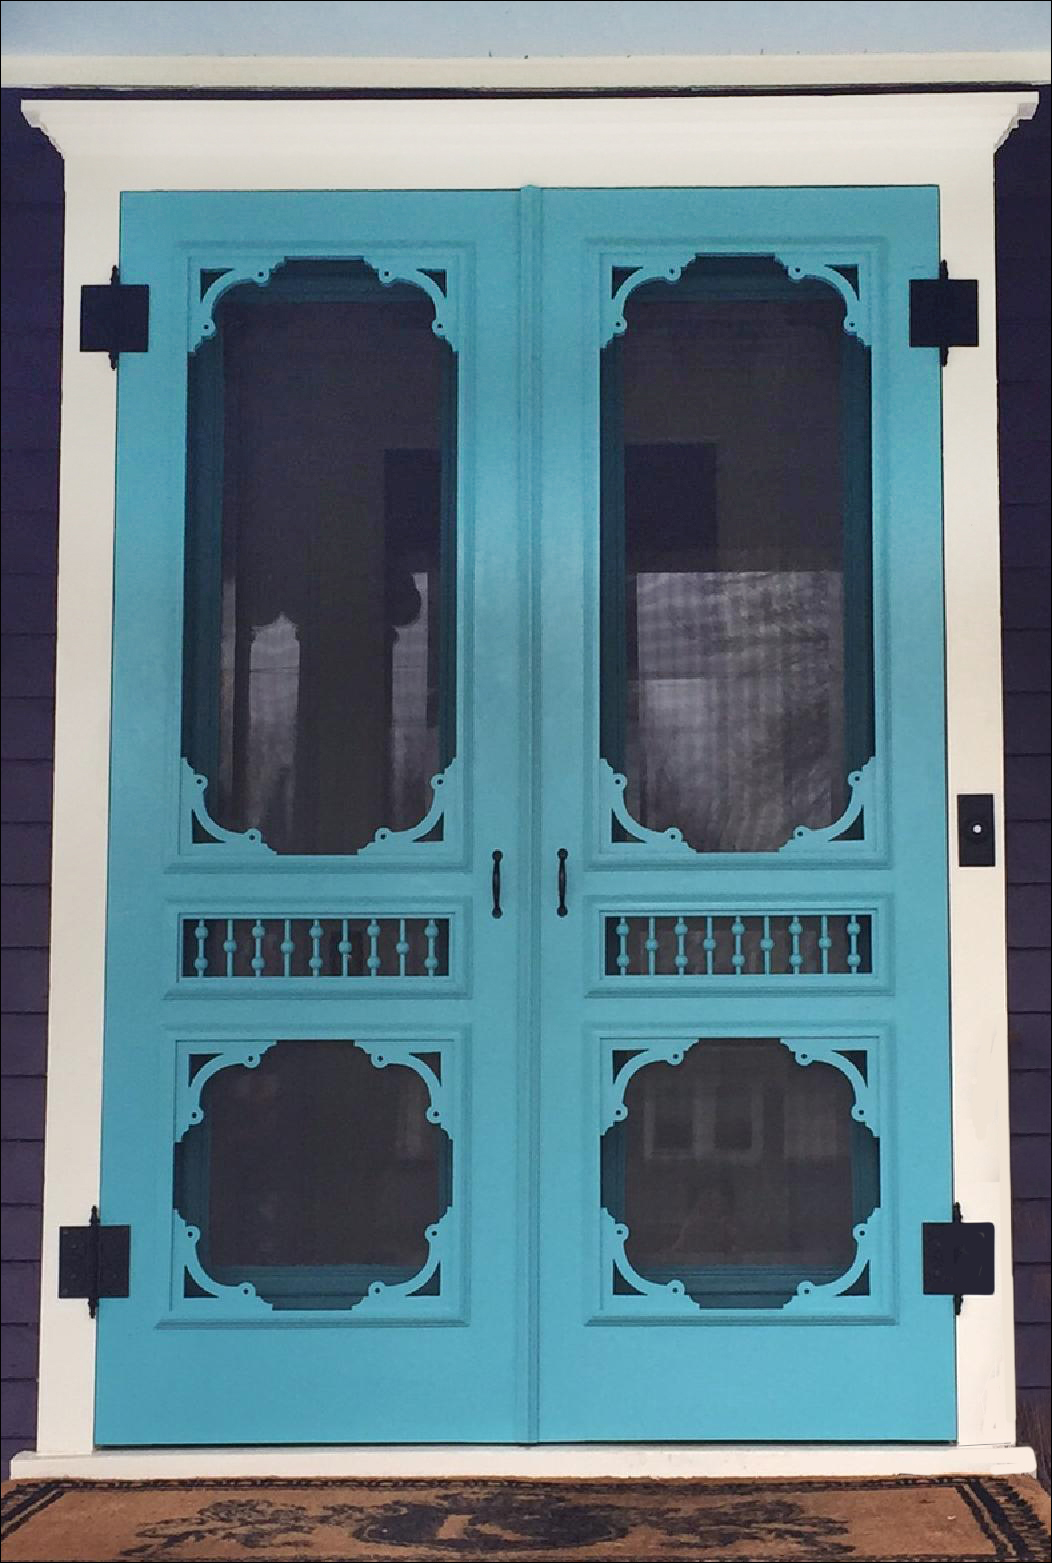 Door 7141 Return to previous page Click for larger view|| 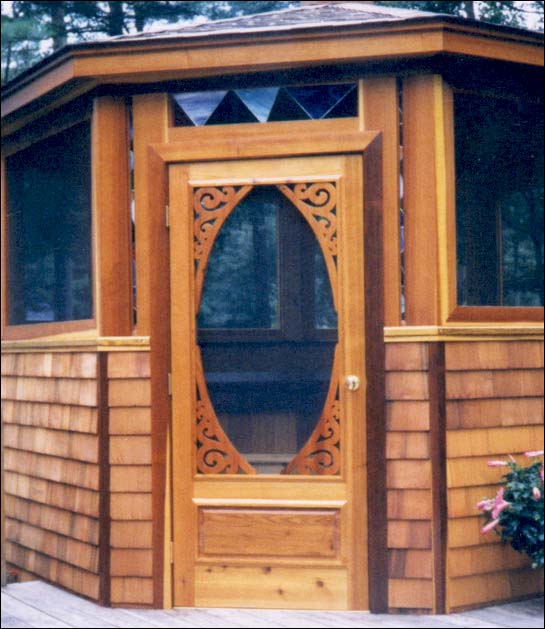 Our Screen Door 7153 in Cedar provides access and ventilation for this hot tub enclosure. Return to previous page Click for larger view|| 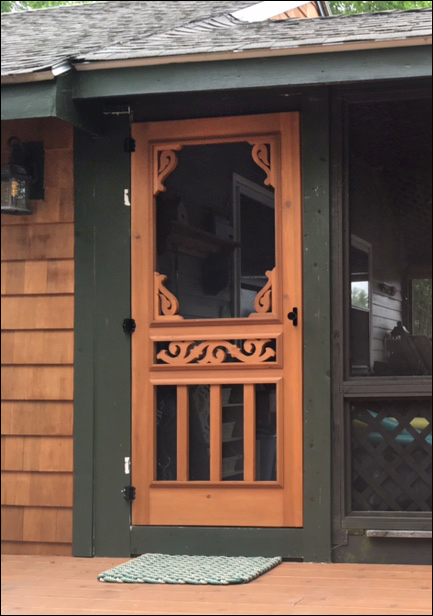 Door 7159 Return to previous page Click for larger and more views|| 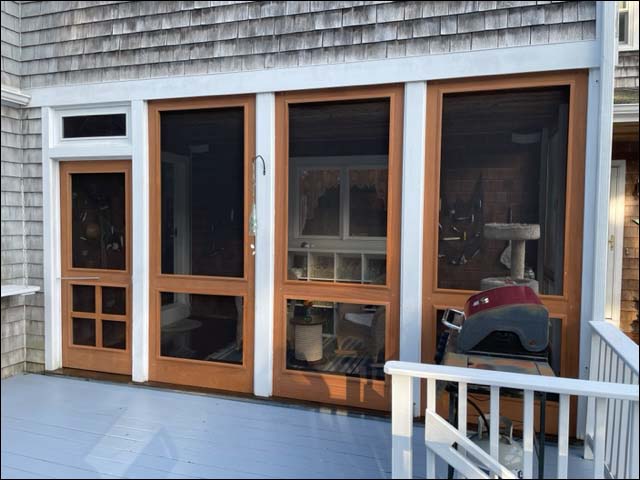 Door 7190 & 7192 "Folks at Vintage Woodworks, I am responding to let you and your entire team at Vintage Woodworks know how extremely happy we are regarding the quality of workmanship in each detail of the panels and door we now enjoy! They look beautiful (even better than we imagined)! My wife and I installed them as soon as the boxes arrived, the packaging was very effective - there was not a scratch or blemish on any item. The fit was exactly to my dimensions and they went in like a dream. Please pass on our sincere thanks to you and your team, you should all be very proud of the quality of work you do and how happy you make your customers." - Darryl & Mary T., Connecticut 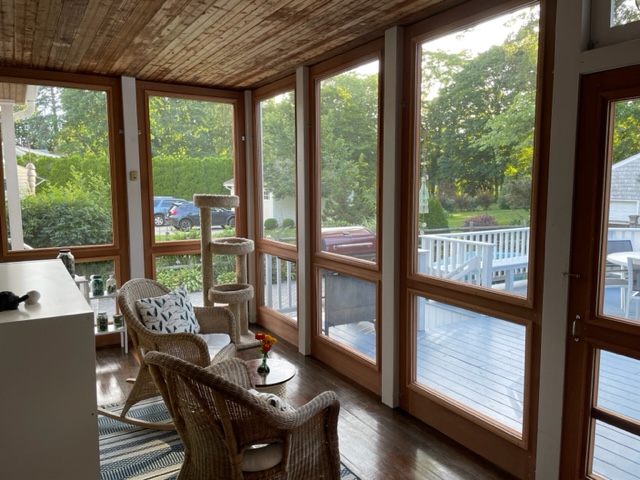 Door 7190 & 7192 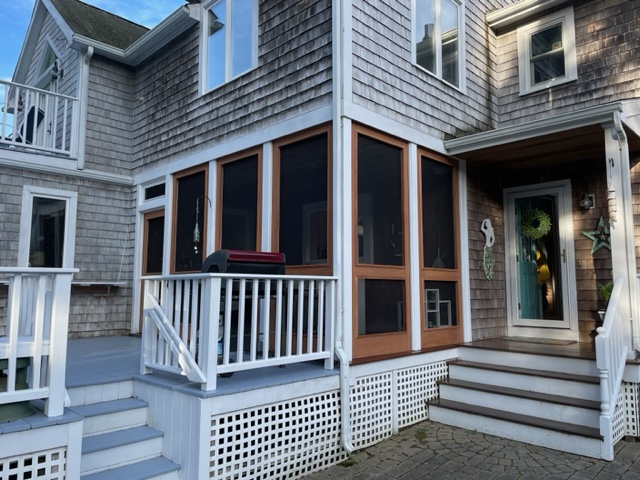 Door 7190 & 7192 ||||||||||||||||0||||||||||New||||||||||||||0||~~|^^|screen-door-7191-photo||item.||fastpivot-2007||scdous||||https://s.turbifycdn.com/aah/vintagewoodworks/door-7191-44.jpg||||Door 7191||||products > screenstordo > screendoors > scdous > ||Products > Screen/Storm Doors > Usage & Detail Photos - Screen Doors > Screen Door Usage Photos > ||||||||||||||||0||1||0||0|||||| Click for larger view|| 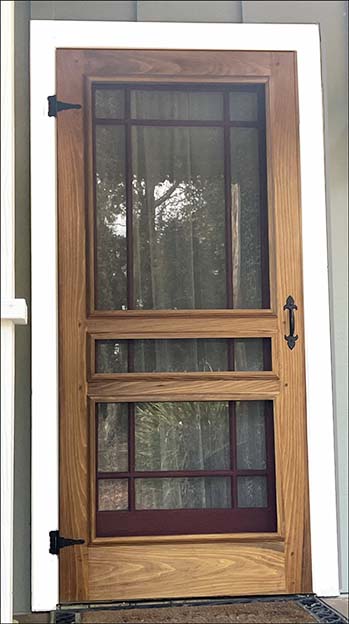 Door 7191 Thank you so much for all your great help. You guys are the best! - Trish B., Pennsylvania Click for larger and more views|| 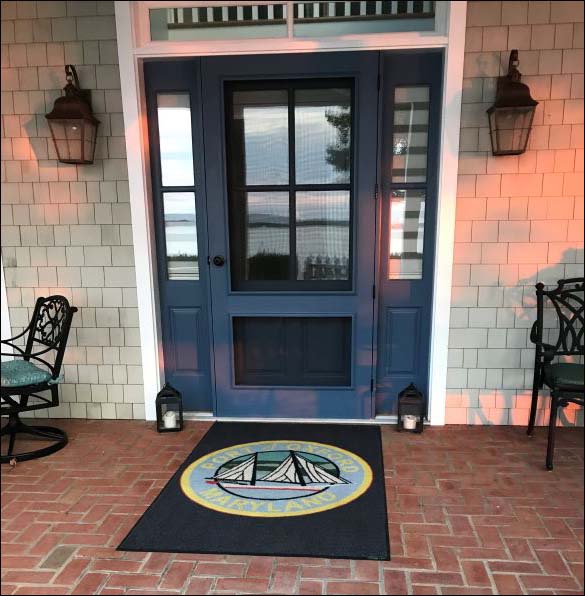 Door 7194 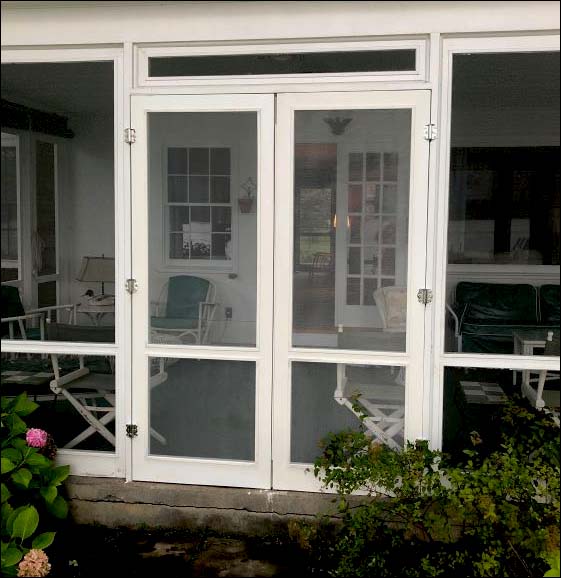 Door 7194 At customer's request we move cross bar up and made it narrower to align with screen supports to either side of this door. Return to previous page Bringing Back Yesterday in Quality & Service! Vintage Woodworks was founded in 1978 to reproduce old-fashioned, solid wood, handcrafted millwork including door casing. We are the largest manufacturer of solid wood traditional door casing for sale directly to the public. Other products include porch railings, window trim, posts and more. Since 1978, we've been ‘Bringing Back Yesterday in Quality and Service!’ Our solid wood products are equally effective for both interior and exterior decoration. And, our expert shipping and small-town, friendly services are sure to please! If after looking over our offerings for door casing in our products section you still have questions, feel free to give us a call at 903-356-2158. We would love to assist you with your questions on our door casing.||||||||||||||||0||||||||||New||||||||||||||0||~~|^^|hoods||item.||fastpivot-2007||poco||||https://s.turbifycdn.com/aah/vintagewoodworks/door-hoods-16.jpg||||Door Hoods||||products > porches > porin > bunewpo > poco > ||Products > Porches - START HERE! > ONLINE PORCH GUIDE > Understanding the Porch > Porch Shapes and Rooflines > ||||||||||||||||0||1||0||0|||||||| We don't call them porches if they don't have Porch Posts or Columns, but we still like them! Click on photo for additional views Click on photo for additional views Bringing Back Yesterday in Quality & Service! Vintage Woodworks was founded in 1978 to reproduce old-fashioned, solid wood, handcrafted millwork including door trim. We are the largest manufacturer of solid wood traditional door trim for sale directly to the public. Other products include porch railings, window casing, posts and more. Since 1978, we've been ‘Bringing Back Yesterday in Quality and Service!’ Our solid wood products are equally effective for both interior and exterior decoration. And, our expert shipping and small-town, friendly services are sure to please! If after looking over our offerings for door trim in our products section you still have questions, feel free to give us a call at 903-356-2158. We would love to assist you with your questions on our door trim.||||||||||||||||0||||||||||New||||||||||||||0||~~|^^|doorbargains||item.||fastpivot-2007||barostar||||||||Doors (discontinued)||||webmaster-pages > q-storage > barostar > ||Webmaster Pages > Storage Area > Bargain Room Storage > ||||||||||||||||0||1||0||0||||door71011 7104 7119 7136 door71511 ||CATEGORY|| (nsnf/ckd)||||||||||||||||0||||||||||New||||||||||||||0||~~|^^|link-applique-doublebailey||link.||||content-links||https://s.turbifycdn.com/aah/vintagewoodworks/double-bailey-applique-17.jpg||||||Double Bailey Applique||||webmaster-pages > misc > content-links > ||Webmaster Pages > Misc Pgs @ WM > Content Links > ||||||||||||||||0||0||0||0||||||||||||||||||||||||0||||||||||New||||||||||||||0||~~|^^|link-applique-doublemeredith||link.||||content-links||https://s.turbifycdn.com/aah/vintagewoodworks/double-meredith-applique-17.jpg||||||Double Meredith Applique||||webmaster-pages > misc > content-links > ||Webmaster Pages > Misc Pgs @ WM > Content Links > ||||||||||||||||0||0||0||0||||||||||||||||||||||||0||||||||||New||||||||||||||0||~~|^^|dripcap-details||item.||popup||hold-azekmldg||||||||Drip Cap Moulding - Details||||popup-pages > azprpo > hold-azekmldg > ||Pop-up Windows (Pages) > AZEK Product pop-ups > AZEK Moulding - measurement details > ||||||||||||||||0||1||0||0||||||(nsnf/ckd)|| Brackets (Sun Ray or Spandrels) made of PVC will be shipped with the solid PVC Drop shown here. The finial on the end of PVC Drop is a continuation of the Drop. The entire Drop and Finial are both made of PVC. - see Dropdown Options at Standard Formats|| see WM > Standard Formats > Dropdown Options at Standard Formats||||||||||||||||0||||||||||New||||||||||||||0||~~|^^|drop||item.||fastpivot-2007||item-pages||||||||Dropdown Options||||webmaster-pages > standard-formats > item-pages > ||Webmaster Pages > Standard Formats > Item Pages > ||||||||||||||||0||1||0||0||||||(nsnf/ckd) CR-How To|| Imporant Never have 2 options labeled the same, particularly if money is involved in either. This confusing the system and first option will be overridden and program will use second option. The first option will not even show up in cart. 1. Select one - All dropdown options should begin with, "Select one:" lower case "o"), followed by a blank line ("----"). See Poly Steele Core Porch Post Item pages. 2. Samples (usually first selection in Length) - should be set off with dashed lines and in all CAPS. See AZEK Misc Mouldings. Dropdowns for Samples in ALL Sizes, Samples in BOTH Sizes, etc. should be the LAST selection because if it's the first selection, the 1 foot Length default will cause the price to be much higher than after you also select SAMPLES (3"). Also see #8 below, Selections for "ALL". 3. Yes / No - the more common selection should typically be listed first. When possible, we need to word Yes/No option title as a question so cs will not skip that option. Example: Are you ordering a custom size? or Custom size? 4. Text Entry boxes (rather than a dropdown) - title needs to include "if ordering" where appropriate. See AZEK Trimboards, Custom size(s), if ordering 5. I'll contact you…/ Contact me - should start with Other - and have a dashed line above it. See F.B. #1, Material and Cutwork Thickness. 6. If a given dropdown has more than 3 selections, use dashed lines to subdivide the selections by size, design, etc., but don't go overboard with this. Exceptions (if your not sure, pls ask): A. Individual Color, Length, etc selections generally do NOT need subdividing dashed lines. See AZEK Porch Boards Item pg. B. Combined dd's typically DO need dashed separators: 1) Single dd with 2 dimensions. See AZEK Trimboards , Thickness & Width 2) Material and Cutwork Thickness dd's. See F.B. #1, Material and Cutwork Thickness. 3) Design and Size dd's. See 2" and 3" Cedar Balusters. 7. Do NOT change the order of any selections without asking. For example, AZEK Crown Moulding, Size dd has All 3 Sizes as the last selection. If you think it should be the first selection, pls ask before changing. 8. Selections for "ALL" Sizes, Samples in BOTH Sizes, etc. should be separated by dashes, have its SKU in ( ) at end of the selection, say "ALL 3 Designs", "BOTH Sizes", etc., and be the last selection, because if it's the first selection, the 1 foot Length default will cause the price to be much higher than after you also select SAMPLES (3"). See AZEK Misc Mouldings. 9. Last line in dropdown should contain a line with at least 14 dashes. See Poly Steele Core Porch Post Item pages. Dashed line can be longer if that works better with other long selections in the dd. See AZEK Miscellaneous Mouldings. 10. Do NOT use quote marks inside a DD. Use double apostrophe instead. 11. Do NOT use parentheses.||||||||||||||||0||||||||||New||||||||||||||0||~~|^^|dropdown-entry-values||item.||fastpivot-2007||references||||||||Dropdown-entry-values (DEV) ||||webmaster-pages > references > ||Webmaster Pages > YS How-To > ||||||||||||||||0||1||0||0||||||(nsnf/ckd)|| (proofed 6.10.13/ef) NOTE - Do NOT use quote marks inside a DD. Use double apostrophe instead. Do NOT use parentheses. It probably won't work to include $ in the visible dropdown and if it's not working with numerals in visible dropdown, try removing them also. 1. Prices can be controlled globally using Dropdown-entry-values (DEV) variables. 2. DEV variables will adjust the "price" of an item. 3. "Price" of an item can be entered as one or more of the following: A. Baseprice B. Plus Pricing C. Utilizing Price field at Edit page 4. Creating DEV variable: A. Review the Item page, confirm "price" will be controlled by a function listed above B. Certain symbols prompt program to behave differently: (1) Exclamation point a. Not display the (!) or anything that follows it in the options dropdown. b. Match DEV value with the dropdown text for given item. c. Upcharge the "price" by the percentage following the "! - " in DEV field. d. Add amount following the "! - " in DEV field to the "price" (2) Asterisk a. Will cause program to exclude amount in DEV field from any additional upcharges. b. Examples: i. Special Packaging ii. Bottom Notching iii. Other options C. Create DEV variable (1) In Edit Mode (but not at the Edit Screen) click the yellow Variables button. (2) Navigate to the DEV field. (3) Add to existing section or add new section. Current sections: a. -------- Material AND Thickness -------- b. -------- Material ONLY -------- c. -------- Thickness ONLY -------- d. -------- Miscellaneous -------- e. -------- Yes, ADD -------- f. -------- HEMLOCK RAIL SETS -------- D. Create item dropdown (1) Important: Dropdown must match what is in DEV field minus "! and all that follows" (2) Examples: a. "Oak !1" in "Material" dropdown and Oak !1" - 40% in DEV field Will cause program to Upcharge the "price" by 40% b. "Poplar !1" in "Material" dropdown and Poplar !1" - (+$5.00) in DEV field Will cause program to add $5.00 to the "price" c. "Hemlock !1" in "Material" dropdown & Hemlock !1" - (+$6.51)* in DEV field Will cause program to add $6.51 to the "price" after all other charges 5. Current options being controlled globally with DEV: A. All Material Types B. Thickness C. Framing D. Special packaging E. Glass options for Doors F. Bottom Notching G. Adding top and/or bottom rails 6. Several Materials and other options that may have more than one upcharge. A. The different upcharges are given individual DEV listings. B. Cedar is the same price as Poplar/Pine for most products, but may be a different upcharge for other products and thicknesses. (1) Each variation of the upcharge is listed separately, but distinguished with a different number following the exclamation point. (2) The way the option for Cedar is listed in the dropdown will determine what upcharge if any will be applied to the "price". Examples: a. Cedar !1 - 0% is used when there is no upcharge for Cedar. b. Cedar !2 - 10% is used when there is a 10% upcharge for Cedar. c. Cedar !3 - 20% is used when there is a 20% upcharge for Cedar. d. Cedar, 1'' and 1-1/4'' thick !4 - 20% is used when there is a 20% upcharge for an item produced in 1" or 1-1/4" Cedar. e. Cedar, 1-1/2'' thick !5 - 0% is used when there is no upcharge for an item produced in 1-1/2" Cedar. f. Cedar, 1-1/4'' thick !6 - 20% is used when there is a 20% upcharge for an item produced in 1-1/4" Cedar. ||||||||||||||||0||||||||||New||||||||||||||0||~~|^^|early-bird-sale-2014||item.||popup||wintersales||||||||Early Bird 10%, Everything||||popup-pages > wintersales > ||Pop-up Windows (Pages) > Sales (Discounts) > ||||||||||||||||1||1||0||0||||||(nsnf/ckd)||  Coupon Code: EB10 or use Code SD20 for 20% off Doors (No minimum for Doors). Both Expire: 3/21/16 Your order must be fully paid by March 21st, but you can delay shipment if that is more convenient. Our online Store doesn't allow the use of two coupons on an order, but if your merchandise total is at least $1350 including Door(s) and you use Code EB10, we'll adjust your final invoice so you receive 20% off on the Door portion of your order. (If ordering only Doors, please use Code SD20. Doors have NO minimum.) Already discounted items (including Bargain Room items) count towards the $1350 minimum and also qualify for this additional 10% discount! what projects have you been wanting to do?  Screen & Storm Doors, and Gable Decorations! Use Coupon Code eb10 at Checkout Your order must be fully paid by February 28th, but you can delay shipment if that is more convenient. To qualify, order at least $950 of Porch and Deck Parts, Screen & Storm Doors, and/or Gable Decor. Once qualified, ALL products are 10% off if ordered at the same time! Already discounted items don't qualify for this additional 10% discount. Please use Coupon Code eb10 at Checkout or if you order by phone. Close this window  Save 15% off EVERYTHING when you order at least $950! Coupon Code: EASTER15 Expires: 4/18/23 (extended deadline!) To qualify, order at least $950 of merchandise. (Already discounted items don't qualify for this 15% discount.) Please use Coupon Code EASTER15 at Checkout or if you order by phone. Close this window  Save 15% off EVERYTHING when you order at least $950! Coupon Code: EASTER15 Expires: 4/11/23 To qualify, order at least $950 of merchandise. (Already discounted items don't qualify for this 15% discount.) Please use Coupon Code EASTER15 at Checkout or if you order by phone. Close this window drawing you will find very useful. An elevation (like the whole house one above) is drawn as though you were viewing one face of the porch from directly in front of you. Thus, everything will be two dimensional. For example, if you are drawing the Beam above the Posts, you will show only the face of the Beam. Likewise, only the face of the Posts will show. (If you were drawing to show the third dimension, then you would be making a perspective drawing, but perspectives are better left to artists and draftspersons. Of course, if you are an artist or draftsperson, have at it... your time will be well spent! You'll want to draw a front and both side elevations. Then you'll be able to see what your porch will look like viewed from the front and from either side. You will be richly rewarded for the time and effort expended on the elevations, as it is always much easier to change your mind on paper! Existing Conditions Again, we need to establish the existing conditions. With your metal tape, measure the height of the wall (or walls) of the building to which your porch will be attached. (You can "read" your floor plan to determine the length of this existing wall.) We will begin with the front elevation. Using the same scale you established for your floor plan, draw light lines representing the ground level, and the length and height of the building side to which your porch will be attached. Locate all doors and windows, and transfer them to your elevation, showing how tall they are. (Use the bottom of the door(s) as your baseline, because the floor of the porch will be just slightly below this level.) Use a light touch to your pencil, as we will want to erase portions of these lines as we proceed. It is important that you take reasonable care in producing this graphical representation of existing conditions onto your elevation. The ultimate success of your porch depends upon the accuracy you are establishing now! A Quick Sketch Once you are satisfied with your portrayal of existing conditions, we can draw in the porch itself. But at this point it is often helpful to set aside for a moment our actual elevation, and work from a rough sketch. We need to verify that our intended porch is going to work! To do this, let's make a quick, rough copy of our elevation. (If a copier is handy, run a quick copy on the machine.) Sketch onto your copy the length and height of the intended porch, indicating the floor line, steps, roof line, Posts, and the Beam above the Posts. Try to use roughly the scale of your elevation in making this sketch. Then you can verify certain rough measurements, such as the length of your Porch Posts. We are drawing just enough to represent the porch as it would be before adding any decorative trim. Sketch in the roof line in sufficient detail to assure that the wall(s) of the existing building are high enough to accept your porch along its entire length. You may need to make several adjustments to this quick sketch before all of the porch elements are in harmony. Do not be concerned with neatness at this point; we merely need to get a quick idea of how our porch "fits" its building! Once you are satisfied with this quick sketch, let's move back to your "official" elevation... The Floor Begin with a line to represent the floor of the porch. Remember, for most porches, the floor is set an inch or two below the bottom of the door(s) of the building to which the porch is attached. This allows proper water drainage. If your porch floor is to be of wood or PVC, you may want a second line on your Elevation to indicate the thickness of the floor. The Foundation Draw in your representation of the foundation the porch floor rests on. (You may want to refer to the Foundation and Floor section in Structural Porch Components for a discussion on types of foundations, or you can skip drawing in the foundation until later.) The Posts Now draw the Posts, both Porch and Newel. Refer to your floor plan for locations. Typically, Porch Posts are set in slightly from the edge of the floor. If the floor is to be of wood, it will normally overhang the structure below it by about 1", and the Porch Posts are then set back from the edge of the floor by this same amount, allowing them to rest firmly on the underlying structure. Using your previously determined scale, draw in the Posts so that you are representing their thickness, as well as their height. The Beam Draw in the Beam above the Porch Posts. The Eave Referring to the description of fascia and soffit in the section on Roof Structure if necessary, draw in the overhanging eave of your porch. Remember, since we are still working on the front elevation (by definition, only two dimensional), all that your drawing will show is the face of the eave. This board is called the fascia. Our interest here is in seeing the balance between the depth of the fascia, the depth of the Beam, and the depth of the porch roof. The Roof Line Drawing the roof line is easier than it might seem, since again you are only concerned with the view directly from the front. Most porch roofs will look more traditional if they are "hipped". By that we mean that they do not have triangular gables at their ends. Rather, the roof "wraps" around the end of the porch. The choice of roof style is up to you. Porch with hipped roof. A Review Of the Front Elevation Pause for a few moments to study the elevation you have just drawn... • Review again the Quick Checklist concerning placement of Porch Posts. Verify that a pleasing symmetry has been achieved. • Have you been able to avoid placing Porch Posts in front of windows or doors? • Does the porch, as you have drawn it on your elevation, match the dimensions and layout of your floor plan? • Does your porch meet your original goals, as set forth in the Quick Checklist? • Are there trees or other obstructions that would prevent the porch being built as you have it drawn? • Do you need secondary steps to access a side yard? • In short, are you looking at a drawing of your Dream Porch? If not, it is much easier to make your changes now! Often setting your plan and elevation aside for a day or two will give you renewed inspiration. Remember ... Take your time. Enjoy the work as you proceed. (You should not expect of yourself that you can, in one burst of energy, create your finished masterpiece.) Life is not merely results, however grand, But mainly the thoughts, the actions, and The individual moments leading to a goal. (View the planning, the design, and the drawing phases as some of the fun, part of the challenge, and much of the joy that you can derive from this project!) Your added bonus is the joy, the satisfaction, And the memory of a job well done. Decorative Trim Items If all appears well with your front elevation, you should now draw in the anticipated decorative components. This will allow you the opportunity to further verify that everything will fit on the actual porch! We do not need an artistic rendition at this point, as we are concerned with fit and overall balance, not your drawing skills (or lack thereof!). Therefore, you may represent the decorative components as triangles and rectangles. You will probably want to refer at this time to the sections on Decorative Porch Parts as a refresher on the possibilities available for your porch. Remember, your elevation is very easy to change. Don't hesitate to experiment with various combinations of trim. For future reference, it is a good idea to indicate on your elevation the stock numbers of the items you are tentatively selecting. When selecting your Decorative Trim, please pay particular attention to the distance from porch floor to bottom of trim items over the steps. (A standard door opening is 6' 8" tall.) Unless your family includes a very tall person, it is generally permissible to fudge a little, but 6' 6" should be about the shortest clearance. We have considerable experience and are knowledgeable about the available options for decorative items for porches. Please do not hesitate to give us a call if we can be of any assistance... (903) 356-2158. Side Elevations You should also take the time to draw side elevations, showing a view of your porch as seen from either end. Follow the same steps you have just used for the front elevation. Typically, your decorative items will continue to the wall of the building to which the porch is attached. Thus, a Bracket (if Brackets are used on the front of the porch) will also be used against this wall. Rather than attach a Bracket or other decoration directly to the wall, the preferred technique is to use a Half Porch Post at the wall to provide a more finished look where Porch and building connect. You are now well on your way to realizing your dream porch! You are familiar with the various features of a porch, both structural and decorative. More importantly, you understand how and where these components are used, and how they relate to one another and to the completed porch... If you will be the one building your porch, you know many of the "tricks of the trade" that are now almost a lost art. If someone else is to do the actual construction, you are now much better prepared to oversee and appreciate the construction process... And perhaps most significantly, you are now ready to proceed with your project, secure in the knowledge that it will be just what you've always wanted... that graceful and peaceful retreat... that special, restful place... in short, your own Magnificent Porch. Good Luck, and have a wonderful time designing, building, and enjoying your porch! ||Almont, Small 1188n8 Almont, Large 1188n24 15" Cupid's Key 1162 23" Cupid's Key 1131 Haley 1185n9 Haley without Finial 1185cn9 Jasmine, Small 1180n8 Jasmine, Large 1180n17 Kirby, extra small 1191n9 Kirby, small 1191n14 Kirby, medium 1191cn13 Kirby, large 1191n16 Kirby, extra large 1191n18 Kirby, extra extra large 1191cn22 Mariposa, small 1513n10 Mariposa, medium 1513n14 Mariposa, large 1513n20 Meredith, small 1167n14 Meredith, large 1167n28 24" Ruffled Swan 1153 21" Scroll Bracket 1103 Stanton, small 1187n8 Stanton, large 1187n17 Swan's Neck 1113 13" Unruffled Swan 1127 18" Unruffled Swan 1182 Zoe 1189n13 Elongated Brackets||"Design" "Select one:" "Almont, Sm (1188n8) (+$41.71)" "Almont, Lg (1188n24) (+$72.86)" "----------------------------------" "15'' Cupid's Key (1162) (+$61.35)" "23'' Cupid's Key (1131) (+$68.72)" "----------------------------------" "Haley, with Finial (1185n9) (+$41.71)" "Haley, without Finial (1185cn9) (+$41.71)" "----------------------------------" "Jasmine, Sm (1180n8) (+$44.16)" "Jasmine, Lg (1180n17) (+$68.72)" "----------------------------------" "Kirby, XS (1191n9) (+$41.71)" "Kirby, Sm (1191n14) (+$49.66)" "Kirby, Med (1191cn13) (+$55.23)" "Kirby, Lg (1191n16) (+$58.94)" "Kirby, XL (1191n18) (+$63.40)" "Kirby, XXL (1191cn22) (+$66.64)" "----------------------------------" "Mariposa, Sm (1513n10) (+$41.71)" "Mariposa, Med (1513n14) (+$56.45)" "Mariposa, Lg (1513n20) (+$64.79)" "----------------------------------" "Meredith, Sm (1167n14) (+$58.90)" "Meredith, Lg (1167n28) (+$72.86)" "----------------------------------" "24'' Ruffled Swan (1153) (+$68.72)" "----------------------------------" "21'' Scroll (1103) (+$76.09)" "----------------------------------" "Stanton, Sm (1187n8) (+$41.71)" "Stanton, Lg (1187n17) (+$63.40)" "----------------------------------" "Swan's Neck (1113) (+$76.09)" "----------------------------------" "13'' Unruffled Swan (1127) (+$56.45)" "18'' Unruffled Swan (1182) (+$64.51)" "----------------------------------" "Zoe (1189n13) (+$53.98)"|^|"Thickness" "Select one:" "3/4'' !1" "1'' !1" "1-1/4'' !1" "1-1/2'' !1"|^|"Material" "Select one: (Last selection is ''Other'')" "Poplar - j400 !1" "Cedar, Western Red - not available in 3/4'' thickness - j200 !1" "Cypress - j500 !1" "Oak, Red - j100 !1" "Oak, White - jWO !1" "Pine, White !1" "PVC - jPV !1" "Redwood - j300 !1" "--------------------" "Other - I'll contact you about another wood and/or thickness." "Other - Contact me about another wood and/or thickness."|^|"Framing" "Select one:" "Framed (standard)" "UNframed - Reduces dimensions by approximately 2''"|^|"Sale Item? (see Sale Listings)" "Select one:" "YES, it is on Sale List." "NO, it is NOT on Sale List."||||||||||||||0||||||||||New||||||||||||||0||~~|^^|em-prodcuts-temp||item.||fastpivot-2007||indevelopment||||||||EM Products||||webmaster-pages > indevelopment > ||Webmaster Pages > Store Work > ||||||||||||||||0||1||0||0||||poly-fretwork-brackets-2 poly-fretwork-brackets ||CATEGORY|| (nsnf/ckd)||||||||||||||||0||||||||||New||||||||||||||0||~~|^^|email-landing||item.||fastpivot-2007||misc-floating-pages||||||||Email Newsletter Sign-up||||misc-floating-pages > ||Misc FLOATING Pages > ||||||||Sign up for our FREE Email Newsletter||||||||0||1||0||0|||||||| Stay informed and get great tips! Sales and special promotions, exciting new products, how-to tips, late-breaking news, and more. We hate spam as much as you do. None of your information will ever be released to third parties. You can unsubscribe at any time. Our privacy policy.
||||||||||||||||0||||||||||New||||||||||||||0||~~|^^|embedded-images||item.||fastpivot-2007||references||||||||Embedded Images ||||webmaster-pages > references > ||Webmaster Pages > YS How-To > ||||||||||||||||0||1||0||0||||||(nsnf/ckd) - see Graphics, Embedded|| See Graphics, Embedded||||||||||||||||0||||||||||New||||||||||||||0||~~|^^|employment||item.||fastpivot-2007||help||||||https://s.turbifycdn.com/aah/vintagewoodworks/employment-18.jpg||Employment ||||help > ||Help Desk > ||||||||Career Opportunities at Vintage Woodworks!||||||||0||1||0||0|||||||| Vintage Woodworks, Inc. is a family-owned national e-commerce retail company selling our architectural products all over the U.S. and Canada. We have been in Quinlan since 1978 and never a layoff! Ideal for men and women. Casual dress. Full Time position. Monday to Friday. No weekends required. 8 hour shift. Overtime available. Safe and friendly working environment. Employee discount. Paid time off. Referral program. Parental leave. Current Employment Openings: Production/Assembly Worker • Production, Assembly and Shipping. • On the job paid training. • Light woodworking equipment. • Tools supplied. Customer Service Representative • Manage incoming calls. • Process incoming online and phone orders. • Provide accurate, valid & complete customer information using the right methods & tools. • Handle customer issues, provide appropriate solutions & follow up to ensure resolution. • Follow communication procedures, guidelines & policies. • Go the extra mile to engage the customer. Please click here Vintage Woodworks Employment Application to fill out the attached pdf application form and email to donna@vintagewoodworks.com. We will review the application and give you a call. We will have an initial interview by phone. Please advise on a good time to call you. If you prefer, you can come to Vintage Woodworks and get a printed application from clipboard under lock box located in the front of the building and return to the lock box. Our address is 9195 Hwy 34 South, Quinlan, TX 75474. Your application will be reviewed the following day after it's deposited in the lock box.||||||||||||||||0||||||||||New||||||||||||||0||~~|^^|enclosed-porch||item.||fastpivot-2007||porches1||||||||Enclosed Porch||||landing-pages > porches1 > ||Alternate Landing Pages > Porches > ||||||||||||||||0||1||0||0||||link-porch-item link-porch-book ||(nsnf/ckd)|| Free assistance! Over 40 years of experience to help you convert your enclosed porch. Hundreds of photos with helpful tips. Buy direct & save on 1000's of wood and synthetic parts. Get inspired! Our photo collection includes some great examples. Use these images to get ideas for converting your enclosed porch. Keep in mind that your house doesn't need to be an exact match to create the same look and feel. Browse examples (photos, drawings, and floorplans). Study anatomy & construction of a converted enclosed porch. Plan and draw your dream porch (no art skills required). Find the best decorative elements and learn proper installation techniques. From Flooring Boards to the decorative items at the top of the Posts, we have everything to convert your enclosed porch! Our professional, easy to install Railing system and Third Dimension approach blend style, substance and authenticity. Extensive selection includes Brackets, Spandrels, Balusters, Rails, and much more in weather-resistant woods and AZEK Brand Cellular PVC. We are available by phone or email for a free personalized consultation to help convert your enclosed porch and answer your related questions. We have long believed that planning, designing, building, and decorating enclosed porches is a most worthwhile endeavor. We still do! Porches are our passion! Over the past 30 years we've been involved with many enclosed porch conversions. An enclosed porch leaves you out in the weather while unlocking a door. This home solves that problem by adding a small open porch forward of the enclosed porch. Return to previous page Free assistance! 30 years of experience converting enclosed porches. Hundreds of photos with helpful tips. Buy direct & save on 1000's of wood and synthetic parts. Get inspired! Our photo collection includes some great examples. Use these images to get ideas for converting enclosed porches. Keep in mind that your house doesn't need to be an exact match to create the same look and feel. Browse examples (photos, drawings, and floorplans). Study anatomy & construction. Plan and draw your dream porch (no art skills required). Find the best decorative elements and learn proper installation techniques to convert enclosed porches. From Flooring Boards to the decorative items at the top of the Posts, we have everything to convert enclosed porches! Our professional, easy to install Railing system and Third Dimension approach blend style, substance and authenticity. Extensive selection includes Brackets, Spandrels, Balusters, Rails, and much more in weather-resistant woods and AZEK Brand Cellular PVC. We are available by phone or email for a free personalized consultation, help with choice of components, and all related questions. We have long believed that planning, designing, building, and decorating enclosed porches is a most worthwhile endeavor. We still do! Porches are our passion! Over the past 30 years we've been involved with many conversions of enclosed porches. (What else [caulk as glue] can be done to protect the ends? Also, balusters can be installed with the 'caulk as glue' trick - "caulking from the inside out". Mention use of thin protective plate - we should provide - for Porch and Newel Posts.)||||||||||||||||0||||||||||New||||||||||||||0||~~|^^|azcolors-english-walnut||item.||popup||azek174colors||||||||English Walnut||||popup-pages > azprpo > azek174colors > ||Pop-up Windows (Pages) > AZEK Product pop-ups > AZEK ® Colors > ||||||||||||||||0||1||0||0|||||||| English Walnut  Close this window - see HTML, Basics|| See HTML, Basics||||||||||||||||0||||||||||New||||||||||||||0||~~|^^|link-poly-entrance-systems||link.||storetemplate.||content-links||https://s.turbifycdn.com/aah/vintagewoodworks/entrance-systems-37.jpg||||||Entrance Systems||||webmaster-pages > misc > content-links > ||Webmaster Pages > Misc Pgs @ WM > Content Links > ||||||||||||||||0||0||0||0||||||Click for compatibility chart instructions and ordering ||||||||||||||||||0||||||||||New||||||||||||||0||~~|^^|entrance-systems||item.||fastpivot-2007||products||||https://s.turbifycdn.com/aah/vintagewoodworks/entrance-systems-38.jpg||||Entry & Window Systems||||products > ||Products > ||||||||||||||||0||1||0||0||||poly-entrance-systems poly-pilasters door-window-caps poly-window-surrounds ||Click for Entrance & Window Systems, Pilasters, and Door & Window Caps|| Our Entrance Systems can include plain or elaborate Pediments and/or Crossheads over the door and Pilasters on either side of the door. Please click Poly Entrance & Window Systems below to get started. ||||||||||||||||0||||||||||New||||||||||||||0||~~|^^|environment||item.||fastpivot-2007||ourcompany||||https://s.turbifycdn.com/aah/vintagewoodworks/environmental-commitment-18.jpg||||Environmental Commitment||||help > ourcompany > ||Help Desk > Our Company > ||||||||||||||||0||1||0||0||||sustainable-forests green-synthetics ||||We are committed to production and office operations that minimize our impact on the environment. Many of these procedures have been a part of our daily routines long before "green" was such a buzz word! It's just part of our "fair and honest dealings"... for our staff, our customers, and the earth!  ‘Wood’ You Believe? ‘Wood’ You Believe? “The sky is falling! The sky is falling!” cries Chicken Little in the ever-popular folk tale where an acorn hits Chicken Little on the head. She instills her fear in the minds of her friends as they race to tell the king. Most versions of this tale end with the worried fowl running straight into Foxy Loxy’s den, never to emerge. How often have you heard "reducing paper and lumber use will save forests”? Obviously, if we use less paper and lumber, fewer trees will be harvested. But, despite what the flock may think, that is not the best plan! Nor is it the approach sustainable forestry managers use. Indeed, Greenpeace co-founder and forest ecologist, Patrick Moore, Ph.D. says, “The claim that using wood somehow leads to forest loss is backwards and silly. Every time we use wood—every time we buy a 2x4 at a lumberyard or a ream of paper at an office supply store—we are in fact ordering up new trees for planting in forests. It is precisely because we use so much wood that we have so much forest.” Read more The video below is a great illustration of the misunderstanding concerning sustainable forests and the solution to this issue: Click to watch now! Environmentally Safe Synthetics As the above article makes clear, when wood products are made from managed forests, it's a win-win-win for consumer, environment, and forest. Plus, there are many uses where nothing can replace real wood for its sheer beauty! On the other hand, many of our products benefit from being made of synthetic materials due to less maintenance and hence, a lower cost of ownership over time. However, each synthetic material we sell must pass our "looks like, sounds like, feels like, cuts like real wood" test because we don't want plastic-looking "fake" wood products on our own homes, and assume you don't either! Additionally, each of these synthetic materials must be gentle on the environment. Read more. Sources for 'Wood' You Believe? article & By the Numbers box: Chooseprint.org Patrick Moore, Ph.D. forest ecologist and Greenpeace co-founder, from an Evergreen interview at the Boise Basin Experimental Forest near Idaho City, Idaho, September 2002 Print Grows Trees U.S Forest Service||||||||||||||||0||||||||||New||||||||||||||0||~~|^^|green-synthetics||item.||fastpivot-2007||environment||||||||Environmentally Safe Synthetics (continued from previous page)||||help > ourcompany > environment > ||Help Desk > Our Company > Environmental Commitment > ||||||||||||||||0||1||0||0||||||Environmental Commitment|| AZEK® Porch Boards are a perfect example because they will last indefinitely, never needs painting, are impervious to insect and moisture damage, and look like painted wood flooring, right down to the small crack between each pair of boards. Not only that, but they are an environmentally "green" product! AZEK® says, "Cellular PVC is the most energy efficient major plastic. Its principle raw material is chlorine derived from common salt, an abundant and inexpensive resource. Cellular PVC is also comparatively low in energy and resource use during production, as well as in conversion to finished products. All scrap generated during the initial manufacturing process is recycled back into the finished product. Additionally, PVC can be recycled at the end of its long, useful life." Likewise, the Polyurethane from which many of our products are made minimalizes its environmental impact because it is: • Chemically stable and non-reactive, and does not contain ozone depleting compounds like CFCs or HCFCs. • Free of toxic gas emissions. • Finished with water base paints that exceed government VOC regulations. This reduces the greenhouse effect. • Manufactured using recycled waste materials from within the process. • Manufactured with post-consumer content, thereby reducing landfill requirements. Use any of our products made with synthetic materials with confidence while you enjoy their long-term, low maintenance advantages and appreciate their authentic appearance for many years into the future.||||||||||||||||0||||||||||New||||||||||||||0||~~|^^|error-message||item.||fastpivot-2007||references||||||||Error Message||||webmaster-pages > references > ||Webmaster Pages > YS How-To > ||||||||||||||||0||1||0||0||||||(nsnf/ckd) - see Not Found Text|| See Not Found Text||||||||||||||||0||||||||||New||||||||||||||0||~~|^^|exofsali||item.||fastpivot-2007||newsapr||||||||Example of Samples Listing||1||webmaster-pages > indevelopment > newsapr > ||Webmaster Pages > Store Work > New Samples Program > ||||||||||||||||0||1||1||0||||||(nsnf/ckd)|| Samples available.||"Length" "Select one" "Random Lengths (+$4.01) per foot" "1/2'' free sample" "4'' sample (+$1.25)" "1 Foot (+$3.41)" "2 Feet (+$6.82)" "3 Feet (+$10.23)" "4 Feet (+$13.63)" "5 Feet (+$17.04)" "6 Feet (+$27.67)" "7 Feet (+$32.28)" "8 Feet (+$36.89)" "9 Feet (+$41.50)" "10 Feet (+$46.12)" "11 Feet (+$50.73)" "12 Feet (+$55.34)" "13 Feet (+$59.95)" "14 Feet (+$64.56)" "15 Feet (+$69.17)"||||||||||||||0||||||||||New||||||||||||||0||~~|^^|crownmoulding-sets||item.||fastpivot-2007||crownmouldings||||https://s.turbifycdn.com/aah/vintagewoodworks/crown-moulding-sets-26.jpg||||Examples of Crown Moulding Assemblies||||products > mouldings > mouldings-item > crownmouldings > ||Products > Mouldings > Moulding Product Listings > Crown Mouldings > ||||||||||||||||0||1||0||0||||||7 Sets|| Where walls and ceilings meet, our Crown Mouldings work wonders! But for an even grander effect, combine our various Crown, Cap, and Miscellaneous mouldings plus Plain Stock and even your own wallpaper borders, to create the Crown Moulding Assemblies shown below. Installed they all look wonderfully complex, but actually they are very easy to create. We have combined the components used to create each Assembly below. With Mouldings from Vintage Woodworks, you can truly “crown” all your rooms! Questions? Please call us... 903-356-2158.
is worth a thousand words. Therefore, in the following drawings we've included numerous examples of porch decoration. By studying these you can get a good idea how your porch will look with different combinations of decorative components. Comparisons Use these drawings for comparison purposes. By showing many variations on the same theme, we've tried to provide answers to such questions as: What is the best Baluster spacing for my porch? How tall should my Handrail be? Do I prefer Sawn or Turned Balusters? Product Cross Reference We have included (see link below) a Cross Reference for the products shown in each drawing. Copy & Paste And please remember... it's easy to print some of our Examples and then mix and match portions of these to create additional Porch Examples of your own. • Porch Example Drawings • Product Cross Reference Select one link that best describes the porch you have or want. Use the Return to previous page links if you want to explore other options. ***Path - Existing Porch - using existing Posts and Balustrade: Balustrade - define||||||||||||||||0||||||||||New||||||||||||||0||~~|^^|reexpo1||item.||fastpivot-2007||porin||||||||Existing Porch Assessment||||products > porches > porin > ||Products > Porches - START HERE! > ONLINE PORCH GUIDE > ||||||||||||||||0||1||0||0||||paandcain |||| your dreams, a remodeling may be in order. But even if you love your porch just the way it is, a checkup for existing or potential problems can avoid a big repair bill down the road! Assessing What Is Present Often a porch will be of sound construction, but lacking in one or more key components. For example, many more recently constructed porches are missing the beam that typically runs directly above the Porch Posts. (Actually, from a structural standpoint, some sort of beam is probably present, but it may be concealed within the space between porch ceiling and roof.) A non-visible beam is a definite handicap if you want to apply Post Top Items. Or perhaps your porch does have a visible beam, but it is not of the same width as the Porch Posts. Again, this is a hindrance in the proper placement of decorative porch trim. Your Porch Posts may be to your liking, but positioned such that one or more Posts are directly in front of windows (or even a door). Or you may wish to replace the Posts with a more decorative style. Steps may need re-positioning or you may choose to add Newel Posts where none previously existed. On a more major scale, you may want to increase the depth or length of the porch or add a right-angled section to allow the porch to wrap around a corner of the house. The porch flooring may be in need of repair or replacement, or some of the structural members may need to be replaced or strengthened. You might choose to add a ceiling where none previously existed. (Vintage Woodworks has a selection of Beaded Ceiling that is very authentic.) Such an addition facilitates the inclusion of new electrical wiring for lights, ceiling fans, or outlets for Christmas lighting. In fact, there are many valid reasons to consider remodeling an existing porch rather than starting over from "scratch." Often the job is not nearly as complicated as it would first seem, once the structure is properly analyzed. And, of course, there are often significant savings of time and materials when remodeling rather than starting fresh. For Your Initial Review Please review our Quick Checklist, to determine those areas that may need attention during any remodeling of an existing porch. Then list all of the existing aspects of your porch that you like and dislike. Be complete. Remember, you are in the "dreaming" stage of planning your remodeling! Plan & Elevations Following the instructions in the section Planning Your Porch , draw a floor plan and front and side elevations of the porch as it presently exists. Then, draw a floor plan and front and side elevations of your porch as you would like for it to be after remodeling. The sections, A Review of the Front Elevation and Decorative Trim Items, will both be helpful. Also, please refer at this time to the section on Decorative Porch Parts as a refresher on the possibilities available for your porch remodeling. *** Ed. note - The following will replace all text at the current Existing Porch Assessment page of the OPG. The current text at this page will be repurposed as a new Remodeling an Existing Porch section to be located right after the current Existing Porch Assessment page. For this discussion we will assume your existing porch has wood Porch Posts supporting an overhead beam, and wood Newel Posts, Railings, Balusters, and decorative trim at the top of the Porch Posts. OVERVIEW The longevity of any porch is contingent on three basic issues: 1. How the porch is constructed. 2. How the Posts, balustrade, and other items are installed. 3. How the porch is maintained. Basic Construction Problems can include: 1. Weak foundation. 2. Structure below porch floor built with untreated wood. 3. Leaking roof, which may be due to lack of sufficient slope. 4. Lack of proper forward slope to the porch floor. Also, adequate roof overhang will help protect the trim at the top of your Porch Posts and adequate ventilation under the porch will help protect the substructure and wood decking. Fortunately, the basic construction of most porches is adequate. However, failure to correct any of the first three construction problems will hasten the demise of your porch. Floor slope is only a problem if standing water is adversely effecting a wooden porch floor (which it will) or if you mind stepping in puddles after a blowing rain. Because on site factors must be taken into account, it is not possible for us to give instructions for correcting porch construction problems. However, you can become more knowledgeable by reading the Structural Porch Components section of this Guide. Please seek advise from a qualified contractor or experienced carpenter before correcting construction problems. Installation Problems Unfortunately, many (perhaps most!) Porch Posts and other items are installed incorrectly. However, even though installation problems are more common than construction problems, they are also easier to correct. A prime example of an installation problem, and one that we see far too often, is the use of flat-topped Bottom Rail with wood Balusters. This almost ensures deterioration due to "soggy bottom rot," as we explain at our Sloped-Top Bottom Railing page. Installation mistakes include: 1. Installation of any items, but particularly Posts, Balusters, or Railings, without completely painting all surfaces first, particular all ends. 2. Flat-topped Bottom Rails, as discussed just above. 3. Installation of Porch Posts directly on the porch floor rather than with hardware that elevates them slightly (please see Porch Post Installation Accessories. 4. Installation of Newel Posts directly on the floor without the use of caulk as a "glue" to completely cover their bottoms, as described at Newel Post Installation. 5. Using nails rather than screws during installation of porch parts, as this makes future maintenance more difficult. The first four installation mistakes are fairly common and WILL cause premature failure of wood components at some point. End rot is only a matter of time. If either of the first two construction problems exist, and if your porch is more than 3 years old, end rot may have already started. It may presently be concealed since it tends to start in the bottom center of items and work outward. Take heart! There are some fairly straightforward steps you can take to arrest any existing problems and mitigate future damage. Also, please be aware that in the Triage section below we discuss prioritizing and work flow so you can do any necessary remediation work in stages to fit the budget and time available. ASSESSING YOUR PORCH The presence of Sloped-top Bottom Rail and proper Porch Post bottom hardware only requires a visual inspection. Whether all surfaces of your porch items (and particularly the bottom ends) were completely painted with multiple coats of a good oil-based paint PRIOR to installation is obviously more difficult, since the ends are now concealed. If you did the installation yourself, or if you observed the installation, perhaps you remember the answer to this very important question. If not, it is certainly well worth the effort to find out by removing and dissembling a balustrade (railing) section. This is not the major surgery you might expect. If you don't know if your Porch Post bottoms were painted prior to installation, removal and inspection of a Porch Post is not as difficult as it sounds. However, if Porch Posts were installed with adequate bottom mounting hardware, you might elect to check the condition of their bottoms without removal, using the probe technique described at the Paint Inspection page. Just be sure to recheck every couple of years to confirm all is well. Also, even if you know all ends (Porch Posts, Newels, Rails) were painted prior to installation, periodical probes (see link just above) are good insurance against future surprises. Of course, if your Porch Posts are not installed with proper bottom hardware, then we advise redoing their installation as soon as possible. Likewise, if you don't know if your Newel bottoms were painted AND completely covered with caulk prior to installation, one should be removed for inspection. This will require removing any attached Railing, so this inspection should be done at the same time as the balustrade removal and disassembly. Here again, you could elect to probe for problems without removing a Newel, but that is not as definative. REMEDIAL ACTION If your porch has none of the above installation problems, you may skip this section. Otherwise, let's explore the remedies available to you. Condition 1: Visible or concealed rotting of any components. > Solution: Repair or replace rotting components. See Repair of Porch Components. Condition 2: Bottom Rails not sloped-top. > Solution: We strongly suggest replacing them with our Sloped-Top Bottom Railing. Condition 3: Inspection determined Rail ends and/or Baluster bottoms were not painted prior to installation or that paint on their ends is failing. > Solution: Remove and dissemble all balustrade sections, treat with epoxy, paint all ends, and reinstall properly. Condition 4: Porch Posts not installed on proper mounting hardware and/or Newel Posts in need of bottom treatment. > Solution: Reinstall Posts correctly using our Installation Accessories. Since that will require the removal of balustrade sections, you can delay inspection for proper end painting of those components until they are removed for Post reinstallation. Prioritizing Your Efforts This section assumes you will correct all installation mistakes to ensure a long and healthy life for your porch. However, budget and time constraints sometimes necessitate performing remediation work in stages. If that's your situation, here are our suggestions, in order of urgency: 1. If visible rot is present, it's safe to assume there's also a lot of concealed rot. Concentrate first on saving as many components as possible. This means arresting the rot's progress, replacing components that are too far gone, and ensuring the rot doesn't return. 2. If you detect concealed rot, the clock is ticking. We recommend acting as fast as possible to save as many components as possible. 3. If you cannot detect any rot, including concealed rot, but any of the other Conditions above are present, then prioritize your efforts in the order most likely to avoid future rotting: A. Replace flat-topped Bottom Rails with Sloped-top Rails. B. Paint ends of Balusters, including epoxy treatment if you want maximum protection. C. Paint all other ends, including additional end treatment if you want maximum protection. D. Reinstall Porch Posts on proper mounting hardware (with proper bottom treatment) and/or reinstall Newel Posts in need of bottom treatment. Of course, if two or more of the above Conditions are present, you should schedule your work so that repeated disassembly and reinstallation is avoided. For example, if your Porch Posts were installed without proper mounting accessories AND you have flat-topped Bottom Rails, then adjoining balustrade sections should be reworked as the Posts are removed. Work flow Even if lots of remediation work is required, it's entirely feasible to progress from one end of your porch to the other, with never more than one Porch Post removed at the same time. Or, you can elect to disassemble everything first, repaint everything as necessary, and then reinstall everything. ||||||||||||||||0||||||||||New||||||||||||||0||~~|^^|expopo||item.||fastpivot-2007||floating-pw||||||||Existing Porch Posts ||||webmaster-pages > indevelopment > porches5 > porchwizard > floating-pw > ||Webmaster Pages > Store Work > Porches > Porch Wizard > Floating Pages - Porch Wizard > ||||||||The Porch Wizard - Existing Porch Posts||||||||0||1||0||0||||||(nsnf/ckd)|| Select one link that best describes the porch you have or want. Use the Return to previous page links if you want to explore other options. *** Path - Existing Porch - Use Existing Posts: Explain need for adequate flat at top and bottom. Mention that Posts can usually be moved if better spacing is needed.) I might want to replace some or all of my Balustrade or add Balustrade where I presently don't have any or I'm planning to use my existing Balustrade or I'm not sure if I need new Balustrade between my Posts ||||||||||||||||0||||||||||New||||||||||||||0||~~|^^|expand-pl-bds-offering||item.||fastpivot-2007||indevelopment||||||||Expand Plain Boards Offering||||webmaster-pages > indevelopment > ||Webmaster Pages > Store Work > ||||||||||||||||0||1||0||0||||||(nsnf/ckd)|| SUMMARY Expand our Plain Boards offering to include both standard (no $12 Setup Fee) and custom($12 Setup Fee), per series email below. Standard widths to include: 3/4", 1-1/2", 2-1/2", 3-1/2, 5-1/2, 7-1/4", 9-1/4", and 11-1/4" Standard thicknesses to include: 3/4", From: Roland Sent: Monday, November 24, 2014 4:45 PM To: Gregory Tatsch Cc: 'Ellen Fowler' Subject: Re: Expanding Plain Boards Offering - 6 ***rht 11.24 below On 11/24/2014 3:02 PM, Gregory Tatsch wrote: rht, So, just to be sure i"m understanding... are you suggesting we offer all BB wood types in "standard" (no $12 Setup Fee) widths (either 2.5", 3.5, 4.5, 5.5, 7.25", 9.25" and 11.25" or BB widths + 7.25, 9.25 and 11.25) with any other widths considered custom ($12 Setup Fee)? ***rht 11.24 - Yes. I will need to ck a few species, such as the Alders and Cherry since they typ are not as readily available in wider widths or length as in the case of Cherry, but we will be able to limit them if necessary to what is readily available. Since some of our wood types ARE purchased S4S, I think it would save labor to NOT offer in "BB" widths of 3-1/4 and 5-1/4 so we don't have to remove 1/4" from standard S4S widths to produce those. Also, since cs are used to working with 3-1/2 and 5-1/2, I think it would be better to stay with those thicknesses. Would we want to offer 3/4" and 1-1/2" widths as standard? ***rht 11.24 - I agree and think it is better, which was my first choice, on going with the standard widths of boards. Particularly since Cs are use to the the 3.5", etc. We could offer the 3/4" and 1.5" as standard also. Don't have a strong feeling for it. Also, we could drop the 4.5" as standard and it could be custom. And are you suggesting each of the above standard widths could be offered in "standard" thicknesses of 3/4", 1", 1-5/16", and 1-9/16"? Do these thicknesses avoid the need to plane, both for S4S and RWL lumber? ***rht 11.24 - Yes, to the thickness issue with following exceptions. As to planning, I will need to ck since some of the species are not available in 1-5/16" and we would have to plane those from 1.5". Example would be Cedar or Redwood that is not available in 5/4. Most to all of our s4s purchased are not available in 5/4". I think now the 1" should be dropped from all as standard as it has to be planned and there will be low demand for it. You can purchase it in some limited species but we do not stock since there is such a low demand for our products in 1". We could do the 1" on a non standard and charge the $12 set up fee or just leave it out and let the Cs ask for it. What I'd like to do is offer standard widths and thicknesses (no $12 Setup Fee) for all wood types we normally offer for BB, and with those standard sizes set so we don't have to resize S4S lumber nor have to plane any lumber. If necessary to accomplish this goal, we can note which of our wood types come standard in which thicknesses. ***rht 11.24 - Yes, I think this is the way to go. gt -------------------------- From: Roland Sent: Monday, November 24, 2014 2:06 PM To: Gregory Tatsch Cc: 'Ellen Fowler' Subject: Re: Expanding Plain Boards Offering - 4 Gt, I was just expanding on what we are already doing @ Plain Bds with Poplar, Cypress and the Oaks in limited widths that are purchased RWL. My thinking below in #2 is that we can offer an S4S bd in different widths of 2.5", 3.5, 4.5, 5.5, 7.25", 9.25" and 11.25" in the RWL and s4s species and thicknesses and therefore add more species to our present listings. I added the 4.5" since it is between the 3.5 and 5.5. OR, in a new thought perhaps even better, we could offer in the same widths as our bb/vg finished width since those cost are known as to the blank size and finished size and would require less time to implement and maintain and then do the cost and upchange to retail on the 7.25, 9.25 and 11.25" on the same basis as the moulding where we add the extra .12 per ft to the cost. I would think that the cost for the s4s plain bd would be the same cost as the bb/vg if we went with the moulding widths, since it is the same blank and therefore same material cost. We do not send our Plain Bds thru the moulder but could still charge the extra .06 for the moulder since we do have to do some additional hand sanding on the edges if they are rough or have burn marks on them. This would make it much easier to keep up with. Rht ----------------------------- On 11/24/2014 8:13 AM, Gregory Tatsch wrote: rht, When u say, "... expand our plain bd section in the standard true widths of ..." are u referring also to wood types we buy RWL? gt ------------------------------- From: Roland Sent: Friday, November 21, 2014 4:43 PM To: Gregory Tatsch Cc: 'Ellen Fowler' Subject: Re: Expanding Plain Boards Offering - 2 Gt, I think it is a very good idea you outline below. Also we should also expand our plain bd section in the standard true widths of 3.5", 5.5", 7.25", 9.25" and 11.25" to also include 1", 1.25" and 1.5", where applicable, with noting that the 5/4 is 1-5/16" and the 6/4 is 1-9/16". The 1" IS 1". Agree we should make a seperate page for the YW's. Rht ---------------------- On 11/18/2014 11:11 AM, Gregory Tatsch wrote: (we may have discussed this previously but didn't take action) rht, In the same way that we cut AZ T.bds to custom sizes, I think we should offer our wood Plain Boards in custom sizes, particularly since we already have this inventory in the lumber shed. And as w/ AZ, we cd h a $12 Setup Fee per order. We may find that we will sell a lot more Pl Bds if we offer them in custom sizes, since our current Pl Bd offering is very ltd. At present Plain Bd sizes correspond with components we already utilize, but I think we should go strictly w/ custom sizes, since I don't think we sell many Pl. Bds at present. I've just added YW Plain Boards for the 2x4 and 2x6, but since we don't want to rip these, I could make a new page just for them, w/ a link to that pg at Pl Bds, just as we now have a link to AZ T.bds at the Pl Bds pg. The new YW Pl Bds pg wd not, of course, offer custom sizes. What do u think? gt||||||||||||||||0||||||||||New||||||||||||||0||~~|^^|export-data||item.||fastpivot-2007||references||||||||Export Data||||webmaster-pages > references > ||Webmaster Pages > YS How-To > ||||||||||||||||0||1||0||0||||||(nsnf/ckd) - see Data Download|| See Data Download||||||||||||||||0||||||||||New||||||||||||||0||~~|^^|sr-extender||item.||fastpivot-2007||sunraybrackets||||https://s.turbifycdn.com/aah/vintagewoodworks/extender-for-sun-ray-brackets-28.jpg||||Extender for Sun Ray Brackets||vww (caf)||products > brackets > bracket-item > wood-pvc-brackets > sunraybrackets > ||Products > Brackets > Bracket Product Listings > Wood and PVC Brackets > Sun Ray Brackets > ||0.000||0.000 ||||||||||||1||1||0||0||||||||1570n62 1170n46 1173n22 1573n30 1175n1 1175n2, 1175n1v 1175n2v 1171 Extender for Sun Ray Brackets||"Extender" "Select one" "1 Foot of 1-1/2'' x 1-3/4'' for 30'' Sun Ray 1 (5213n1) (+$5.87)" "2 Feet of 1-1/2'' x 1-3/4'' for 30'' Sun Ray 1 (5213n2) (+$11.73)" "3 Feet of 1-1/2'' x 1-3/4'' for 30'' Sun Ray 1 (5213n3) (+$17.60)" "4 Feet of 1-1/2'' x 1-3/4'' for 30'' Sun Ray 1 (5213n4) (+$23.46)" "5 Feet of 1-1/2'' x 1-3/4'' for 30'' Sun Ray 1 (5213n5) (+$29.33)" "6 Feet of 1-1/2'' x 1-3/4'' for 30'' Sun Ray 1 (5213n6) (+$35.20)" "7 Feet of 1-1/2'' x 1-3/4'' for 30'' Sun Ray 1 (5213n7) (+$41.20)" "8 Feet of 1-1/2'' x 1-3/4'' for 30'' Sun Ray 1 (5213n8) (+$46.93)" "9 Feet of 1-1/2'' x 1-3/4'' for 30'' Sun Ray 1 (5213n9) (+$52.80)" "--------------------------------------------------------" "1 Foot of 1-1/2'' x 1-1/2'' for 22'' Sun Ray 1 (5206n1) (+$5.87)" "2 Feet of 1-1/2'' x 1-1/2'' for 22'' Sun Ray 1 (5206n2) (+$11.73)" "3 Feet of 1-1/2'' x 1-1/2'' for 22'' Sun Ray 1 (5206n3) (+$17.60)" "4 Feet of 1-1/2'' x 1-1/2'' for 22'' Sun Ray 1 (5206n4) (+$23.46)" "5 Feet of 1-1/2'' x 1-1/2'' for 22'' Sun Ray 1 (5206n5) (+$29.33)" "6 Feet of 1-1/2'' x 1-1/2'' for 22'' Sun Ray 1 (5206n6) (+$35.20)" "7 Feet of 1-1/2'' x 1-1/2'' for 22'' Sun Ray 1 (5206n7) (+$41.20)" "8 Feet of 1-1/2'' x 1-1/2'' for 22'' Sun Ray 1 (5206n8) (+$46.93)" "9 Feet of 1-1/2'' x 1-1/2'' for 22'' Sun Ray 1 (5206n9) (+$52.80)" "--------------" "1 Foot of 1-1/2'' x 2'' for Sun Ray 3 (5203n1) (+$6.39)" "2 Feet of 1-1/2'' x 2'' for Sun Ray 3 (5203n2) (+$12.77)" "3 Feet of 1-1/2'' x 2'' for Sun Ray 3 (5203n3) (+$19.16)" "4 Feet of 1-1/2'' x 2'' for Sun Ray 3 (5203n4) (+$25.54)" "5 Feet of 1-1/2'' x 2'' for Sun Ray 3 (5203n5) (+$31.93)" "6 Feet of 1-1/2'' x 2'' for Sun Ray 3 (5203n6) (+$38.32)" "7 Feet of 1-1/2'' x 2'' for Sun Ray 3 (5203n7) (+$44.70)" "8 Feet of 1-1/2'' x 2'' for Sun Ray 3 (5203n8) (+$51.09)" "9 Feet of 1-1/2'' x 2'' for Sun Ray 3 (5203n9) (+$57.47)"|^|"Material" "Select One" "Pine, White !T" "Cedar, Western Red - j200 !T" "Cypress - j500 !T" "Oak, Red - j100 !T" "Oak, White - jWO !T" "Poplar - j400 !T" "PVC - jPV !T" "Redwood - j300 !T" "--------------" "I'll contact you about another wood." "Contact me about another wood."||||||||||||||0||||||||||New||||||||||||||0||~~|^^|link-ext-stair-parts||link.||storetemplate.||content-links||https://s.turbifycdn.com/aah/vintagewoodworks/exterior-stair-components-20.jpg||||||Exterior Stair Components||||webmaster-pages > misc > content-links > ||Webmaster Pages > Misc Pgs @ WM > Content Links > ||||||||||||||||0||0||0||0||||||||||||||||||||||||0||||||||||New||||||||||||||0||~~|^^|link-ext-stair-turnings||link.||storetemplate.||content-links||https://s.turbifycdn.com/aah/vintagewoodworks/exterior-stair-turnings-20.jpg||||||Exterior Stair Turnings||||webmaster-pages > misc > content-links > ||Webmaster Pages > Misc Pgs @ WM > Content Links > ||||||||||||||||0||0||0||0||||||||||||||||||||||||0||||||||||New||||||||||||||0||~~|^^|link-ext-balustrade||link.||storetemplate.||content-links||https://s.turbifycdn.com/aah/vintagewoodworks/exterior-balustrade-components-23.jpg||||||Exterior Balustrade Components||||webmaster-pages > misc > content-links > ||Webmaster Pages > Misc Pgs @ WM > Content Links > ||||||||||||||||0||0||0||0||||||||||||||||||||||||0||||||||||New||||||||||||||0||~~|^^|link-ext-balusters||link.||||content-links||||||||Exterior Balusters||||webmaster-pages > misc > content-links > ||Webmaster Pages > Misc Pgs @ WM > Content Links > ||||||||||||||||0||0||0||0||||||||||||||||||||||||0||||||||||New||||||||||||||0||~~|^^|extra-bead||item.||fastpivot-2007||misc-floating-pages||||||||Extra Center Bead or Center V-Groove||||misc-floating-pages > ||Misc FLOATING Pages > ||||||||||||||||0||1||0||0|||||||| If you want an extra Center Bead or V-Groove in the face of each board please specify this when you order. Return to Beadboard or V-Groove Board||||||||||||||||0||||||||||New||||||||||||||0||~~|^^|sr-drop||item.||fastpivot-2007||sunraybrackets||||https://s.turbifycdn.com/aah/vintagewoodworks/extra-drops-for-sun-ray-brackets-38.jpg||||Extra Drops for Sun Ray Brackets||vww||products > brackets > bracket-item > wood-pvc-brackets > sunraybrackets > ||Products > Brackets > Bracket Product Listings > Wood and PVC Brackets > Sun Ray Brackets > ||0.000||0.000 ||||||||||||1||1||0||0||||||||5201n5 5207n5 1570n62 1170n46 1173n22 1573n30 1175n1 1175n2, 1175n1v 1175n2v 1171 Extra Drops for Sun Ray Brackets Square Drop||"Square Drop" "Select one" "2'' x 2'' (5201n5) (+$22.07)" "1-1/2'' x 1-1/2'' (5207n5) (+$22.07)"|^|"Material" "Select One" "Pine, White !T" "Cedar, Western Red - j200 !T" "Cypress - j500 !T" "Oak, Red - j100 !T" "Oak, White - jWO !T" "Poplar - j400 !T" "PVC - jPV !T" "Redwood - j300 !T" "--------------" "I'll contact you about another wood." "Contact me about another wood."||||||||||||||0||||||||||New||||||||||||||0||~~|^^|extreme-makeover-home-edition||item.||fastpivot-2007||ourcompany||||https://s.turbifycdn.com/aah/vintagewoodworks/extreme-makeover-home-edition-17.jpg||||Extreme Makeover: Home Edition||||help > ourcompany > ||Help Desk > Our Company > ||||||||||||||||0||1||0||0|||||||| Donates Millwork Trim to Help Fellow Americans Episode aired December 2, 2011 on ABC The Walker family has spent the past two years turning their 11-year-old son’s tragic death into something positive as they work to raise awareness and lobby for new laws against bullying. ABC’s Extreme Makeover: Home Edition decided to turn their home into a positive for them as well.
Photos 2-4, 9 & 10 - by The Republican Photos 5-8 - by Vintage Woodworks The Emmy award winning reality program Extreme Makeover: Home Edition ran nine seasons on ABC. It was produced by Endemol USA, a division of Endemol Holding, and was executive-produced by Brady Connell and George Verschoor. David Goldberg is Chairman, Endemol North America.||||||||||||||||0||||||||||New||||||||||||||0||~~|^^|fanbrackets||item.||fastpivot-2007||wood-pvc-brackets||||https://s.turbifycdn.com/aah/vintagewoodworks/fan-brackets-29.jpg||||Fan Brackets||vww||products > brackets > bracket-item > wood-pvc-brackets > ||Products > Brackets > Bracket Product Listings > Wood and PVC Brackets > ||0.000||0.000 ||||Fan Brackets||||||||1||1||0||0||||||Symmetrical elegance. Click for 26 Designs||4'' - 3 Ball 1328n4 5'' - 3 Ball 328n5 6-3/4'' - 12 Ball 1327 6-3/4'' - 3 Ball 1328n6 9-1/2'' - 3 Ball 1312 11'' - 12 Ball 1330 11'' - 8 Ball 1385 13-3/4'' - 12 Ball 1384 13-3/4'' - 16 Ball 1362 17-3/4'' - 28 Ball 1329 4'' - 3 Spindle 1324 5'' - 3 Spindle 1325 6-3/4'' - 4 Spindle 1326 11'' - 4 Spindle 1344 12'' - 5 Spindle 1323 12'' x 15'' - 5 Spindle 1321 13-3/4'' - 4 Spindle 1368 15'' - 5 Spindle 1322 9-1/2'' - 3 Spool 1310n9 9-1/2'' - 4 Spool 1314 12'' - 3 Spool 1310n12 15'' - 3 Spool 1310n15 16'' - 5 Spool 1318 16'' x 20'' - 5 Spool 1319 20'' x 20'' - 5 Spool 1320 Fan Brackets||"Design" "Select one" "4'' - 3 Ball (1328n4) (+$31.89)" "5'' - 3 Ball (1328n5) (+$36.81)" "6-3/4'' - 12 Ball (1327) (+$46.63)" "6-3/4'' - 3 Ball (1328n6) (+$46.63)" "9-1/2'' - 3 Ball (1312) (+$68.72)" "11'' - 12 Ball (1330) (+$68.72)" "11'' - 8 Ball (1385) (+$68.72)" "13-3/4'' - 12 Ball (1384) (+$73.62)" "13-3/4'' - 16 Ball (1362) (+$73.62)" "17-3/4'' - 28 Ball (1329) (+$135.02)" "----------------------------------------" "4'' - 3 Spindle (1324) (+$31.89)" "5'' - 3 Spindle (1325) (+$36.81)" "6-3/4'' - 4 Spindle (1326) (+$46.63)" "11'' - 4 Spindle (1344) (+$68.72)" "12'' - 5 Spindle (1323) (+$90.82)" "12'' x 15'' - 5 Spindle (1321) (+$98.18)" "13-3/4'' - 4 Spindle (1368) (+$73.62)" "15'' - 5 Spindle (1322) (+$117.83)" "----------------------------------------" "9-1/2'' - 3 Spool (1310n9) (+$68.72)" "9-1/2'' - 4 Spool (1314) (+$68.72)" "12'' - 3 Spool (1310n12) (+$73.62)" "15'' - 3 Spool (1310n15) (+$98.18)" "16'' - 5 Spool (1318) (+$117.83)" "16'' x 20'' - 5 Spool (1319) (+$122.73)" "20'' x 20'' - 5 Spool (1320) (+$135.02)"|^|"Thickness" "Select one:" "3/4'' !1" "1'' !1" "1-1/4'' !1" "1-1/2'' !1"|^|"Material" "Select one: (Last selection is ''Other'')" "Poplar - j400 !1" "Cedar, Western Red - not available in 3/4'' thickness - j200 !1" "Cypress - j500 !1" "Oak, Red - j100 !1" "Oak, White - jWO !1" "Pine, White !1" "PVC - jPV !1" "Redwood - j300 !1" "--------------------" "Other - I'll contact you about another wood and/or thickness." "Other - Contact me about another wood and/or thickness."||||||||||||||0||||||||||New||||||||||||||0||~~|^^|farmers-porches||item.||fastpivot-2007||porches1||||||||Farmers Porch||||landing-pages > porches1 > ||Alternate Landing Pages > Porches > ||||||||||||||||0||1||0||0||||link-porch-item link-porch-book ||(nsnf/ckd)|| Free assistance! Over 40 years of farmers porch experience. Hundreds of photos with helpful tips. Buy direct & save on 1000's of wood and synthetic parts for your farmers porch. Get inspired! Our collection includes some great farmer's porch photos. Use these images to get ideas for your own home. Keep in mind that your house doesn't need to be an exact match to create the same look and feel. Browse examples (photos, drawings, and floorplans). Study anatomy & construction. Plan & draw your dreams (no art skills required). Find the best decorative elements for your farmers porch and learn proper installation techniques. From Flooring Boards to the decorative items at the top of the Posts, we have everything to bring your farmers porch to life! Our professional, easy to install Railing system and Third Dimension approach blend style, substance and authenticity. Extensive selection includes Brackets, Spandrels, Balusters, Rails, and much more in weather-resistant woods and AZEK Brand Cellular PVC. We are available by phone or email for a free personalized consultation, help with choice of components, and all related questions. We have long believed that planning, designing, building, and decorating the farmers porch is a most worthwhile endeavor. We still do! Porches are our passion! Over the past 30 years we've been involved with many farmers porch.  Stainless Steel Screws Stainless Steel Screws Grade 305, #7 x 2-1/4" Stainless Steel Trim Head Screws. Ideal for installing AZEK® Porch Boards through the tongue for hidden fastening. Auger tip design eliminates pre-drilling AZEK® Porch or Deck Boards and ensures a fast, easy, professional installation. First and last Porch Boards should be surface screwed using Color Matched Stainless Steel Screws listed below. Grade 305, #8 x 2-1/2" Color Matched Stainless Steel Trim Head Screws. Available in head colors that match all AZEK® Porch and Deck Board colors and White to match AZEK® Trimboards. Auger tip design eliminates pre-drilling AZEK® Porch or Deck Boards and ensures a fast, easy, professional installation. Also available in Marine Grade 316 Stainless Steel, which is recommended for marine environments.  CONCEALoc® Hidden Fasteners CONCEALoc® Hidden Fasteners CONCEALoc® Fasteners provide a quick and easy way to install edge-grooved Deck Boards without visible fasteners. A single screw (included) locks the Deck Board securely at each framing joist. Router Bit available to cut grooves in non-edge-grooved boards.||||||||||||||||0||||||||||New||||||||||||||0||~~|^^|fakitforhora||item.||fastpivot-2007||ub-products-temp||||||||Fastening Kit for Straight Run Rails||||webmaster-pages > indevelopment > ub-products-temp > ||Webmaster Pages > Store Work > UB Products Temp > ||||||||||||||||0||1||0||0||||||(nsnf/ckd)|| ||||||||||||||||0||||||||||New||||||||||||||0||~~|^^|azcolors-fawn||item.||popup||azek174colors||||||||Fawn||||popup-pages > azprpo > azek174colors > ||Pop-up Windows (Pages) > AZEK Product pop-ups > AZEK ® Colors > ||||||||||||||||0||1||0||0||||||(nsnf/ckd)|| Fawn - see Global-cross-sell-ids || See Global-cross-sell-ids ||||||||||||||||0||||||||||New||||||||||||||0||~~|^^|newsletter-feedback||item.||fastpivot-2007||newsletter-archives||||https://s.turbifycdn.com/aah/vintagewoodworks/feedback-from-our-readers-27.jpg||https://s.turbifycdn.com/aah/vintagewoodworks/feedback-from-our-readers-28.jpg||Feedback from Our Readers||||help > ourcompany > newsletter-archives > ||Help Desk > Our Company > Newsletter Archives > ||||||||||||||||0||1||0||0||||||||Here's what our Newsletter readers are saying... Nice :) Congratulations on your 34th! I've told many about your great operation. Keep up your good work! M. Hubbel, New York This was great! always like to hear success stories like this and your company is a pleasure to deal with. My house and front porch are filled with your millwork. Everyone always says "I didn't know anybody still made this stuff". Well, back in 1995, I didn't either - I was one of the ones who happened to see those small ads in Old House Journal magazine, called and got a catalog and 17 years and thousands of dollars later I am still enjoying your fine millwork. I'd be very interested in reading your history after the first year as well! S. Ferenz, Pennsylvania I love your product!!! Wish I had more room so I could get more. I moved about 10 years ago and there was no way the piece of Vintage Woodworks was being left behind. I took it down, shortened it to fit over the sink instead of between rooms, painted it and enjoy it to this day. Our kitchen, after I remodeled it, was featured in a National magazine with your woodwork over the sink area. We purchased a new piece for a room separation so your products are well liked around here. Keep up the good work, and God Bless. R. Billington, Maryland One of these days, we are going to buy everything (lots) of your stuff! L. Dinnel, California Want to thank you for being in business... Still enjoying the fretwork we bought a mere 23 years ago for a bathroom in a Victorian brownstone — and hope to do something similar for a future project. Wishing you the best R. Charnes, New Jersey We're truly grateful for comments like these! We love "Bringing Back Yesterday in Quality and Service." Honor us with an order, and we'll prove it to you! PS - We'd love to hear from you! Contact Us||||||||||||||||0||||||||||New||||||||||||||0||~~|^^|fees||item.||fastpivot-2007||sarepin||||||||Fees & Extra Charges ||||webmaster-pages > sarepin > ||Webmaster Pages > * Reps' Info * > ||||||||Fees & Extra Charges that May Not Be Charged Automatically by the Store||||||||0||1||0||0||||||(nsnf/ckd)|| $12 Setup Fee Wood & PVC BB and V-Groove Board - If ordering Extra Center Bead or V-Groove, customer must use the secondary Setup Fee page to add this Fee to their order. If customer forgets to add the Fee we will adjust their ACT order. It is NOT necessary to contact the customer, since this Fee is clearly noted online, but we should note on their ACT invoice that they forgot to add this required Fee. $8 Special Packaging Old Lace with Extensions & End Pieces - Special Packaging WILL be automatically charged IF customer chooses the correct selection from the Special Packaging dropdown when ordering 35" Old Lace. Otherwise, we will need to add this Fee. It is not necessary to inform the customer we did so, but we should note on their ACT invoice that they forgot to add this required Fee. $45.99 Oversize Fee Screen & Storm Doors, Victorian & Country Designs with Spandrels, and the other 5 Door Subcategories - Oversize Fee WILL be automatically charged IF customer chooses the correct selection from Overall Width & Length dropdown. Otherwise, we will need to add this Fee and contact customer due to size of the Fee. Any page with items 60" or longer We must add $10.50 fee to their ACT invoice, but it is not necessary to contact the customer. Any page with items which must ship via Motor Frgt (May include longer items plus Screen/Storm Doors.) We must add MF Fee to their ACT invoice and contact customer. ||||||||||||||||0||||||||||New||||||||||||||0||~~|^^|filled-brackets||item.||fastpivot-2007||tradbrac||||https://s.turbifycdn.com/aah/vintagewoodworks/wm-filled-brackets-21.jpg||||Filled Brackets||vww||products > brackets > bracket-item > wood-pvc-brackets > tradbrac > ||Products > Brackets > Bracket Product Listings > Wood and PVC Brackets > Traditional Brackets > ||0.000||0.000 ||||||||||||1||1||0||0||||||14 Designs||Bailey, small 196n10 Bailey, large 1196n20 Barrett 1199 Beau 1552 Bradie 1553 Brooks 1186 Callie 1158 Camden 1557 Effie 1184 Emma 1560 Multi-fleur 1160 Newberry with finial 1558 Newberry without finial 1558 Olga 1559 Phoebe 1177 Riley 1551 Filled Brackets||"Design" "Select one:" "Bailey, Sm (1196n10) (+$31.89)" "Bailey, Lg (1196n20) (+$68.72)" "Barrett (1199) (+$36.81)" "Beau (1552) (+$31.89)" "Bradie (1553) (+$36.81)" "Brooks (1186) (+$36.81)" "Callie (1158) (+$24.52)" "Camden (1557) (+$29.44)" "Effie (1184) (+$31.89)" "Emma (1560) (+$29.44)" "Multi-fleur (1160) (+$73.62)" "Newberry, with finial (1558) (+$29.44)" "Newberry, without finial (1558) (+$29.44)" "Olga (1559) (+$29.44)" "Phoebe (1177) (+$31.89)" "Riley (1551) (+$24.52)"|^|"Thickness" "Select one:" "3/4'' !1" "1'' !1" "1-1/4'' !1" "1-1/2'' !1"|^|"Material" "Select one: (Last selection is ''Other'')" "Poplar - j400 !1" "Cedar, Western Red - not available in 3/4'' thickness - j200 !1" "Cypress - j500 !1" "Oak, Red - j100 !1" "Oak, White - jWO !1" "Pine, White !1" "PVC - jPV !1" "Redwood - j300 !1" "--------------------" "Other - I'll contact you about another wood and/or thickness." "Other - Contact me about another wood and/or thickness."|^|"Framing" "Select one:" "Framed (standard)" "UNframed - Reduces dimensions by approximately 2''"|^|"Sale Item? (see Sale Listings)" "Select one:" "YES, it is on Sale List." "NO, it is NOT on Sale List."||||||||||||||0||||||||||New||||||||||||||0||~~|^^|finalthoughts||item.||fastpivot-2007||porin||||||||Final Reminder||||products > porches > porin > ||Products > Porches - START HERE! > ONLINE PORCH GUIDE > ||||||||||||||||0||1||0||0|||||||| Dear Lover of Porches, Porches are our passion! We welcome the opportunity to help you in any way we can! If questions arise, either during your reading of this Guide or at a later time, please give us a call at (903) 356-2158. Sincerely, The Folks at Vintage Woodworks PS - We would be greatly honored if you would share your thoughts concerning improvements to our Online Porch Guide. PPS - We'd love to see a picture of your Magnificent Porch. Why don't you keep a photo journal of your progress, and then send us Befores & Afters of your completed masterpiece? - see Text, Find|| nsnf - see Text, Find||||||||||||||||0||||||||||New||||||||||||||0||~~|^^|find-301-link-pages||item.||||||||||||Find Pages||||||||||||||||||||||1||1||0||0||||||||||||||||||||||||0||||||||||New||||||||||||||0||~~|^^|br-finials||item.||fastpivot-2007||barostar||||https://s.turbifycdn.com/aah/vintagewoodworks/finial-bargains-24.jpg||||Finial Bargains||vww||webmaster-pages > q-storage > barostar > ||Webmaster Pages > Storage Area > Bargain Room Storage > ||0.000||0.000 ||||Bargain Room Finials||||||||0||1||0||0||||||(nsnf/ckd)|| Items ordered from the Bargain Room automatically move to the front of the line for prompt shipment. Some of the Regular Prices quoted in our Bargain Room are based on older prices. Therefore, our Sale Prices may now be an even better bargain! If you don't find the items you need, or if you need more of an item, please go to our main Finials section. And remember, our same return policy applies to Bargain Room items - a prompt refund if returned in the same condition and before finishing and installation. Please select Bargain Number from Dropdown below to display Sale Price. ||"Bargain Room Number" "Select one" "iMS-TCB6 (Canon Ball) (+$23.99)"||||||||||||||0||||||||||New||||||||||||||0||~~|^^|finialpopups||item.||fastpivot-2007||popup-pages||||||||Finial pop-ups||||popup-pages > ||Pop-up Windows (Pages) > ||||||||||||||||0||1||0||0||||prjtlavi hoarforlavio hoarforsmcef redwood-finial-popups ||CATEGORY|| (nsnf/ckd)||||||||||||||||0||||||||||New||||||||||||||0||~~|^^|finialsdrops||item.||fastpivot-2007||products||||https://s.turbifycdn.com/aah/vintagewoodworks/finials-drops-spires-17.jpg||||Finials & Drops||||products > ||Products > ||||||||Finial & Drop Categories||||||||0||1||0||0||||cedar-finials redwood-finials treated-finials roof-spires-1 poly-finials crowcordrop small-finials squaredrops ||Click to browse Finials & Drops|| We offer a large variety of Finial styles and sizes. Our wooden Finials include a dowel pin or screw for easy installation. Crown Moulding Drops avoid tedious miter cuts and coping when installing Crown Mouldings. They also add additional decoration at the top of your rooms. Our Square Drops are used to enhance Spandrel, Running Trim, Bracket and Gable installations, and the high density polyurethane of our Polyurethane Roof Spires is extremely durable. That's perfect for roof decoration, where maintenance is more difficult. "We loved your finials the first time we ordered, so we're adding to the original set. You guys do great work!" - Tom M, Virginia||||||||||||||||0||||||||||New||||||||||||||0||~~|^^|poly-finishing||item.||fastpivot-2007||misc-floating-pages||||||||Finishing||||misc-floating-pages > ||Misc FLOATING Pages > ||||||||Finishing Polyurethane Products||||||||0||1||0||0|||||||| All of our Polyurethane Products are primed with an exterior grade latex paint and are ready to install. After initial installation, to achieve the most consistent finished appearance you should fill any screw or nail holes made during the installation and touch up all seams and joints prior to painting. The steps to be followed are the same for all of our polyurethane products and are as follows: 1. Allow all installation adhesive to dry 24-48 hours before beginning the finishing procedure. 2. Cut off any excess adhesive using a utility knife. 3. Clean and remove all dirt, oil, and grease from the surface using a wax and grease remover product. 4. With 80 grit sandpaper, “rough up” the surface surrounding screw/nail holes made during installation. This will ensure good filler adhesion. 5. Sand all joint areas with 80 grit sandpaper to “rough up” and “blend in” any misalignment of the product during installation. 6. Once all the areas needing touch up are “roughed up” and “blended in”, remove all dust from the surface of the product, again using the wax and grease remover. Compressed air can be used to remove excess sanding dust. 7. Apply filler to the areas needing touch up. (Use a 2-component, light weight automotive filler, such as “ Car Systems AutoFit, Eurosoft # CARS134458”). Apply the filler using thin coats, sanding between each coat with 120 or 180 grit sandpaper. Doing so will reduce the amount of material which will have to be sanded away. Generally it will be necessary to apply 2 or more coats of filler to get the best results. 8. Prime all areas which have been filled. (Use an interior/exterior latex primer such as Sherwin-Williams A100). 9. Caulk seams along bedding edges of moulding, around ceiling medallions, around column shafts, around caps/bases, around the end of railings, around balusters, and in any other areas necessary to provide a clean installation. (Use an exterior, paintable exterior Latex caulking such as Sherwin-Williams ProSelect 1100A). 10. Paint the product as desired. Do not use dark or glossy colors as they will accentuate any flaws left during the installation. (Use a product such as Sherwin Williams Interior/Exterior A100 or SuperPaint, flat or satin). With Pointer Tool (arrow in top left corner) active, use Canvas tab at bottom to set Canvas size. Add More Canvas to Existing File In addition to the above, when adding Canvas to an existing file, anchor on the opposite side of the Canvas from where you want to add white space.||||||||||||||||0||||||||||New||||||||||||||0||~~|^^|flattop-bottom-rail||item.||fastpivot-2007||bottom-rails||||https://s.turbifycdn.com/aah/vintagewoodworks/flat-top-bottom-rail-25.jpg||||Flat-top Bottom Rail||(caf)||products > rails > rail-item > bottom-rails > ||Products > Rails > Rail Product Listings > Bottom Rails > ||0.000||0.000 ||||||||||||1||1||0||0||||||||Flat-top Bottom Rail 5608 5617||"Overall Size" "Select one:" "Small - 1-7/8'' x 3-1/8'' (5608) (+$12.96)" "Medium - 2-5/8'' x 3-3/8'' (5617) (+$14.70)"|^|"LENGTH: Length" "Select one:" "1 Feet (12'')" "2 Feet (24'')" "3 Feet (36'')" "4 Feet (48'')" "5 Feet (60'')" "6 Feet (72'')" "7 Feet (84'')" "8 Feet (96'')" "9 Feet (108'')" "10 Feet (120'')" "11 Feet (132'')" "12 Feet (144'')" "13 Feet (156'')" "14 Feet (168'')" "15 Feet (180'')"|^|"Material" "Select one:" "Poplar - j400 !1" "Cypress - j500 !1" "Mahogany - j700 !1" "Oak, Red - j100 !1" "Oak, White - jWO !1" "Pine, White !1" "PVC - jPV !1" "Redwood - j300 !1" "--------------" "I'll contact you about another wood." "Contact me about another wood."|^|"Quantity Based Pricing" "Select one:" "Combined TOTAL (ALL Rails) will be more than 15 feet - no extra charge." "Combined TOTAL (ALL Rails) will be 11 to 15 feet. (We'll add $4 TOTAL to final invoice.)" "Combined TOTAL (ALL Rails) will be 6 to 10 feet. (We'll add $5 TOTAL to final invoice.)" "Combined TOTAL (ALL Rails) will be 1 to 5 feet. (We'll add $6 TOTAL to final invoice.)"|^|"Project Location" "Select one:" "Exterior - I have read ''Important'' notice at top of page." "Interior"|^|"Shipping Info" "Select one:" "- This item is 46'' or longer. I read about the extra fee at 'Important Shipping Info' link above." "- This item is less than 46'' in length."||||||||||||||0||||||||||New||||||||||||||0||~~|^^|flattened-page-audit-trail||item.||fastpivot-2007||references||||||||Flattened New Product Page Audit Trail||||webmaster-pages > references > ||Webmaster Pages > YS How-To > ||||||||||||||||0||1||0||0||||||(nsnf/ckd)|| After a product page has been flattened in WM, before transferring "Flattened Page" to the store, you need to preserve the pages that will no longer be orderable. 1. Create a new page in "OLD PAGES" (see "New Page Creation".) A. ID: ex. old-other-trad-brkts (copy link/write down) B. Type: item. C. Name: (ex. OLD Other Traditional Brackets) D. Orderable: No E. Caption: Add the 2 lines of No Search/No Follow HTML text to top of Caption by copy/paste from an existing page. F. Abstract: (nsnf) G. Click "New Property": (1) Name: parent (2) Type: ids H. Fill "Parent" Property: index 2. If the "Items Per Page" are too many to live on one page, add a "New Property." A. Title: items-per-page B. Property Type: number C. Fill "Items Per Page" Property: 50 3. Paste "id" into "OLD PAGES" cover page at the beginning of the "Content" section for it to live in "Old Pages". 4. Copy all ID's from "Contents" public cover page & paste in the newly created "OLD PAGE" content section. 5. Breadcrumbs: The last page where an "ID" is entered into "Contents" will become the "Foster" parent for that ID. To get around this, go to the page you want to show publicly as the "Parent" in the breadcrumbs, cut all "IDs" from that page's "Contents", and then update. Next, paste those "ID's" back into "Contents" and update again. Proof that all are now in order.||||||||||||||||0||||||||||New||||||||||||||0||~~|^^|flattenedpgs||item.||fastpivot-2007||prmefl||||||||FLATTENED Pgs||||webmaster-pages > indevelopment > prmefl > ||Webmaster Pages > Store Work > Flattening > ||||||||||||||||0||1||0||0||||||(nsnf/ckd)|| (nsnf) Flattened Pages:
See Contents of this page for suggested pages to flatten, currently working pages, and previously flattend pages. - Review entire site looking for ways to combine sizes/styles/etc into Base Price type pricing. - Look for items that have both a Section and single Item page, as these should have just the Item page. Example: Door & Window Cap #5451. - Keep Dev, etc. in mind as we consider when to flatten. - See printed Flattening Sections Checklist located at ||||||||||||||||0||||||||||New||||||||||||||0||~~|^^|flattening||item.||fastpivot-2007||references||||||||Flattening ||||webmaster-pages > references > ||Webmaster Pages > YS How-To > ||||||||||||||||0||1||0||0||||||(nsnf/ckd)|| Use the Template found at Wiki Flattening Checklist to create (copy and paste) a new progress check off.||||||||||||||||0||||||||||New||||||||||||||0||~~|^^|flattening-checklist-other-trad-brkts||item.||fastpivot-2007||||||||||Flattening Checklist, Other Traditional Brackets||||||||||||||||||||||1||1||0||0||||||||Flattening Checklist Entire Checklist completed on: Check Considerations When Changing Store 1. Review Product Category/Subcategory Check to see that all items have the same dropdowns and can be flattened If deleting any URLs, make a list immediately below and also email list to EF and GT 2. Create at WM a short Mock-up of new flattened page Use Contents edit button > New to create URL = category-item (Example: Product Listings - Balusters (Spindles) = baluster-item.html) Add NSNF at top of Caption Add at new page: Usage Photo Visible-Caption (review current Category and Item pages) Order Below button Product Table (with Text box at top and first row of items) Code = d/ (Sale Items present) or vww Price = 0.00 Orderable = YES Abstract - if present at current Category/Subcategory page, copy to new flattened page Icon - upload from current Category/Subcategory page Review Mock-up page in BOTH Firefox and IE 3. Start Sale Listings Pop-up Create Sale Listings pop-up page with URL = sale-list-category. Follow standard format. See Cornices and YS - How To. Create bold pop-up link: Sale Listings for (Category) and place at top and bottom of pop-up page Do Spell Check 4. Ask FBG Managers to review Mock-up at WM Reviewed by gt Reviewed by ef 5. After receiving Mock-up approval from FBG Manger: Add remaining products to Table (with pop-up windows for Larger View when necessary) Add text links for similar products from other Categories (IGM) Get finial page layout approved by gt Get finial page layout approved by ef 6. Set Properties (IGM) Page Title, using proper format Caption (original) - in alpha order, list all Product Names and SKUs Cross-sell-ids - Copy from current Category/Subcategory pages 7. Create Option Dropdowns and Baseprices (IGM) Add at new page: Design (or Size, etc) in alpha order, with Baseprice ~ codes and dividing dashed lines Material and [category] Thickness (Copy both Set dropdowns and first current Item page Material and Thickness dropdowns to new page.) Framing (if applicable) Sale Item? (see Sale Listings) Any other applicable Dropdowns currently present at Item pages Add Baseprice properties, with prices. Print Design Dropdowns from Flattened page (Selection only). Go to each Current Item page, select Poplar, and enter Baseprice in your printout. Enter Baseprices in Flattened page. 8. Finish Sale Listings Pop-up (IGM) Add all additional listings using proper format from YS - How To 9. Proof newly flattened page (IGM) (Do NOT proof your own work) No Search/No Follow Confirm that No Search/No Follow is present in the Caption (non visible caption). Review Visible-caption At current Product Subcategory page and individual Item pages, study Visible-caption to be sure everything moved properly to the new flattened page. Pay attention to links, dimensions, etc. Consider whether recent changes to similar pages should be incorporated in the newly flattened page If there is anything special/unique on a current Item page, confirm it is now properly handled on the new flattened page For each Popup, confirm correct Popup format, size, presence of "Close this Window" at top and bottom, and proper page name Review all Properties in edit mode, including proofing of name and SKU in Caption 10. Q Proofing RT Confirm the combined Material/Thickness dropdown Set is correct by reviewing the Set description at flattened page against a current Item Page dropdown. Be sure Set number of Material/Thickness dropdown matches number in Set Name dropdown. Pay particular attention to Cedar. At first current Item Page for this Product Category, select a Size, if necessary, and note the Base Price At first current Item Page, set the Material dropdown to Cedar, 1" and 1- 1/4" thick and note if price is the expected upcharge, as indicated in the Material/Thickness Set Name dropdown at the flattened page. Repeat for Cedar 1-1/2" . Reset dropdown to Select One At first current Item Page, set the current Thickness dropdown to 1" and confirm proper upcharge. Repeat process for 1- 1/4" and 1- 1/2" . Verify two more Designs as above. Consider whether any Designs use a different pricing scheme. At new flattened page, remove separate Material and Thickness dropdowns, Set Name dropdown, and the reference number & dash at front of combined Material/Thickness dropdown . Create 2 printouts At the newly flattened page, in edit mode: A. Select the Design option and hit Ctrl P. Select "print selection" and print (or copy and paste into an email and print). Label the printout "[Subcategory] - Design". Write sizes from current Item pages beside each Item. B. Select the Baseprices and hit Ctrl P. Select "print selection" and print. Lable the printout for the correct subcategory. Open each current Item page Confirm graphic on newly flattened page matches Image on each current Item page Verify Alt and Title tags were moved properly to the newly flattened page by hovering over the graphic Determine if all logical product cross reference links have been added to flattened page If there is anything special/unique on a current Item page, confirm it is now properly handled on the flattened page Proof Item Name, SKU, Size, and Price At each current Item page, confirm the following are correct on the flattened page's Design printout: Item Name SKU Size Price Any links or text in Table 11. Get EF's Final Approval Approved by ef 12. Prepare for Moving to Public Area of Store Do Spell Check on all new pages Notify EF it’s time to consider PPC ad links (Don’t actually change PPC links until new URL is published unless working in offline Editor) Create new Content links (CL) as needed Check A to Z Index for links that will have to be changed Check FAQ for links that will have to be changed Do Store searches in public mode for items on new page Print Store Search results to have a list of links that will require changing Do Store searches in public mode for R/Ps of old pages and/or items (Broken Links Checker will not catch R/P) We will have to catch before we publish because once deleted the item will not display as R/P Print Store Search results for R/Ps so they can be changed Have EF decide if we want to do any 301 Redirects to keep the old URL a while longer Request by email to SL, RT, AR, EF, RG, and GT that Q suspend changes to the Sale Listings for this product Category/Subcategory (IGM) Have FBG proof new Sales Listings against current Sale Listings (both listings in EDIT MODE) (IGM) 13. Notifications Consider time of day and people’s schedules before proceeding! Get approval from GT and EF to begin moving new pages to public part of Store. Ask those proofing if they will be available to proof once new pages are moved but before Store is Published 14. Move New Pages to Public Area of Store Old (obsolete) Pages Cut and move old pages to WM > Old Pages Save all old graphics at WM > Old Pages New Pages Move new pages from WM to where they will live Double check Breadcrumbs Remove NSNF from new flattened page NOT sale listing pop-up Make page Orderable if not already set to YES If present, remove wm - from Name Field on all new pages Category at Pictorial Index Change Variables - LeftNav-product-categories Change Variables - Global Cross-sell-ids Change Variable - Header Change Home page property Rotator-browse-links Change Home page property Rotator-photo-links Change Home page property Rotator-main-links Create CL at WM as needed Proof (GT) Proof (EF, especially every single link now that it’s moved and confirm that old pages were deleted, and RT if prices, sku, etc.) Correct Links prior to Publishing Change links found during the public Store searches (can be done while EF/RT proof) Change links found during the public Store searches on Alt Landing Pages (can be done while being proofied) Change links found during the public Store searches on Pop-up Pages (can be done while being proofied) PPC Ads Links Pause affected Ad Groups (in Google and Bing) and leave paused until after Publishing complete Make changes while paused Old Pages in WM Delete Old Pages from WM > Old Pages (Must delete before proofing or publishing so that broken links will actually be broken and thus show up on Link Checker.) 15. Publish Store Check with Q if Ok to publish (Let them know we will be publishing several times and ask before they edit) Update Variables Publish Store and update Wiki UNpause PPC Ad Groups Have EF start Broken Link Checker Correct links found by Link Checker Use CTRL + F to find multiple links on a given page but don’t put “.html” in your find so it will also search R/P If a link appears as broken on every page, use above and then use View Source and CTRL F. This will show things outside the page like the Left Nav Double check PPC links are working (coordinate w/ EF) Have EF create 301 Redirects (not sooner so we can test for broken links) Put Test Order in Cart (check for prices and names of products as they appear on store orders) Send Q info if URL changed so Reply BP and Signatures can be adjusted. 16. After Initial Publishing, Urgent Re-publish Store and update Wiki > Publishing Have EF pause 310 Redirects Have EF run Broken Link Checker again Correct broken links (see notes above) Have EF UNpause 310 Redirects Re-publish Store and update Wiki > Pulblishing Have EF pause 310 Redirects Have EF run Broken Link Checker again Correct broken links (see notes above) Have EF UNpause 310 Redirects Repeat 5 steps immediately above until no more broken links are found Create SN as needed 17. After Publishing, Less Urgent Let Q know store is published and they can resume updating sale listing Verify that Abstract is correct Remove this task from To Do Lists at Wiki and elsewhere Check all new pages for removal of NSNF Do specific "Search" for all pages to assure NSNF has been removed Review Bread Crumbs for all pages. (Should not point to WM.) Update A-Z Index with any new cross references to newly flattened page Add the new pages as Related Pages at other Product Categories||||||||||||||||0||||||||||New||||||||||||||0||~~|^^|runningtrim4||item.||fastpivot-2007||gfrunningtrim||||||||Fleur Running Trim, 3/4" x 2-1/2" ||2206n2||landing-pages > gf > gfrunningtrim > ||Alternate Landing Pages > Google Feed ALT. Pages > Running Trim > ||64.790||64.790 ||||||||||||1||1||0||0|||||||| Fleur (2206) Available 48" long in 4 heights: 2-1/2", 3-3/8", 5", and 7" Patterns repeats perfectly when 2 pieces are butted together, or you can trim to fit. See MORE OPTIONS for additional designs, more wood choices and an available top rail. (as shown at left) for easier installation beneath other features. Material Choices CA Resident WARNING VERY IMPORTANT! Read before ordering: Important Shipping Info ORDER 3/4" x 2-1/2" Fleur in Poplar BELOW or see MORE OPTIONS for additional designs, more wood choices and an available top rail.||"Material" "Select one:" "Poplar - j400" "Click the MORE OPTIONS link above for other material choices"|^|"Top Rail" "Select one:" "No thanks" "Yes, please add !2"|^|"Shipping Info" "Please select the following:" "I read about the extra fee at the 'Important Shipping Info' link above."||||||||||||||0||||||||||New||||||||||||||0||~~|^^|float-pg-locator||item.||fastpivot-2007||webmaster-pages||||||||Floating Page Locator||||webmaster-pages > ||Webmaster Pages > ||||||||||||||||0||1||0||0||||||(nsnf/ckd) Alternate Landing Pages Misc Floating Pages Pop-up Pages|| Alternate Landing Pages Misc Floating Pages Pop-up Pages||||||||||||||||0||||||||||New||||||||||||||0||~~|^^|floating-pages||item.||fastpivot-2007||references||||||||Floating Pages||||webmaster-pages > references > ||Webmaster Pages > YS How-To > ||||||||||||||||1||1||0||0||||||(nsnf/ckd)|| also see Floating Page Locator 1. Floating Pages do not live under the Home page. 2. They can be Section Pages with subsections and sub-subsections A. Breadcrumbs for a floating section page with sub-sections: Home > name of floating page > name of floating sub-section B. Current Floating Sections Pages: (1) Webmaster's Storage Area (2) Alternate Landing Pages (3) Misc Floating Pages (4) Pop-up Pages (5) iFrames (holding area) 3. Accessing Floating Pages A. In Public mode - using a link or entering proper full URL. (1) Webmasters URL = http://www.vintagewoodworks.com/webemaster-pages.html B. In Edit Mode (1) Enter URL suffix (webemaster-pages.html) (2) Click on "Contents", locate URL (without .html) , and click on URL 4. Creating Floating Pages A. Specific URL page (1) Click "Contents" then "New". (2) Enter specific URL prefix in ID field (without .html suffix). Example: bracket-questions for bracket-questions.html (3) Click "Continue" (4) Fill in Name Field (5) IMPORTANT: Add NSNF unless assigning a Parent. (6) Fill in other standard fields and add new custom fields as needed B. URL generated by Yahoo Store (1) Navigate to Webmasters > Store Work (2) Create page (Don't forget to add NSNF, unless assigning a Parent.) and click update (3) Click on Store Work in breadcrumbs (4) Click Edit (5) Remove last item in Contents field 5. Add Parent property to have breadcrumbs display as if page was not floating. 6. Removing the Page Id from the "Contents" field of the page another page lives on will cause that other page to become a floating page.||||||||||||||||0||||||||||New||||||||||||||0||~~|^^|floating-pw||item.||fastpivot-2007||porchwizard||||||||Floating Pages - Porch Wizard||||webmaster-pages > indevelopment > porches5 > porchwizard > ||Webmaster Pages > Store Work > Porches > Porch Wizard > ||||||||||||||||0||1||0||0||||powirepopo stco exba newporchposts styodo expopo newbalustrade plan thirddimension replacebalustrade yesyoucan sizeandconfig ||CATEGORY|| (nsnf/ckd) Items on this page were at one time part of the OPG||||||||||||||||0||||||||||New||||||||||||||0||~~|^^|flcolow||item.||fastpivot-2007||porch-photos-cross-ref||||https://s.turbifycdn.com/aah/vintagewoodworks/floor-concrete-low-16.jpg||||Floor, concrete, low||||webmaster-pages > sarepin > nonpublic > porch-photos-cross-ref > ||Webmaster Pages > * Reps' Info * > Customer Special Access > Porch Features > ||||||||||||||||0||1||0||0|||||||| is with a package of graph paper. Decide how many inches each square on the paper will represent (the scale of the drawing), and note this at the top of your page. You will also need a sharp pencil, a straight-edged instrument (such as a ruler), and a metal measuring tape. Existing Conditions With your metal tape, measure the length of the wall (or walls) of the building to which your porch will be attached. (Of course, if you are planning a porch for a building not yet constructed, you will need to use the proposed plan for this building to determine the length of wall to which your porch will be attached.) Draw a line(s) to represent this wall(s), being careful to apply the scale you have decided upon. Locate all doors and windows and transfer them to your drawing. What we are trying to achieve is a graphical representation of existing conditions. The Length Next we must decide upon a tentative length for your porch, based upon existing conditions. The overall balance of porch and main structure is the most important factor. It is often more visually pleasing for a porch to end a foot or two short of the corner of the building to which it is attached. We are only determining a tentative length at this point, for we may soon find that slightly more or less length will work better when the spacing of steps, posts, etc. are considered. For now, it is the approximate length of your porch we are needing. Once you determine this length, so indicate with marks on your drawing. The Depth The depth, front to back, of your porch can vary from less than enough for sitting (for decorative purposes only!) to extra deep. We like porches that are at least eight feet deep. This allows room for swings, chairs and small tables. However, if you plan to spend much time on your porch you might enjoy having 10 feet of depth. Decide upon a tentative depth, and draw this onto your plan. The Steps The next most important consideration is the position of the steps, both for the primary entrance to the porch, and for any secondary steps you may desire. If the porch is to have a low concrete slab foundation, steps, in the traditional sense, may not be required. In that case, the present discussion of step location should be interpreted to mean the location of the walkway, opening in the Balustrade, if any, or opening in the flower beds that would determine the point at which one would step onto the porch. Generally, the main entrance steps will be directly in front of the main entrance to the building, assuming this is a front porch. For side or rear porches, it is often more convenient for the main steps of the porch to be located at a position other than directly in front of the entrance to this side of the building. Mark temporarily on your plan the location of the primary (and any secondary) steps you would like to have. Indicate the width of opening onto the porch that these steps will require. (There is, of course, no absolute rule of thumb for how wide steps should be, but certainly the primary steps should be of sufficient width to allow two people to comfortably pass one another.) Porch Post Placement Now we are ready to determine the tentative placement of Porch Posts and Newel Posts. For reasons that will become apparent shortly, this is one of the most important aspects of designing your porch! The following discussion does not take into account structural considerations. We cannot make these determinations for you, but generally, for standard porch construction, Porch Posts can be spaced up to ten feet apart. It is typically not the strength of the Posts but the strength of the beam above that limits Porch Post spacing. If you are unsure of the structural aspects involved, please seek the advice of a qualified contractor, architect, or structural engineer. Spacing Our goal is to have the same distance between each pair of Porch Posts but exact symmetry is seldom possible! Also, it is very typical for the Posts on either side of steps to be closer to one another than other pairs of Posts. If your porch will be a wrap-around, then it is desirable to have the same distance between Porch Posts on each side of the porch. Considerations There are several considerations to be made in determining the proper placement of Posts: • You must have a Porch Post at each corner of the porch. • You must have either a full length Porch Post or a Newel Post on either side of any steps or entryway. • You want to avoid having a Porch Post in front of any door or window, if possible. • It is more visually pleasing to use Half Posts against walls. • If a Balustrade is planned, an intermediate Newel Post may be used between each pair of Porch Posts, if desired. Please notice that the above list includes two "must haves" (Posts at each corner and at either side of steps), one "want" (Posts clear of windows or doors ), and two "options" (Half Posts and intermediate Newel Posts). Mark Your Plan Let's start by temporarily marking your plan with a "P" for the location of each corner Porch Post. If using them, also mark an "H" for the position of Half Posts. If you'll have Newel Posts to provide an opening for steps, then mark those locations with an "N" (otherwise mark a "P" where Porch Posts will be used on either side of each set of steps). Now, with corners and steps located, let's see if we can determine intermediate Porch Post positions that will satisfy our goal of having equal spacing between all Porch Posts, while also not having any Porch Posts in front of windows or doors. (It will usually work from an aesthetic standpoint to have between five and ten feet between Porch Posts.) If you can easily position your intermediate Porch Post to meet all of our parameters, consider yourself lucky and move on to the next section on Elevations! Fine Tuning For the other 99% of all porches, let's see what can be done to optimize your somewhat uneven Porch Post spacing: • Consider making your steps a different width. • For secondary steps, consider relocating them. • If you've used Porch Posts to the side of your steps, consider substituting Newel Posts. You can be somewhat arbitrary in deciding how much distance to have between these Newels and your Porch Posts. Thus, you will have some flexibility in determining the position of the intermediate Porch Posts. • Consider changing the overall length of your porch. • If your house is not yet built, consider changing the position of windows and doors. • If your porch turns a corner, consider using a different total number of intermediate Porch Posts, in the hope that this may help to equalize the space between Posts from one side of the porch to the other. And after all of these consideration, if you are still unable to achieve exactly equal spacing between your Porch Posts, take heart. As long as you are reasonably close, you are probably the only one that will ever know. We won't tell if you don't!  See MORE OPTIONS for additional designs, thicknesses & material choices. Only available for 10/12 and 12/12 roof pitches. 12/12 pitch (shown) is 74" wide overall. 10/12 pitch is 94" wide. Shipped as individual components. Ball and dowel section (36" wide) is assembled. Balls and dowels are light colored hardwoods regardless which frame material is ordered. Use temporary cross bracing to hoist assembled Gable Decoration into position. Click graphic for larger view. Our Recommendation: Due to the weather exposure gables typically receive, please consider PVC for your Gable Decorations. AZEK® Brand Cellular PVC is a synthetic wood that will never crack, warp, or rot and is impervious to moisture, salt, and insects! That's perfect for Gable Decorations, since they're difficult to re-paint once installed. NOTE: Balls & dowels are light-colored smooth hardwoods, regardless which material you select. "Attached is a photograph of ... the installation of your [Gable Decorations] on the front gables. Thanks for supplying the most recent improvement. Your product line is excellent and the appearance of the house has resulted in numerous compliments." - Dave L, Texas Material Choices CA Resident WARNING VERY IMPORTANT! Read Before Ordering: 1. Important Product Details 2. Important Shipping Info ORDER 3/4" thick Flying Circle Gable Decoration in Poplar BELOW or see MORE OPTIONS for additional designs, thicknesses & material choices.||"Material" "Select one:" "Poplar - j400" "Click the MORE OPTIONS link above for other material choices"|^|"Roof Pitch / Closest Horizontal Measurement (HM)" "Select one:" "10/12 roof pitch (n10)" "12/12 roof pitch (n12)" "-------------" "Contact me to discuss roof pitch." "I'll contact you to discuss roof pitch."|^|"Shipping Info" "Select one:" "- This item is 46'' or longer. I read the 'Important Shipping Info' link above."||||||||||||||0||||||||||New||||||||||||||0||~~|^^|font-size||item.||fastpivot-2007||references||||||||Font Sizes ||||webmaster-pages > references > ||Webmaster Pages > YS How-To > ||||||||||||||||0||1||0||0||||||(nsnf/ckd) - see Text-sizes (H)|| See Text-sizes (H)||||||||||||||||0||||||||||New||||||||||||||0||~~|^^|footer||item.||fastpivot-2007||references||||||||Footer||||webmaster-pages > references > ||Webmaster Pages > YS How-To > ||||||||||||||||1||1||0||0||||||(nsnf/ckd) - also see Copyright Footer|| Also see Copyright Footer 1. At the homepage in Edit Mode, click "Variables." 2. Scroll down to the "Footer" field. A. This field controls the Footer Nav Bar  B. Field contains html links that can be altered to change the appearance of the "Footer." C. Change any html links as needed. Click "Update" and publish the store. ||||||||||||||||0||||||||||New||||||||||||||0||~~|^^|hold-forged||item.||fastpivot-2007||balusterpopups||||||||Forged Baluter pop-ups (CF)||||popup-pages > balusterpopups > ||Pop-up Windows (Pages) > Baluster Pop-ups > ||||||||||||||||0||1||0||0||||marquette-samples tulane-samples ||CATEGORY|| (nsnf/ckd)||||||||||||||||0||||||||||New||||||||||||||0||~~|^^|platform||item.||fastpivot-2007||stpoco||||||||Foundation & Floor||||products > porches > porin > bunewpo > stpoco > ||Products > Porches - START HERE! > ONLINE PORCH GUIDE > Understanding the Porch > Structural Porch Components > ||||||||||||||||0||1||0||0|||||||| by an adequate foundation. Foundation Considerations Most porch foundations will be either pier and beam or concrete slab construction. We recommend pier and beam with AZEK Porch Boards. This will be much more traditional than a concrete porch and we think much more enjoyable for you and your family. Either way, please be aware that your finished porch floor should be slightly below the door threshold to permit proper water drainage and should slope gently away from the house. Please seek professional assistance in determining the proper foundation for your location and situation. The most important consideration with any foundation is that it be stable and able to withstand any movement the underlying ground may experience. Frost heave (the tendency of frozen ground to push upward) must always be addressed where the ground freezes in winter. Pier and Beam Foundation Typically used with a structural wooden framework (floor joists) covered by wood, composite, or PVC flooring. Joists are supported by beams (girders), which are in turn supported by short posts or columns (piers). Each pier typically sits atop a concrete pad (footing) set into the ground below the frost line. Joists Cantilevered Over Beam Cantilevered Joists Joist framework can rest atop the Beams, as shown above. This permits overhanging the Beam. If the crawl space under the porch is to be left open, overhanging the Beam presents a neater appearance, as the Beam is recessed. If the crawl space is later enclosed with underpinning an overhung Beam is less tedious to work with. Joist Hangers Conversely, joists can be hung with readily available metal Joist Hangers directly to the side of the Beam, as shown below. If the piers are pyramidal in shape or if their tops are wider than the Beam, they may extend beyond the face of the Beam. If so, this will make it more difficult to enclose the crawl space with underpinning. Joists Hung on Beam Face Treated Lumber, please! Joists and Beams should be made of treated lumber to withstand the moist conditions they are subjected to. To allow proper water drainage, the foundation and joists should be built with a slight slope towards the front of the porch. Also, the floor boards should run from the back of the porch to the front. This will allow water to run down the boards and off the front of the porch. Therefore, it will be necessary to install blocking between the joists, as shown above, on which to fasten the flooring. Underpinning Underpinning is the skirting which conceals the foundation of many homes. It is most often used below the front edge of a porch floor and typically extends to the ground. This skirting is often made of lattice panels or sheet metal panels with a stamped pattern simulating brick or stone. These traditional skirting materials are usually available locally. A very effective underpinning can be created using PVC Beadboard. Others have used our Sawn Balusters as a unique and decorative underpinning. Concrete Slab Foundation Typically a solid, poured-in-place concrete structure. The resulting concrete floor may be used directly as the finished floor. Alternatively, tile, stone, brick, or other masonry-type finished flooring may be applied over the concrete. If so, it is very important to lower the finished height of the concrete to allow for the installed thickness of this floor. Slab Specifications The concrete slab, as it is commonly called, is strengthened with steel bars or wire running through its core. The slab is generally 3" to 6" thick. Concrete beams (footings) 10" to 16" wide and 12" to 36" deep are typically placed under its perimeter and occasionally through its length or width depending upon the size of the slab. Most people, unless they have experience in this area, will contract with a professional to "pour the slab." Dotted line represents "frost line." Floor Framing If you are planning a Pier and Beam Foundation, then you will need to decide upon the size and spacing of your beams and joists. It is always preferable to err on the side of larger and closer, for you will want your porch floor to feel (and to be) very sturdy! Please seek professional advice in determining these important factors. Ledger Boards Where the floor joists meet the wall of the building to which the porch is to be attached, it is typical to have a ledger board, as shown below. This ledger board is fastened horizontally to the building, so as to receive the ends of the floor joists. It, as well as the rest of the floor framing, should be of pressure treated lumber, as mentioned earlier. Ledger Board fastened directly to the building. This ledger must, of course, be fastened securely into the structure of the building, as it will support considerable weight. We recommend the use of steel Joist Hangers as the method of attaching joists to the ledgers, both for their ease of installation, and for their strength. Direction of Flooring It is traditional for porch flooring to run perpendicular to the house on all sides, with a 45 degree seam where the flooring turns a corner, as shown below. We feel strongly about this and are concerned you will be disappointed in the 'deck like" appearance of porch flooring that all runs in the same direction on a porch that turns a corner. Blocking If you install blocking between each pair of framing joists the floor joists can run perpendicular to the house, as is standard. The drawings above illustrate this. Note that the blocking can be staggered for easy installation of the blocking when using tongue and groove flooring, as the flooring fasteners will not show. You can easily modify the underlying framing (see drawing below) to permit a single diagonal Porch Board at the corner seam to which your regular corner Porch Boards are butted. This makes it easier to install the Porch Boards, as you avoid having to keep Porch Board pairs as tightly matched at the seam. We think this creates a more professional final appearance. The drawing above illustrates the most typical way to frame the corner of a porch by using a pair of diagonal floor joists at the corner. As shown, shorter joists die into this pair of diagonal joists. In the drawing above the dashed lines on either side of the diagonal joist pair represent 3/4" blocking which as been installed between each pair of shorter joists. (1-1/2" blocking can also be used.) This blocking serves two purposes. First, it locks the mitered end of each shorter jost into place to keep them from later twisting away from the diagonal pair of joists. Second, it increases the overall width of the diagonal joists to 4-1/2" (with 3/4" blocking) when measured perpendicularly across these joists. That 4-1/2" overall joist and blocking width is important because it allows a 3" wide diagonal porch board (net width after removing the tongue on tongue & groove boards) to be installed on top of the diagonal joists while also preserving 3/4" of exposed blocking on either side of the joists to receive the regular corner Porch Boards. The regular Porch Boards are mitered on one end and butted to this diagonal board. This method is only slightly more trouble at the framing stage but provides a more professional look for your porch corners. Installing Porch Boards (using the Diagonal Corner Flooring Board Method Described Above) Once the underlying framing is prepared, a diagonal corner flooring board is installed, centered on the diagonal corner joists (see drawing above). The end at the inside corner should be notched to fit around the house corner and the end at the outside corner should be pointed to create the corner of the flooring. Next, a pair of full width Porch Boards are installed at the outside corner, running perpendicular to each respective wall of the house. This first pair and all subsequent corner floor boards should be mitered at a 45 degree angle on the edge against the diagonal porch board. Cut this miter so that the groove side of these boards can be butted against the diagonal corner flooring board. Subsequent mitered Porch Boards should also be installed in pairs. Maintain even, symmetrical alignment from side-to-side on each pair for the tips closest the house. You can 'fudge' the space between boards ever so slightly to maintain this side-to-side symmetry. Floor Types Your choice of floor type will depend upon the type of foundation you choose (or vice versa). Pier and Beam foundations are typically used for wood, composite, and PVC floors, while masonry floors are normally laid over concrete slab foundations. Regardless of the material chosen for your floor, you should design your porch so that the front and side edges of the floor will be inside the line of the roof overhang. This will, obviously, keep your porch floor drier. Wood flooring Providing your joist blocking is spaced closely enough for adequate support, a very traditional wood floor can be made of 1 by 4 lumber. Many "old-timers" feel this lumber should not be "flooring" (with tongue & groove or shiplapped edges), as this will tend to trap moisture. Rather, they favor a premium grade of square-edged lumber, nailed down edge to edge. The resulting cracks between boards allow moisture to fall through to the ground below. These same old-timers avoid the use of pressure treated lumber for flooring, as it often warps badly. One of our owners has had good success using a high grade of 1x4 pressure treated pine for replacement boards, but this was installed before AZEK Porch Flooring was available. He will be changing to AZEK Cellular PVC Porch Flooring (see below) when it's time to replace the entire porch floor. The individual boards should run from the front to the back of the porch, as mentioned above. This will allow water to run down the boards and off the front of the porch. If the boards were to run the length of the porch, the cracks between boards would impede the flow of water! And as also mentioned above, be sure that there is a slope from the back of the porch to the front. Obviously, a premium grade of porch decking paint is required for any wood floor! Also, it is always a good idea to keep shrubbery trimmed well back from wooden porches, as this will keep the porch drier. Composite Flooring In recent years a number of man-made outdoor flooring products have come to market. Most of these are composites made of some sort of synthetic material mixed with wood fibers. Originally intended for decks, more recently some have been introduced that attempt to simulate wood porch boards. Unfortunately, these composites have fallen short of the promise of long and trouble free life. Early discoloration, unsightly scratches and staining, as well as stability problems have plagued these products. As they age, more and more of their shortfalls are becoming apparent. AZEK PVC Flooring - by far the best! Fortunately, there is a synthetic material that overcomes all of the shortcomings of composites - a PVC formulation from AZEK, the leading company for cellular PVC products to the building industry. AZEK's Porch Boards are almost 100% PVC, the same general material used extensively for many years for underground plumbing. However, you would never know this flooring is PVC . . . (read more and order a free sample). Masonry Floors As mentioned above, be sure to allow for the installed thickness of the tile, brick, stone, etc. you may wish to apply over your concrete slab. Porch Steps (Stairs) If your porch is far enough off the ground to require two or more steps, then you need Railings (also known as Balustrade) for safety. It is typical to use the same components that are used on the horizontal sections of Balustrade. Unless AZEK PVC Balusters and Bottom Rails are planned, it's important that the Bottom Rail have a sloped-top. text in caption field. General Bracket Info section page set to display caption Framing section page set to dispaly Abstracts||||||||||||||||0||||||||||New||||||||||||||0||~~|^^|frbesa||item.||fastpivot-2007||beadboard3||||||||Free Beadboard Sample||FBS||landing-pages > beadboard3 > ||Alternate Landing Pages > Beadboard > ||0.000||0.000 ||||||||||||1||1||1||0||||||(nsnf/ckd)|| Order your free Beadboard sample below. We'll send 2 pieces so you can see how perfectly the tongue and groove joint works. When you've completed your check out, click the "Keep Shopping" link to return here. If you prefer to specify a thickness, width, and material type for your sample (and pay a very small charge for it) you can do that at our regular Beadboard Product Listing.||||||||||||||||0||||||||||New||||||||||||||0||~~|^^|mouldedframingrail-samples||item.||fastpivot-2007||indevelopment||||https://s.turbifycdn.com/aah/vintagewoodworks/free-moulded-framing-rail-20.jpg||||Free Moulded Framing/Rail Samples||mouldedframingsamples||webmaster-pages > indevelopment > ||Webmaster Pages > Store Work > ||0.000||0.000 ||||||||||||0||1||0||0||||||(nsnf/ckd)|| Feel free to order as many samples as you wish. Just check off the combinations of Size and Material you want. Then click the Add to Cart button at the bottom of this page. NOTE - If we don't have in stock all the Sizes/Material combinations you want, we will substitute other materials for those Size. However, we WILL send a sample of each Material you specified.||"Total Number of Samples Ordered" "Please indicate TOTAL number of samples ordered, including 2 free ones" "---------------" "1 sample" "2 samples" "3 samples (+$.50)" "4 samples (+$1.00)" "5 samples (+$1.50)" "6 samples (+$2.00)" "7 samples (+$2.50)" "8 samples (+$3.00)" "9 samples (+$3.50)" "10 samples (+$4.00)" "11 samples (+$4.50)" "12 samples (+$5.00)" "13 samples (+$5.50)" "14 samples (+$6.00)" "15 samples (+$6.50)" "16 samples (+$7.00)" "17 samples (+$7.50)" "18 samples (+$8.00)" "19 samples (+$8.50)" "20 samples (+$9.00)" "21 samples (+$9.50)" "22 samples (+$10.00)" "23 samples (+$10.50)" "24 samples (+$11.00)" "25 samples (+$11.50)" "26 samples (+$12.00)" "27 samples (+$12.50)" "28 samples (+$13.00)" "29 samples (+$13.50)" "30 samples (+$14.00)" "31 samples (+$14.50)" "32 samples (+$15.00)" "33 samples (+$15.50)" "34 samples (+$16.00)" "35 samples (+$16.50)" "36 samples (+$17.00)" "37 samples (+$17.50)" "38 samples (+$18.00)" "39 samples (+$18.50)" "40 samples (+$19.00)" "41 samples (+$19.50)" "42 samples (+$20.00)" "43 samples (+$20.50)" "44 samples (+$21.00)" "45 samples (+$21.50)" "46 samples (+$22.00)" "47 samples (+$22.50)" "48 samples (+$23.00)" "49 samples (+$23.50)" "50 samples (+$24.00)" "51 samples (+$24.50)" "52 samples (+$25.00)" "53 samples (+$25.50)" "54 samples (+$26.00)" "55 samples (+$26.50)" "56 samples (+$27.00)" "57 samples (+$27.50)" "58 samples (+$28.00)" "59 samples (+$28.50)" "60 samples (+$29.00)" "61 samples (+$29.50)" "62 samples (+$30.00)" "63 samples (+$30.50)" "64 samples (+$31.00)" "65 samples (+$31.50)" "66 samples (+$32.00)" "67 samples (+$32.50)" "68 samples (+$33.00)" "69 samples (+$33.50)" "70 samples (+$34.00)" "71 samples (+$34.50)" "72 samples (+$35.00)" "73 samples (+$35.50)" "74 samples (+$36.00)" "75 samples (+$36.50)" "76 samples (+$37.00)" "77 samples (+$37.50)" "78 samples (+$38.00)" "79 samples (+$38.50)" "80 samples (+$39.00)" "81 samples (+$39.50)" "82 samples (+$40.00)" "83 samples (+$40.50)" "84 samples (+$41.00)" "85 samples (+$41.50)" "86 samples (+$42.00)" "87 samples (+$42.50)" "88 samples (+$43.00)" "89 samples (+$43.50)" "90 samples (+$44.00)" "91 samples (+$44.50)" "92 samples (+$45.00)" "93 samples (+$45.50)" "94 samples (+$46.00)" "95 samples (+$46.50)" "96 samples (+$47.00)" "97 samples (+$47.50)" "98 samples (+$48.00)" "99 samples (+$48.50)" "100 samples (+$49.00)" "101 samples (+$49.50)" "102 samples (+$50.00)" "103 samples (+$50.50)" "104 samples (+$51.00)" "105 samples (+$51.50)" "106 samples (+$52.00)" "107 samples (+$52.50)" "108 samples (+$53.00)" "109 samples (+$53.50)" "110 samples (+$54.00)" "111 samples (+$54.50)" "112 samples (+$55.00)" "113 samples (+$55.50)" "114 samples (+$56.00)" "115 samples (+$56.50)" "116 samples (+$57.00)" "117 samples (+$57.50)" "118 samples (+$58.00)" "119 samples (+$58.50)" "120 samples (+$59.00)" "121 samples (+$59.50)" "122 samples (+$60.00)" "123 samples (+$60.50)" "124 samples (+$61.00)" "125 samples (+$61.50)" "126 samples (+$62.00)" "127 samples (+$62.50)" "128 samples (+$63.00)" "129 samples (+$63.50)" "130 samples (+$64.00)" "131 samples (+$64.50)" "132 samples (+$65.00)" "133 samples (+$65.50)" "134 samples (+$66.00)" "135 samples (+$66.50)" "136 samples (+$67.00)" "137 samples (+$67.50)" "138 samples (+$68.00)" "139 samples (+$68.50)" "140 samples (+$69.00)" "141 samples (+$69.50)" "142 samples (+$70.00)" "143 samples (+$70.50)" "144 samples (+$71.00)"||||||||||||||0||||||||||New||||||||||||||0||~~|^^|frpepoco||item.||fastpivot-2007||porches||||https://s.turbifycdn.com/aah/vintagewoodworks/free-personalized-porch-consultation-39.jpg||||Free Personalized Porch Consultation||||products > porches > ||Products > Porches - START HERE! > ||||||||||||||||0||1||0||0||||||Click for free personalized consultation info|| 1. Are you planning a new porch or fixing up an existing porch? 2. Approximate overall size? Length and width. And, if it is an existing porch, how tall are the Porch Posts and how much unturned, flat space is there above and below the turned portion of the Post if any? 3. What is your primary goal? Create an overall look or style for the house. Decorative addition to dress up the house. Correct problems (be specific). 4. Do you have other changes in mind? Gables, Eaves, Windows, Siding, Ceiling, etc. 5. Do you have photos or drawings? We can provide the best help if you share a photo. We would like to have a picture from the front of the house (street view) as well as angle shots and close-ups of areas of special concern. If you have pictures of the look you want, those will be helpful also. Please put the above information in a letter, fax, or email and send it to us at one of our contact addresses or phone numbers and we'll take it from there. Be sure to include the best way to get back to you with ideas or additional questions. Over the past 35 years we've been involved with many thousands of porches. We're eager to help create the porch of your dreams. "The website and ease of ordering was great. I will most definitely be doing business with the folks at Vintage Woodworks again. I think they have an edge on the products because of their understanding of the customers needs and their business as well." - Randall M, Georgia NOTE - Our Online Porch Guide contains everything from this printed Porch Design book and a lot more. 208 pages of authoritative insight for anyone building, remodeling, or dreaming porches. During or after your review of Porch Design you can, of course, contact us to discuss this information... because we want your "dream porch" to be perfect!
Use the Shipping Method pop-down below to select a shipping method. Book is actually FREE but appears to vary due to the automatic shipping charge added (or not added, in the case of Canada) at Checkout, and the high cost of sending to Canada. ||"Shipping Method" "Select one" "US - First Class Mail (+$0.00)" "US - Priority Mail (+$3.00)" "Canada - First Class Mail - includes Shipping (+$15.50)" "Canada - Priority Mail - includes Shipping (+$23.95)"||||||||||||||0||||||||||New||||||||||||||0||~~|^^|free-porch-designs||item.||fastpivot-2007||porches1||||||||Free Porch Designs||||landing-pages > porches1 > ||Alternate Landing Pages > Porches > ||||||||||||||||0||1||0||0||||link-porch-item link-porch-book ||(nsnf/ckd)|| Don't accept one-size-fits-all free porch designs. Our 30 years experience and free personalized consultation will insure a great porch design - one perfectly suited to your home! Get inspired! Review our photos to kindle great ideas. Keep in mind there's really no such thing as one-size-fits-all free porch designs. Porches should be as individual as their houses and the people who live in them! Browse examples (photos, drawings, & floorplans). Study anatomy and construction. Plan and draw your own free porch designs (no art skills required). Find the best decorative elements and learn proper installation techniques. From Flooring Boards to the decorative items at the top of the Posts, we can create great free porch designs! Our professional, easy to install Railing system and Third Dimension approach blend style, substance and authenticity. Extensive selection includes Brackets, Spandrels, Balusters, Rails, and much more in weather-resistant woods and AZEK Brand Cellular PVC. We are available by phone or email for a free personalized consultation on porch designs, help with choice of components, and all related questions. We have long believed that planning, designing, building, and decorating porches is a most worthwhile endeavor. We still do! Porches are our passion! During the past 30 years we've created free porch designs for thousands. French White Oak  Specific product information is found at each product's section online. Once at the main page for a given product category, look for an Information link. And if you still have questions, please contact us. We are always eager to help! "Customer service is among the very best. It hasn't changed in the 20 odd years I have ordered from them." - Arthru F, California
Click for 17 Designs||F.B. 1 1231 F.B. 2 1232n11 1232n13 F.B. 3 1233 F.B. 4 1235n9 1235n12 F.B. 6 1242 F.B. 7 1241 F.B. 8 1243n10 1243n12 F.B. 9 1254 F.B. 10 1255 F.B. 11 1253n10 1253n14 F.B. 12 1240n7 1240n13 F.B. 13 1259 F.B. 15 1261 Olympian 1260 The Stockbridge 1238 The Archredeux 1239 Nautilus 1248 Fretwork Brackets||"Design" "Select one" "F.B. 1 (1231) (+$49.08)" "----------------------------------------" "F.B. 2 (1232n11) (+$68.72)" "F.B. 2 (1232n13) (+$76.09)" "----------------------------------------" "F.B. 3 (1233) (+$68.72)" "----------------------------------------" "F.B. 4 (1235n9) (+$49.08)" "F.B. 4 (1235n12) (+$61.35)" "----------------------------------------" "F.B. 6 (1242) (+$76.09)" "F.B. 7 (1241) (+$68.72)" "----------------------------------------" "F.B. 8 (1243n10) (+$49.08)" "F.B. 8 (1243n12) (+$68.72)" "----------------------------------------" "F.B. 9 (1254) (+$56.45)" "F.B. 10 (1255) (+$68.72)" "----------------------------------------" "F.B. 11 (1253n10) (+$68.72)" "F.B. 11 (1253n14) (+$80.99)" "----------------------------------------" "F.B. 12 (1240n7) (+$36.81)" "F.B. 12 (1240n13) (+$68.72)" "----------------------------------------" "F.B. 13 (1259) (+$61.35)" "F.B. 15 (1261) (+$49.08)" "Olympian (1260) (+$58.90)" "The Stockbridge (1238) (+$100.64)" "The Archredeux (1239) (+$100.64)" "Nautilus (1248) (+$115.38)"|^|"Thickness" "Select one:" "3/4'' !1" "1'' !1" "1-1/4'' !1" "1-1/2'' !1"|^|"Material" "Select one: (Last selection is ''Other'')" "Poplar - j400 !1" "Cedar, Western Red - not available in 3/4'' thickness - j200 !1" "Cypress - j500 !1" "Oak, Red - j100 !1" "Oak, White - jWO !1" "Pine, White !1" "PVC - jPV !1" "Redwood - j300 !1" "--------------------" "Other - I'll contact you about another wood and/or thickness." "Other - Contact me about another wood and/or thickness."|^|"Framing" "Select one" "Framed (standard)" "UNframed - Reduces dimensions by approximately 2''" "Please frame my UNframed 'Sale Listing' Bracket ($20 extra)"|^|"Sale Item? (see Sale Listings)" "Select one" "YES, it is on Sale List." "NO, it is NOT on Sale List."||||||||||||||0||||||||||New||||||||||||||0||~~|^^|panels-medallions-item||item.||fastpivot-2007||grilmed||||https://s.turbifycdn.com/aah/vintagewoodworks/product-listings-fretwork-panels-medallions-20.jpg||||Fretwork Medallions Product Listings||(caf)||products > grilmed > ||Products > Medallions, Fretwork > ||0.000||0.000 ||||||||||||1||1||0||0||||||3 Designs Victoria Circle Medallion (2502) Victoria Oval Medallion (2504) Tulip Medallion, (2505, 2505n14, 2505n16)||"Design" "Select one:" "Victoria Circle Medallion (2502) (+$233.22)" "Victoria Oval Medallion (2504) (+$466.44)" "--------------" "Tulip Medallion, 14-1/4'' x 12-1/4'' (2505n14) (+$100.64)" "Tulip Medallion, 16-1/2'' x 14'' (2505n16) (+$115.38)"|^|"Thickness" "Select one:" "3/4'' - not available in Cedar !9" "1'' !1" "1-1/4'' !1" "1-1/2'' !1"|^|"Material" "Select one: (Last selection is ''Other'')" "Poplar - j400 !1" "Cedar, Western Red - not available in 3/4'' thickness - j200 !1" "Cypress - j500 !1" "Oak, Red - j100 !1" "Oak, White - jWO !1" "Pine, White !1" "PVC - jPV !1" "Redwood - j300 !1" "--------------------" "Other - I'll contact you about another wood and/or thickness." "Other - Contact me about another wood and/or thickness."|^|"Framing" "Select one:" "Standard Framing, as described and shown above" "--------------" "Frame Victoria Circle or Oval Medallion on all four sides (+$15.00)" "Frame Victoria Circle or Oval Medallion for vertical installation" "--------------" "Omit all Framing on Victoria Circle or Oval Medallion"|^|"Sale Item? " "Select one:" "--------------" "Yes, it is on Sale List." "No, it is NOT on Sale List."||||||||||||||0||||||||||New||||||||||||||0||~~|^^|fretspan||item.||fastpivot-2007||spandrels-item||||https://s.turbifycdn.com/aah/vintagewoodworks/fretwork-spandrels-32.jpg||||Fretwork Spandrels||(caf)||products > spandrels > spandrels-item > ||Products > Spandrels > Spandrel Product Listings > ||0.000||0.000 ||||Fretwork Spandrels||||||||1||1||0||0|||||| 7 Designs ||Fretwork Spandrel Jenny Lind (4108), Lisa (4109), Eloise (4105), Lily Langtry (4115), Mary Elizabeth (4110), Mary Elaine (4177), Large Arch (4104), Small Arch (4121)||"Design" "Select one:" "Eloise (4105) (+$76.84)" "Jenny Lind (4108) (+$59.76)" "Lisa (4109) (+$70.43)" "Lily Langtry (4115) (+$87.51)" "Mary Elizabeth (4110) (+$106.58)" "Mary Elaine (4177) (+$117.40)" "Large Arch (4104) (+$70.43)" "Small Arch (4121) (+$51.22)"|^|"LENGTH: Feet and Inches" "Select one:" "1 FOOT (12'')" "1 foot 1 inch (13'')" "1 foot 2 inches (14'')" "1 foot 3 inches (15'')" "1 foot 4 inches (16'')" "1 foot 5 inches (17'')" "1 foot 6 inches (18'')" "1 foot 7 inches (19'')" "1 foot 8 inches (20'')" "1 foot 9 inches (21'')" "1 foot 10 inches (22'')" "1 foot 11 inches (23'')" "--------------" "2 FEET (24'')" "2 feet 1 inch (25'')" "2 feet 2 inches (26'')" "2 feet 3 inches (27'')" "2 feet 4 inches (28'')" "2 feet 5 inches (29'')" "2 feet 6 inches (30'')" "2 feet 7 inches (31'')" "2 feet 8 inches (32'')" "2 feet 9 inches (33'')" "2 feet 10 inches (34'')" "2 feet 11 inches (35'')" "--------------" "3 FEET (36'')" "3 feet 1 inch (37'')" "3 feet 2 inches (38'')" "3 feet 3 inches (39'')" "3 feet 4 inches (40'')" "3 feet 5 inches (41'')" "3 feet 6 inches (42'')" "3 feet 7 inches (43'')" "3 feet 8 inches (44'')" "3 feet 9 inches (45'')" "3 feet 10 inches (46'')" "3 feet 11 inches (47'')" "--------------" "4 FEET (48'')" "4 feet 1 inch (49'')" "4 feet 2 inches (50'')" "4 feet 3 inches (51'')" "4 feet 4 inches (52'')" "4 feet 5 inches (53'')" "4 feet 6 inches (54'')" "4 feet 7 inches (55'')" "4 feet 8 inches (56'')" "4 feet 9 inches (57'')" "4 feet 10 inches (58'')" "4 feet 11 inches (59'')" "--------------" "5 FEET (60'')" "5 feet 1 inch (61'')" "5 feet 2 inches (62'')" "5 feet 3 inches (63'')" "5 feet 4 inches (64'')" "5 feet 5 inches (65'')" "5 feet 6 inches (66'')" "5 feet 7 inches (67'')" "5 feet 8 inches (68'')" "5 feet 9 inches (69'')" "5 feet 10 inches (70'')" "5 feet 11 inches (71'')" "--------------" "6 FEET (72'')" "6 feet 1 inch (73'')" "6 feet 2 inches (74'')" "6 feet 3 inches (75'')" "6 feet 4 inches (76'')" "6 feet 5 inches (77'')" "6 feet 6 inches (78'')" "6 feet 7 inches (79'')" "6 feet 8 inches (80'')" "6 feet 9 inches (81'')" "6 feet 10 inches (82'')" "6 feet 11 inches (83'')" "--------------" "7 FEET (84'')" "7 feet 1 inch (85'')" "7 feet 2 inches (86'')" "7 feet 3 inches (87'')" "7 feet 4 inches (88'')" "7 feet 5 inches (89'')" "7 feet 6 inches (90'')" "7 feet 7 inches (91'')" "7 feet 8 inches (92'')" "7 feet 9 inches (93'')" "7 feet 10 inches (94'')" "7 feet 11 inches (95'')" "--------------" "8 FEET (96'')" "8 feet 1 inch (97'')" "8 feet 2 inches (98'')" "8 feet 3 inches (99'')" "8 feet 4 inches (100'')" "8 feet 5 inches (101'')" "8 feet 6 inches (102'')" "8 feet 7 inches (103'')" "8 feet 8 inches (104'')" "8 feet 9 inches (105'')" "8 feet 10 inches (106'')" "8 feet 11 inches (107'')" "--------------" "9 FEET (108'')" "9 feet 1 inch (109'')" "9 feet 2 inches (110'')" "9 feet 3 inches (111'')" "9 feet 4 inches (112'')" "9 feet 5 inches (113'')" "9 feet 6 inches (114'')" "9 feet 7 inches (115'')" "9 feet 8 inches (116'')" "9 feet 9 inches (117'')" "9 feet 10 inches (118'')" "9 feet 11 inches (119'')" "--------------" "10 FEET (120'')" "10 feet 1 inch (121'')" "10 feet 2 inches (122'')" "10 feet 3 inches (123'')" "10 feet 4 inches (124'')" "10 feet 5 inches (125'')" "10 feet 6 inches (126'')" "10 feet 7 inches (127'')" "10 feet 8 inches (128'')" "10 feet 9 inches (129'')" "10 feet 10 inches (130'')" "10 feet 11 inches (131'')" "--------------" "11 FEET (132'')" "11 feet 1 inch (133'')" "11 feet 2 inches (134'')" "11 feet 3 inches (135'')" "11 feet 4 inches (136'')" "11 feet 5 inches (137'')" "11 feet 6 inches (138'')" "11 feet 7 inches (139'')" "11 feet 8 inches (140'')" "11 feet 9 inches (141'')" "11 feet 10 inches (142'')" "11 feet 11 inches (143'')" "--------------" "12 FEET (144'')" "12 feet 1 inch (145'')" "12 feet 2 inches (146'')" "12 feet 3 inches (147'')" "12 feet 4 inches (148'')" "12 feet 5 inches (149'')" "12 feet 6 inches (150'')" "12 feet 7 inches (151'')" "12 feet 8 inches (152'')" "12 feet 9 inches (153'')" "12 feet 10 inches (154'')" "12 feet 11 inches (155'')" "---------------" "13 FEET (156'')" "13 feet 1 inch (157'')" "13 feet 2 inches (158'')" "13 feet 3 inches (159'')" "13 feet 4 inches (160'')" "13 feet 5 inches (161'')" "13 feet 6 inches (162'')" "13 feet 7 inches (163'')" "13 feet 8 inches (164'')" "13 feet 9 inches (165'')" "13 feet 10 inches (166'')" "13 feet 11 inches (167'')" "---------------" "14 FEET (168'')" "14 feet 1 inch (169'')" "14 feet 2 inches (170'')" "14 feet 3 inches (171'')" "14 feet 4 inches (172'')" "14 feet 5 inches (173'')" "14 feet 6 inches (174'')" "14 feet 7 inches (175'')" "14 feet 8 inches (176'')" "14 feet 9 inches (177'')" "14 feet 10 inches (178'')" "14 feet 11 inches (179'')" "--------------" "15 FEET (180'')" "15 feet 1 inch (181'')" "15 feet 2 inches (182'')" "15 feet 3 inches (183'')" "15 feet 4 inches (184'')" "15 feet 5 inches (185'')" "15 feet 6 inches (186'')" "15 feet 7 inches (187'')" "15 feet 8 inches (188'')" "15 feet 9 inches (189'')" "15 feet 10 inches (190'')" "15 feet 11 inches (191'')" "--------------" "16 FEET (192'')"|^|"LENGTH: Fractional Inch" "Select one:" "Not Needed" "1/16" "1/8" "3/16" "1/4" "5/16" "3/8" "7/16" "1/2" "9/16" "5/8" "11/16" "3/4" "13/16" "7/8" "15/16"|^|"Thickness" "Select one:" "3/4'' - not available in Cedar !9" "1'' !1" "1-1/4'' !1" "1-1/2'' !1"|^|"Material" "Select one: (Last selection is ''Other'')" "Poplar - j400 !1" "Cedar, Western Red - not available in 3/4'' thickness - j200 !1" "Cypress - j500 !1" "Oak, Red - j100 !1" "Oak, White - jWO !1" "Pine, White !1" "PVC - jPV !1" "Redwood - j300 !1" "--------------------" "Other - I'll contact you about another wood and/or thickness." "Other - Contact me about another wood and/or thickness."|^|"Shipping Info" "Select one:" "- This item is 46'' or longer. I read the 'Important Shipping Info' link above." "- This item is less than 46'' in length."|^|"Special Packaging" "Select one:" "Required for safe shipment (+$10.00)*"||||||||||||||0||||||||||New||||||||||||||0||~~|^^|frontporch||item.||fastpivot-2007||porches1||||||||Front Porch||||landing-pages > porches1 > ||Alternate Landing Pages > Porches > ||||||||||||||||0||1||0||0||||link-porch-item link-porch-book ||(nsnf/ckd)|| Free assistance! Over 40 years of front porch experience. Hundreds of photos with helpful tips. Buy direct & save on 1000's of wood and synthetic parts for your front porch. Get inspired! Our collection includes great front porch photos. Use these images to get ideas for your own home. Keep in mind that your house doesn't need to be an exact match to create the same look and feel. Browse examples (photos, drawings, & floorplans). Study anatomy & construction. Plan & draw your dream front porch (no art skills required). Find the best decorative elements & learn proper installation techniques. From Flooring Boards to the decorative items at the top of the Posts, our vast selection includes everything for a fabulous front porch! Our professional, easy to install Railing system and Third Dimension approach blend style, substance and authenticity. Extensive selection includes Brackets, Spandrels, Balusters, Rails, and much more in weather-resistant woods and AZEK Brand Cellular PVC. We are available by phone or email for a free personalized consultation, help with choice of components, and all other questions. We have long believed that planning, designing, and building a front porch is a most worthwhile endeavor. We still do! Porches are our passion! Over the past 30 years we've assisted thousands with their front porch. Bringing Back Yesterday in Quality & Service! Vintage Woodworks was founded in 1978 to reproduce old-fashioned, solid wood, handcrafted millwork including decorative items for your front porch. We are the largest manufacturer of solid wood traditional millwork for your front porch for sale directly to the public. Since 1978, we've been ‘Bringing Back Yesterday in Quality and Service!’ Our solid wood products are equally effective for both interior and exterior decoration. And, our expert shipping and small-town, friendly services are sure to please! If after looking over our offerings for your front porch in our products section you still have questions, feel free to give us a call at 903-356-2158. We would love to assist you with your questions on decorative items for your front porch.||||||||||||||||0||||||||||New||||||||||||||0||~~|^^|front-porch-additions||item.||fastpivot-2007||roanoke||||||||Front Porch Additions||||landing-pages > roanoke > ||Alternate Landing Pages > Roanoke > ||||||||||||||||0||1||0||0||||||(nsnf/ckd)|| Bringing Back Yesterday in Quality & Service! Vintage Woodworks was founded in 1978 to reproduce old-fashioned, solid wood, handcrafted millwork including decorative items for front porch additions. We are the largest manufacturer of solid wood traditional millwork for front porch additions for sale directly to the public. Since 1978, we've been ‘Bringing Back Yesterday in Quality and Service!’ Our solid wood products are equally effective for both interior and exterior decoration. And, our expert shipping and small-town, friendly services are sure to please! If after looking over our offerings for front porch additions in our products section you still have questions, feel free to give us a call at 903-356-2158. We would love to assist you with your questions on your front porch additions.||||||||||||||||0||||||||||New||||||||||||||0||~~|^^|front-porch-design||item.||fastpivot-2007||porches1||||||||Front Porch Design||||landing-pages > porches1 > ||Alternate Landing Pages > Porches > ||||||||||||||||0||1||0||0||||link-porch-item link-porch-book ||(nsnf/ckd)|| We offer free front porch design help! Don't settle for a one-size-fits-all design. Our 40 years experience can help you create a great front porch design - one that's perfectly suited to your home. Get inspired! Review our photos to kindle great ideas. Keep in mind there's really no such thing as a one-size-fits-all front porch design. Porches should be as individual as their houses and the people who live in them! Browse examples (photos, drawings, & floorplans). Study anatomy & construction. Draw your own front porch design (no art skills required). Find the best decorative elements and learn proper installation techniques. From Flooring Boards to the decorative items at the top of the Posts, our vast selection includes everything for a fabulous front porch design! Our professional, easy to install Railing system and Third Dimension approach blend style, substance and authenticity. Extensive selection includes Brackets, Spandrels, Balusters, Rails, and much more in weather-resistant woods and AZEK Brand Cellular PVC. We are available by phone for a free personalized consultation on your front porch design, choice of components, and all other questions. We have long believed that planning, designing, building, and decorating porches is a most worthwhile endeavor. We still do! Porches are our passion! Over the past 30 years we've been involved with many thousands of front porch design projects. Free help with front porch designs! Don't settle for one-size-fits-all front porch designs. Our 40 years experience can help design a great porch - one that's perfectly suited to your home. Get inspired! Review our photos to kindle great ideas. Keep in mind there's really no such thing as one-size-fits-all front porch designs. Porches should be as individual as their houses and the people who live in them! Browse examples (photos, drawings, & floorplans). Study anatomy & construction. Plan and draw front porch designs (no art skills required). Find the best decorative elements for your porch and learn proper installation techniques. From Flooring Boards to the decorative items at the top of the Posts, our vast selection includes everything for fabulous front porch designs! Our professional, easy to install Railing system and Third Dimension approach blend style, substance and authenticity. Extensive selection includes Brackets, Spandrels, Balusters, Rails, and much more in weather-resistant woods and AZEK Brand Cellular PVC. We are available by phone for a free personalized consultation on front porch designs, choice of components, and all other questions. We have long believed that planning, designing, building, and decorating porches is a most worthwhile endeavor. We still do! Porches are our passion! Over the past 30 years we've been involved with many thousands of front porch designs. Better than free front porch designs! Don't settle for one-size-fits-all front porch designs. Our 30 years experience can help you plan a great porch - one that's perfectly suited to your home. Get inspired! Review our photos to kindle great ideas for your porch. Keep in mind there's really no such thing as one-size-fits-all front porch designs. Porches should be as individual as their houses and the people who live in them! Our goal is to share knowledge. Our hope is that this book will assist with front porch designs and the construction of magnificent porches! Whether your interest is physically building your own, only design a porch, or merely understanding the process better, we believe our Porch Design book can be of genuine help. We have what your front porch designs will need! From Flooring Boards to the decorative items at the top of the Posts, we've got what it takes to create inviting porches. Our Railing systems provide easy, professional installation with maximum protection from water damage. Our "Third Dimension" items create depth and authenticity. We are available by phone for free consultation on front porch designs, choice of components, and all other porch questions. We have long believed that planning, designing, and building porches is a most worthwhile endeavor. We still do! Over the past 30 years we've been involved with many thousands of front porch designs. Now we're eager to help create the porch of your dreams! ||||||||||||||||0||||||||||New||||||||||||||0||~~|^^|frontporchideas||item.||fastpivot-2007||porches1||||||||Front Porch Ideas||||landing-pages > porches1 > ||Alternate Landing Pages > Porches > ||||||||||||||||0||1||0||0||||link-porch-item link-porch-book ||(nsnf/ckd)|| The right place for great front porch ideas! Over 40 years experience. Free Online Guide. Hundreds of photos with helpful tips. Free personalized consulation. Buy direct and save on 1000's of wood and synthetic parts to bring your front porch ideas to life. Get inspired! Review our photos to kindle great front porch ideas. Keep in mind that your house doesn't need to be an exact match to create the same look and feel. Browse examples (photos, drawings, and floorplans). Study anatomy & construction. Incorporate our front porch ideas for your own home (no art skills required). Discover the best decorative elements and learn proper installation techniques. From Flooring Boards to the decorative items at the top of the Posts, our vast selection will generate fabulous front porch ideas! Our professional, easy to install Railing system and Third Dimension approach blend style, substance and authenticity. Extensive selection includes Brackets, Spandrels, Balusters, Rails, and much more in weather-resistant woods and AZEK Brand Cellular PVC. We are available by phone or email for help with your front porch ideas and all questions through a free personalized consultation. We have long believed that planning, designing, building, and decorating porches is a most worthwhile endeavor. We still do! Porches are our passion! Over the past 30 years we've shared our front porch ideas with thousands. Get inspired! Review our photos to kindle great front porch ideas for your own home. Keep in mind that your house doesn't need to be an exact match to create the same look and feel. Our goal is to share knowledge. Our hope is that this book will assist in the study, design, and construction of magnificent porches! Whether it's your intention to physically build your own, only gather front porch ideas for the future, or merely understand the process better, we believe our Porch Design book can be of genuine help. We have what your front porch ideas will need! From Flooring Boards to the decorative items at the top of the Posts, we've got what it takes to create inviting porches. Our Railing systems provide easy, professional installation with maximum protection from water damage. Our "Third Dimension" items create depth and authenticity. We are available by phone or email for free help with your front porch ideas and all porch questions. We have long believed that planning, designing, and building porches is a most worthwhile endeavor. We still do! Over the past 30 years we've shared our front porch ideas with thousands. Now we're eager to help create the porch of your dreams! ||||||||||||||||0||||||||||New||||||||||||||0||~~|^^|front-porch-pictures||item.||fastpivot-2007||porches1||||||||Front Porch Pictures||||landing-pages > porches1 > ||Alternate Landing Pages > Porches > ||||||||||||||||0||1||0||0||||link-porch-item link-porch-book ||(nsnf/ckd)|| Most of our hundreds of front porch pictures are captioned with helpful tips and many include Before & After shots. Our comprehensive Online Porch Guide includes two porch photo essays: Which porch is best for your house? and Porch Shapes and Rooflines. Study our front porch pictures and then tap our over 40 years of experience to create the porch of your dreams! Get inspired! Review our front porch pictures to kindle great ideas for your porch. Keep in mind there's really no such thing as a one-size-fits-all porch. Porches should be as individual as their houses and the people who live in them! Browse porch examples (photos, drawings, & floorplans). Study porch anatomy & construction. Design and draw your dream porch (no art skills required). Find the best decorative elements for your porch & learn proper installation techniques. The porches in our front porch pictures were created using our porch parts. From Flooring Boards to the decorative items at the top of the Posts, we've got what it takes to design inviting porches. Our Railing systems provide easy, professional installation with maximum protection from water damage. Our "Third Dimension" items create depth and authenticity. We are available by phone or email to discuss any of our front porch pictures, help with choice of components, and for all other porch questions. We have long believed that planning, designing, and building porches is a most worthwhile endeavor. We still do! For 35 years we've helped thousands with their porches. Please review our front porch pictures and then let us help create the porch of your dreams! ||||||||||||||||0||||||||||New||||||||||||||0||~~|^^|frontporchplanning||item.||fastpivot-2007||porches1||||||||Front Porch Planning ||||landing-pages > porches1 > ||Alternate Landing Pages > Porches > ||||||||||||||||0||1||0||0||||link-porch-item link-porch-book ||(nsnf/ckd)|| You're at the right place for front porch planning! Over 40 years experience. Hundreds of photos with helpful front porch planning tips. Buy direct and save on 1000's of wood and synthetic parts. Get inspired! Review our photos to kindle great ideas for your own front porch planning. Keep in mind there's really no such thing as one-size-fits-all. Porches should be as individual as their houses and the people who live in them Browse examples (photos, drawings, & floorplans). Study anatomy & construction. Get insight for your front porch planning. Find the best decorative elements and learn proper installation techniques. From Flooring Boards to the decorative items at the top of the Posts, our vast selection will spark ideas for your front porch planning! Our professional, easy to install Railing system and Third Dimension approach blend style, substance and authenticity. Extensive selection includes Brackets, Spandrels, Balusters, Rails, and much more in weather-resistant woods and AZEK Brand Cellular PVC. We are available by phone or email for a free personalized consultation for front porch planning, help with choice of components, and all other questions. We have long believed that planning, designing, building, and decorating porches is a most worthwhile endeavor. We still do! Porches are our passion! Over the past 30 years we've helped many thousands with their front porch planning. Free assistance! 30 years experience with front porch planning. 200 photos with helpful tips. Buy direct & save on 1000's of wood and synthetic parts for porches. Get inspired! Review our photos to kindle great ideas for your front porch planning. Keep in mind there's really no such thing as one-size-fits-all. Porches should be as individual as their houses and the people who live in them! Our goal is to share knowledge. Our hope is that this book will assist with front porch planning and construction. Whether your interest is physically building your own, only design a porch, or merely understanding the process better, we believe our Porch Design book can be of genuine help. We have what you'll need! From Flooring Boards to the decorative items at the top of the Posts, we've got what it takes to bring your front porch planning into reality! Our Railing systems provide easy, professional installation with maximum protection from water damage. Our 'Third Dimension' items create depth and authenticity. We are available by phone or email for free front porch planning, help with choice of components, and all other porch questions. We have long believed that planning, designing, and building porches is a most worthwhile endeavor. We still do! Over the past 30 years we've helped many thousands with their front porch planning. Now we're eager to help create the porch of your dreams! ||||||||||||||||0||||||||||New||||||||||||||0||~~|^^|front-porch-plans||item.||fastpivot-2007||porches1||||||||Front Porch Plans||||landing-pages > porches1 > ||Alternate Landing Pages > Porches > ||||||||||||||||0||1||0||0||||link-porch-item link-porch-book ||(nsnf/ckd)|| Better than free front porch plans! We don't have one-size-fits-all plans. We do have 30 years experience with all kinds of front porches and can help create front porch plans perfectly suited to your home. Get inspired! Review our photos to kindle great ideas for your front porch plans. Keep in mind there's really no such thing as one-size-fits-all. Porches should be as individual as their houses and the people who live in them! Browse examples (photos, drawings, & floorplans). Study anatomy & construction. Get ideas for your front porch plans. Find the best decorative elements and learn proper installation techniques. From Flooring Boards to the decorative items at the top of the Posts, our vast selection includes everything for fabulous front porch plans! Our professional, easy to install Railing system and Third Dimension approach blend style, substance and authenticity. Extensive selection includes Brackets, Spandrels, Balusters, Rails, and much more in weather-resistant woods and AZEK Brand Cellular PVC. We are available by phone or email for a free personalized consultation about your front porch plans, choice of components, and all other questions. We have long believed that planning, building, and decorating porches is a most worthwhile endeavor. We still do! Porches are our passion! Over the past 30 years we've been involved with many thousands of front porch plans. Free assistance! Over 40 years experience with front porches. Hundreds of photos with helpful tips. Buy direct & save on 1000's of wood and synthetic parts for front porches. Browse examples (photos, drawings, & floorplans). Study anatomy & construction. Plan & draw your dream porch (no art skills required). Find the best decorative elements for front porches & learn proper installation techniques. We are available by phone or email for a free personalized consultation, help with choice of components, and all other questions. We have long believed that planning, designing, and building front porches is a most worthwhile endeavor. We still do! Porches are our passion! Over the past 30 years we've been involved with many thousands of front porches large and small. Extend Gable roof forward of main house to create the desired depth of porch. Click on photo for "Before" view Click on photo for additional view Click on photo for additional views Click on photo for additional views Click on photo for additional views Click on photo for additional views Click on photo for additional views Gable Decoration||||||||0||1||0||0||||||Click for Details (nsnf/ckd)|| Items ordered from the Bargain Room automatically move to the front of the line for prompt shipment. Some of the Regular Prices quoted in our Bargain Room are based on older prices. Therefore, our Sale Prices may now be an even better bargain! If you don't find the items you need, or if you need more of an item, please go to our main Gable Decoration section. And remember, our same return policy applies to Bargain Room items - a prompt refund if returned in the same condition and before finishing and installation.||||||||||||||||0||||||||||New||||||||||||||0||~~|^^|gable-item||item.||fastpivot-2007||gabledecor||||https://s.turbifycdn.com/aah/vintagewoodworks/product-listings-gable-decorations-25.jpg||||Gable Decoration Product Listings||(caf)||products > gabledecor > ||Products > Gable Decorations > ||0.000||0.000 ||||||||||||1||1||0||0||||||8 Designs||Gable Decorations Gable Wings Gable 4212, 4212n35, 4212n45 Small Scroll Gable 4221 Standard Old Lace Gable 4214, 4214n21, 4214n35 Large Ball Gable 4210 Flying Circle Gable 4208, 4208n10, 4208n12 Lauren Elizabeth Gable 4203 Ampersand Gable 4215, 4215n62, 4215n74 Modified, Extendable Old Lace 4214||"Design" "Select one:" "Gable Wings with 35'' Side Rails (4212n35) (+$245.49)" "Gable Wings with 45'' Side Rails (4212n45) (+$320.21)" "--------------" "Small Scroll (4221) (+$184.12)" "--------------" "Standard Old Lace with 21'' Side Rails (4214n21) (+$294.59)" "Standard Old Lace with 35'' Side Rails (4214n35) (+$392.80)" "--------------" "EXTENDED Old Lace - use link at drawing above to order" "--------------" "Large Ball Gable - only available 1-1/2'' thick (4210) (+$270.03)" "--------------" "Flying Circle for 10/12 Pitch (4208n10) (+$392.80)" "Flying Circle for 12/12 Pitch (4208n12) (+$392.80)" "--------------" "Lauren Elizabeth (4203) (+$540.10)" "--------------" "Ampersand with 62'' Side Rails (4215n62) (+$613.74)" "Ampersand with 74'' Side Rails (4215n74) (+$736.51)"|^|"Material" "Select one:" "Poplar - j400 !1" "Cedar, Western Red - not available in 3/4'' or 1'' thickness - j200 !1" "Cypress - j500 !1" "Oak, Red - j100 !1" "Oak, White - jWO !1" "Pine, White !1" "PVC - jPV !1" "Redwood - not available in 3/4'' thickness - j300 !1" "--------------------" "Other - I'll contact you about another wood and/or thickness." "Other - Contact me about another wood and/or thickness."|^|"Thickness" "Select one:" "3/4'' - not available in Cedar or Redwood !9" "1'' - not available in Cedar !9" "1-1/4'' !1" "1-1/2'' - EXCEPT Large Ball Gable !9" "1-1/2'' - Large Ball Gable ONLY !9"|^|"Roof Pitch / Closest Horizontal Measurement (HM)" "Select one:" "3/12 roof pitch (69-3/4'' HM)" "4/12 roof pitch (68-1/4'' HM)" "5/12 roof pitch (66-3/8'' HM)" "6/12 roof pitch (64-3/8'' HM)" "7/12 roof pitch (62-1/8'' HM)" "8/12 roof pitch (59-7/8'' HM)" "9/12 roof pitch (57-5/8'' HM)" "10/12 roof pitch (55-3/8'' HM)" "11/12 roof pitch (53-1/8'' HM)" "12/12 roof pitch (51'' HM)" "13/12 roof pitch (48-7/8'' HM)" "14/12 roof pitch (46-7/8'' HM)" "15/12 roof pitch (44-7/8'' HM)" "16/12 roof pitch (43-1/8'' HM)" "17/12 roof pitch (41-1/2'' HM)" "18/12 roof pitch (39-7/8'' HM)" "19/12 roof pitch (38-3/8'' HM)" "20/12 roof pitch (37'' HM)" "21/12 roof pitch (35-5/8'' HM)" "22/12 roof pitch (34-3/8'' HM)" "23/12 roof pitch (33-1/4'' HM)" "24/12 roof pitch (32-1/8'' HM)" "-------------" "Contact me to discuss roof pitch." "I'll contact you to discuss roof pitch."|^|"Special Packaging" "Select one:" "Ordering Small Scroll - Special Packaging Fee Not Required" "Ordering Standard 21'' Old Lace - Special Packaging Fee Not Required" "Required for safe shipment (+$8.00)*"|^|"Shipping Info" "Select one:" "- This item is 46'' or longer. I read the 'Important Shipping Info' link above." "- This item is less than 46'' in length."||||||||||||||0||||||||||New||||||||||||||0||~~|^^|link-gable-photos||link.||storetemplate.||content-links||https://s.turbifycdn.com/aah/vintagewoodworks/gable-decoration-usage-photos-27.jpg||||||Gable Decoration Usage Photos||||webmaster-pages > misc > content-links > ||Webmaster Pages > Misc Pgs @ WM > Content Links > ||||||||||||||||0||0||0||0||||||Click to browse photos||||||||||||||||||0||||||||||New||||||||||||||0||~~|^^|gabledecor||item.||fastpivot-2007||products||||https://s.turbifycdn.com/aah/vintagewoodworks/gable-decorations-20.jpg||||Gable Decorations||||products > ||Products > ||||||||Introduction to Gable Decorations||||||||0||1||0||0||||gable-item gade gadein ||We can fit your roof.|| It is very common for Gable Decorations to be quite different from the rest of the decorative items on a house. This was certainly also true 100 years ago, during the heyday of architectural detailing. Because the gable is typically somewhat distant from the porch, it can be a separate but important focal point. "The first one worked so well, I'm ordering three more. Once those are up, I'll decide on the other ornaments to complement these. Thanks!" - Deborah W, California "We are a repeat customer... purchased three of these gable decorations a few months ago and they look fantastic! We decided to do one more :)" - Dennis H, Ohio Dormers are not only a source of light and ventilation inside the home, but can be enhanced outside with decorative trim such as our Gable Decorations. Dormer decoration design often differs from the design chosen for the main gables, but if you prefer matching trim, our Standard Old Lace Gable Decoration comes in a smaller size perfect for dormers. Likewise, many customers use Gable Wings in their main gables and Small Scroll Gable Decorations for their dormers. The photo above right shows a dormer with a full-sized Standard Old Lace Gable Decoration. This works well because this is a two window dormer. Our smaller Old Lace Gable Decoration fits most single window dormers. Also, keep in mind that if a Dormer has a 12/12 pitch, a single Bracket can be used for decoration. The 12/12 roof pitch is also known as a square pitch roof, since a 90 degree angle is formed at the peak of such roofs. Because of the right angle they form, any Bracket that is symmetrical (equal on both sides) can be used as decoration. The drawing at left shows our Three Square Bracket in a dormer. Running Trim can be used along the eaves of your gable, either below a Gable Decoration or by themselves. If Running Trim is going to be used, we strongly recommend upgrading to PVC to minimize the upkeep. Photo on left features Gable Wings with Fleur Running Trim below it along the eaves. Running Trim makes great Bargeboards for the eaves of your gable. Use an optional Gable Drop in the center, as shown to the right, or just miter the upper ends of the Running Trim to fit snuggly into the apex. 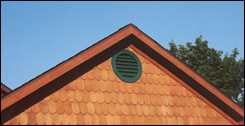 Shingle Gable Decoration Shingle Gable Decoration Gables and dormers can also be decorated with Fancy Cut Cedar Shingles. Both of these gables have Round Fancy Cut Cedar Shingles, but using more than one pattern gives almost limitless design possibilities. 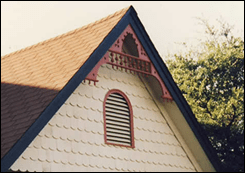 When properly applied, Cut Shingles require little maintenance. Use Polyurethane Vents to keep the low maintenance theme going. The photo above has a round Polyurethane Vent. The photo at right features our Flying Circle Gable Decoration, Round Cut Shingles, and a Curved Top Vent. ||||||||||||||||0||||||||||New||||||||||||||0||~~|^^|link-gable-drops||link.||storetemplate.||content-links||https://s.turbifycdn.com/aah/vintagewoodworks/gable-drops-26.jpg||||||Gable Drops||||webmaster-pages > misc > content-links > ||Webmaster Pages > Misc Pgs @ WM > Content Links > ||||||||||||||||0||0||0||0||||||PVC style shown on right. Click for 2 Styles||||||||||||||||||0||||||||||New||||||||||||||0||~~|^^|porchphoto159||item.||fastpivot-2007||gade||||https://s.turbifycdn.com/aah/vintagewoodworks/porch-photo-159-20.jpg||||Gable Photo||||products > gabledecor > gade > ||Products > Gable Decorations > Usage Photos - Gable Decorations > ||||||||||||||||0||1||0||0|||||| Click for more views and details|| Standard Old Lace Gable really adds to the front of this home! Click for larger view and details|| The contrasting color of this Flying Circle Gable Decoration sets it off handsomely. Click for larger view and details|| 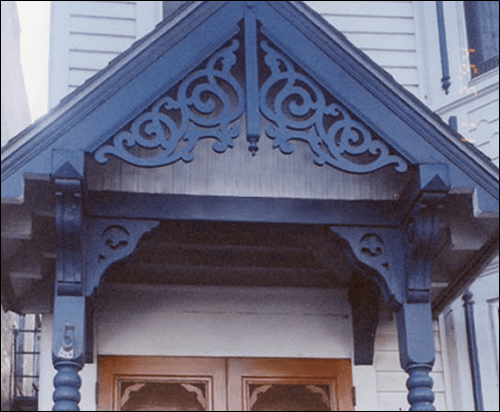 Our Standard Old Lace Gable Decoration is perfect for this small porch gable. Click for larger view and details|| The scrollwork on these Gable Wings & Ampersand Gable Decorations compliment each other and work well with the available space of each gable. Click for more views and details|| A pair of Flying Circle Gable Decorations adds great curb appeal. Click for more views and details|| Our Flying Circle Gable Decoration really finishes this gable. Return to previous page Click for more views and details|| Dormers also look great with Gable Decorations. An Old Lace Gable Decoration fits this double window dormer nicely. Single window dormers may require our smaller size. Keep in mind that Domers with a 12/12 pitch can be decorated using many of our Brackets, if the Bracket measures the same length on each side. Return to previous page Click for larger view and details|| This Gable Wings Gable Decoration draws your attention all the way to the top of this wonderful house. Return to previous page Click for larger view and details|| Gable Wings painted in a contrasting color really stands out on this gable. Return to previous page Click for more views and details|| A pair of Flying Circle Gable Decorations tie the two sections of this house together nicely. Click for more views and details|| 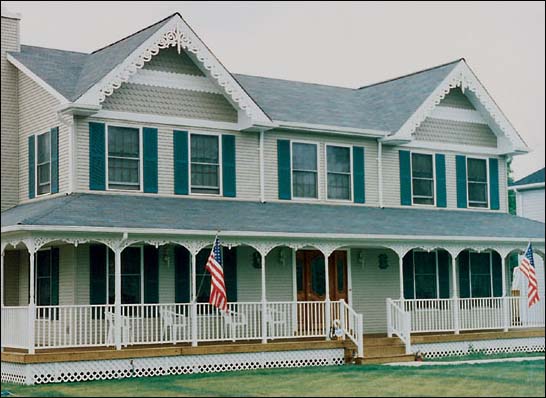 The icicle effect seen on these gables is thanks to our Old Lace Gable Decorations with extensions. Quincy Headers and Arch Brackets create a similar effect on the Porch. Cut Cedar Shingles also adorn the gables. Click for larger view and details||  These Gable Wings Gable Decorations draw your attention and give this home great curb appeal. Return to previous page Click for more views and details|| Our Standard Old Lace Gable Decoration makes this home special. Click for larger view and details|| A pair of Gable Wings Decorations adds the finishing touch to this gable! Click for larger view and details|| This Ampersand Gable Decoration complements the scollwork on the porch. Click for more views and details|| This darling playhouse is finished with our Small Scroll Gable, Turned Balusters, and Corner Blocks. ||||||||||||||||0||||||||||New||||||||||||||0||~~|^^|gablephoto1||item.||fastpivot-2007||wmgausphre||||||||Gable Photo 1 (redo)||||webmaster-pages > indevelopment > graphics2 > usphre > wmgausphre > ||Webmaster Pages > Store Work > Graphics > Usage Photos - Redo > WM - Gable Usage Photos - REDO > ||||||||||||||||0||1||0||0||||||(nsnf/ckd)|| Consider using graphic number 9C (Gables) for first photo <IMG SRC="-------------" ALIGN=bottom ALT="Close-up of Gable Photo 1" TITLE="Close-up of Gable Photo 1"> consider cropping 9A.jpg instead of 9B currently being used. 9A has much more brighter colors Icon crop 9A.jpg (brighter colors) See MORE OPTIONS for additional designs, thicknesses & material choices. 2 cutwork pieces with attached 35" long side rails. Center drop with attached finial. 12/12 pitch shown. Click graphic for larger view. Our Recommendation: Due to the weather exposure gables typically receive, please consider PVC for your Gable Decorations. AZEK® Brand Cellular PVC is a synthetic wood that will never crack, warp, or rot and is impervious to moisture, salt, and insects! That's perfect for Gable Decorations, since they're difficult to re-paint once installed. "Attached is a photograph of ... the installation of your [Gable Decorations] on the front gables. Thanks for supplying the most recent improvement. Your product line is excellent and the appearance of the house has resulted in numerous compliments." - Dave L, Texas Material Choices CA Resident WARNING VERY IMPORTANT! Read Before Ordering: 1. Important Product Details 2. Important Shipping Info ORDER 3/4" thick Gable Wings Gable Decoration in Poplar BELOW or see MORE OPTIONS for additional designs, thicknesses & material choices.||"Material" "Select one:" "Poplar - j400" "Click the MORE OPTIONS link above for other material choices"|^|"Roof Pitch / Closest Horizontal Measurement (HM)" "Select one:" "3/12 roof pitch (69-3/4'' HM)" "4/12 roof pitch (68-1/4'' HM)" "5/12 roof pitch (66-3/8'' HM)" "6/12 roof pitch (64-3/8'' HM)" "7/12 roof pitch (62-1/8'' HM)" "8/12 roof pitch (59-7/8'' HM)" "9/12 roof pitch (57-5/8'' HM)" "10/12 roof pitch (55-3/8'' HM)" "11/12 roof pitch (53-1/8'' HM)" "12/12 roof pitch (51'' HM)" "13/12 roof pitch (48-7/8'' HM)" "14/12 roof pitch (46-7/8'' HM)" "15/12 roof pitch (44-7/8'' HM)" "16/12 roof pitch (43-1/8'' HM)" "17/12 roof pitch (41-1/2'' HM)" "18/12 roof pitch (39-7/8'' HM)" "19/12 roof pitch (38-3/8'' HM)" "20/12 roof pitch (37'' HM)" "21/12 roof pitch (35-5/8'' HM)" "22/12 roof pitch (34-3/8'' HM)" "23/12 roof pitch (33-1/4'' HM)" "24/12 roof pitch (32-1/8'' HM)" "-------------" "Contact me to discuss roof pitch." "I'll contact you to discuss roof pitch."|^|"Shipping Info" "Select one:" "- This item is 46'' or longer. I read the 'Important Shipping Info' link above." "- This item is less than 46'' in length."||||||||||||||0||||||||||New||||||||||||||0||~~|^^|gaonporoop||item.||fastpivot-2007||porch-photos-cross-ref||||https://s.turbifycdn.com/aah/vintagewoodworks/gable-on-porch-roof-open-16.jpg||||Gable, on porch roof, open||||webmaster-pages > sarepin > nonpublic > porch-photos-cross-ref > ||Webmaster Pages > * Reps' Info * > Customer Special Access > Porch Features > ||||||||||||||||0||1||0||0|||||||| Gallery Rails||||||||0||1||0||0||||||KEEP URL ALREADY USED IN CL FOR BR GALLERY RAILS - RG 1/19/12 (nsnf/ckd)|| The Gallery Rails listed below are FIRST QUALITY, unless otherwise noted. They may differ from the picture. If so, we'll list this difference for each. Paint grade means small cracks, chips, discoloration, etc. These will look great once they are painted. Turned parts are light-colored smooth hardwoods, regardless which rail wood type is listed. Top and bottom railing is our standard 1/2" x 3/4" Pine, unless another wood rail type is noted. Drawings not to scale. Order a Gallery Rail from the Bargain Room and you automatically move to the front of the line for almost immediate shipment of these items! Remember, our same return policy applies to Bargain Room items - a prompt refund if returned in the same condition and before finishing and installation. See our main Gallery Rails page for our complete selection or to order more than is available here.
2" Gallery Rail 4851 2-3/4" Spindle Gallery Rail 4853 2-7/8" Spindle Gallery Rail (4854) 2-7/8" Combo Gallery Rail (4855)||"Design" "Select one:" "2'' Gallery Rail (4851) (+$19.46)" "2-3/4'' Spindle Gallery Rail (4853) (+$19.46)"|^|"LENGTH: Length" "Select one:" "4 Feet (48'')" "6 Feet (72'')" "8 Feet (96'')"|^|"Rail Material" "Select one:" "Poplar - j400 !1/2" "Cypress - j500 !1/2" "Oak, Red - j100 !1/2" "Oak, White - jWO !1/2" "Pine, White !1/2" "PVC - jPV !1/2" "Redwood - j300 !1/2" "-----------------------------------------------" "I'll contact you about another wood." "Contact me about another wood."|^|"Shipping Info" "Select one:" "- This item is 46'' or longer. I read the 'Important Shipping Info' link above." "- This item is less than 46'' in length."|^|"Special Packaging" "Select one:" "Required for safe shipment (+$6.00)*"||||||||||||||0||||||||||New||||||||||||||0||~~|^^|garage-door-thermostop-details||item.||popup||hold-azekmldg||||||||Garage Door Thermostop Details - AZEK||||popup-pages > azprpo > hold-azekmldg > ||Pop-up Windows (Pages) > AZEK Product pop-ups > AZEK Moulding - measurement details > ||||||||||||||||0||1||0||0||||||(nsnf/ckd)||  We accept PayPal (including PayPal Credit), Visa, Mastercard, Discover, money order, or personal check. If you prefer, you may call to give your card number. We require payment prior to order shipment. Sales Tax We are required to charge Sales Tax for shipments to the following states: Pennsylvania - 6.00% Texas - 6.75% Checking In Your Order Here are the instructions we send with each shipment. Our Guarantee We take great pride in our Product and in our Company! If you are not totally satisfied with our work and with our service, just let us know before finishing and installation. We'll send a prompt and courteous refund! (Custom sizes and custom items are not returnable unless made incorrectly.) We've been Bringing Back Yesterday in Quality & Service since 1978. How may we help you? "Smooth ordering process ... item delivered as expected ... will use [Vintage Woodworks] again." - Earla K, South Dakota||||||||||||||||0||||||||||New||||||||||||||0||~~|^^|geov||link.||storetemplate.||content-links||||||||General Overview||||webmaster-pages > misc > content-links > ||Webmaster Pages > Misc Pgs @ WM > Content Links > ||||||||||||||||0||0||0||0||||||Click for general overview||||||||||||||||||0||||||||||New||||||||||||||0||~~|^^|gifcer1||item.||fastpivot-2007||products||||https://s.turbifycdn.com/aah/vintagewoodworks/gift-certificates-24.jpg||||Gift Certificates||GC||products > ||Products > ||20.000||20.000 ||||||||1.000 ||||1||0||1||0||||||No expiration date.|| Purchase as many $20 Gift Certificates as you need. After clicking the Put in Shopping Basket button below, you may change the quantity at your Shopping Cart. We will issue one Gift Certificate for the total amount. There is no expiration date. If you would like the Certificate mailed directly to the recipient (or to an address other than your Billing Address), please indicate that and provide the mailing address in the Comments box during Checkout.||||||||||||||||0||||||||||New||||||||||||||0||~~|^^|global-variables||item.||fastpivot-2007||references||||||||Global Variables ||||webmaster-pages > references > ||Webmaster Pages > YS How-To > ||||||||||||||||0||1||0||0||||||(nsnf/ckd)|| see #15.91.95.26 Global Controls About: There are now many features at our Yahoo Store than can be controlled globally. This means once change can and will affect every page at the store. Features are controlled globally at "Variables" in Advanced Edit Mode at the Home Page. 1. Leftnav-product-categories 2. Additional-leftnav-links2-ids 3. Order-button 4. Global-cross-sell-ids 5. Order-form-info 6. Item-not-orderable-text 7. Footer ||||||||||||||||0||||||||||New||||||||||||||0||~~|^^|global-cross-sell-ids||item.||fastpivot-2007||references||||||||Global-cross-sell-ids ||||webmaster-pages > references > ||Webmaster Pages > YS How-To > ||||||||||||||||0||1||0||0||||||(nsnf/ckd)|| This property can only be accessed under the "Variables" tab while in EDIT Mode. DO NOT CHANGE UNLESS INSTRUCTED BY MANAGEMENT Property Type = ids Controls global default for Featured Items & Related Pages Example: Home pg Programmed to display on the right hand side of web pages. Defaults are links to (1) Porch Components (2) Gable Decorations (3) Screen/Storm Doors (4) Spandrels (5) Brackets (6) AZEK Products Controlled globally by clicking "Variables" at the Home Page in Edit Mode and reviewing and/or editing the "Global-cross-sell-ids" field. Featured Items can be set to display other specific pages by using the Cross-sell-ids property to create Related Pages ||||||||||||||||0||||||||||New||||||||||||||0||~~|^^|section-c||link.||storetemplate.||porch-photos-b||https://s.turbifycdn.com/aah/vintagewoodworks/go-to-porch-photos-sec-c-18.jpg||||||Go to Porch Photos - Sec. C ||||products > porches > porchphotos3 > porch-photos-b > ||Products > Porches - START HERE! > Porch Photos - Sec. A > Porch Photos - Sec. B > ||||||||||||||||0||0||0||0||||||||||||||||||||||||0||||||||||New||||||||||||||0||~~|^^|gotobpophseg||link.||storetemplate.||||https://s.turbifycdn.com/aah/vintagewoodworks/go-to-porch-photos-sec-g-18.jpg||||||Go to Porch Photos - Sec. G ||||||||||||||||||||||0||0||0||0||||||||||||||||||||||||0||||||||||New||||||||||||||0||~~|^^|gotobpophseh||link.||storetemplate.||||https://s.turbifycdn.com/aah/vintagewoodworks/go-to-porch-photos-sec-h-18.jpg||||||Go to Porch Photos - Sec. H ||||||||||||||||||||||0||0||0||0||||||||||||||||||||||||0||||||||||New||||||||||||||0||~~|^^|gotobpophsei||link.||storetemplate.||||https://s.turbifycdn.com/aah/vintagewoodworks/go-to-porch-photos-sec-i-19.jpg||||||Go to Porch Photos - Sec. I ||||||||||||||||||||||0||0||0||0||||||||||||||||||||||||0||||||||||New||||||||||||||0||~~|^^|gf||item.||fastpivot-2007||landing-pages||||||||Google Feed ALT. Pages||||landing-pages > ||Alternate Landing Pages > ||||||||||||||||1||1||0||0||||gfbalusters gfbaseboards gfbeadboard gfblocks gfbrackets gfcasings gfporchflooring gfgables gfporchposts gfrailsets gfrunningtrim gfscreendoors gfspandrels gftrimboards ||These pages SHOULD have nsnf, as they have lots of duplicate content.|| (nsnf)||||||||||||||||0||||||||||New||||||||||||||0||~~|^^|azekscrews||item.||fastpivot-2007||azekfasten||||https://s.turbifycdn.com/aah/vintagewoodworks/grade-305-color-matched-stainless-steel-screws-29.jpg||||Grade 305 Color Matched Stainless Steel Screws||SB-S||products > azpvcpr > azek-products-item > azekfasten > ||Products > AZEK® Brand PVC > AZEK® Product Listings > Fasteners for AZEK® > ||0.000||0.000 ||||||||||||1||1||0||0||||||||SB-TXD43L10250b SB-STX34L08250b SB-STX63L08250b SB-STX81L08250b SB-STX71L08250b SB-STX37L08250b SB-STX73L08250b SB-STX65L08250b SB-STX64L08250b SB-STX31L08250b SB-STX54L08250b SB-STX39L08250b SB-TXD43L10250 SB-STX34L08250 SB-STX63L08250 SB-STX81L08250 SB-STX71L08250 SB-STX37L08250 SB-STX73L08250 SB-STX65L08250 SB-STX64L08250 SB-STX31L08250 SB-STX54L08250 SB-STX39L08250 Grade 305 Color Matched Stainless Steel Screws SB-S||"Quantity and Color" "Select one:" "Bag of 20 - Ashwood 43 (SB-TXD43L10250b) (+$22.14)" "Bag of 20 - Brown 34 (SB-STX34L08250b) (+$20.26)" "Bag of 20 - Buckskin 63 (SB-STX63L08250b) (+$20.26)" "Bag of 20 - Cedar 81 (SB-STX81L08250b) (+$20.26)" "Bag of 20 - Chocolate 71 (SB-STX71L08250b) (+$20.26)" "Bag of 20 - Gray 37 (SB-STX37L08250b) (+$20.26)" "Bag of 20 - Java 73 (SB-STX73L08250b) (+$20.26)" "Bag of 20 - Rosy Brown 65 (SB-STX65L08250b) (+$20.26)" "Bag of 20 - Sand 64 (SB-STX64L08250b) (+$20.26)" "Bag of 20 - Tan Gray 31 (SB-STX31L08250b) (+$20.26)" "Bag of 20 - Warm Gray 54 (SB-STX54L08250b) (+$20.26)" "Bag of 20 - White 39 (SB-STX39L08250b) (+$20.26)" "-------------------------------" "Box of 100 - Ashwood 43 (SB-TXD43L10250) (+$96.88)" "Box of 100 - Brown 34 (SB-STX34L08250) (+$88.63)" "Box of 100 - Buckskin 63 (SB-STX63L08250) (+$88.63)" "Box of 100 - Cedar 81 (SB-STX81L08250) (+$88.63)" "Box of 100 - Chocolate 71 (SB-STX71L08250) (+$88.63)" "Box of 100 - Gray 37 (SB-STX37L08250) (+$88.63)" "Box of 100 - Java 73 (SB-STX73L08250) (+$88.63)" "Box of 100 - Rosy Brown 65 (SB-STX65L08250) (+$88.63)" "Box of 100 - Sand 64 (SB-STX64L08250) (+$88.63)" "Box of 100 - Tan Gray 31 (SB-STX31L08250) (+$88.63)" "Box of 100 - Warm Gray 54 (SB-STX54L08250) (+$88.63)" "Box of 100 - White 39 (SB-STX39L08250) (+$88.63)"||||||||||||||0||||||||||New||||||||||||||0||~~|^^|ststsc||item.||fastpivot-2007||azekfasten||||https://s.turbifycdn.com/aah/vintagewoodworks/grade-305-stainless-steel-screws-31.jpg||||Grade 305 Stainless Steel Screws||SB-ST||products > azpvcpr > azek-products-item > azekfasten > ||Products > AZEK® Brand PVC > AZEK® Product Listings > Fasteners for AZEK® > ||0.000||0.000 ||||||||||||1||1||1||0||||||||SB-TXCO7225b SB-TXCO7225 SB-TXDO7225 Grade 305 Stainless Steel Screws SB-ST||"Container" "Select one:" "Bag of 20 (SB-TXCO7225b) (+$13.94)" "1 lb. Box - 136 pcs (SB-TXCO7225) (+$41.48)" "5 lb. Box - 680 pcs (SB-TXDO7225) (+$180.44)"||||||||||||||0||||||||||New||||||||||||||0||~~|^^|graphic-linkpage||item.||fastpivot-2007||references||||||||Graphic, Link to a page ||||webmaster-pages > references > ||Webmaster Pages > YS How-To > ||||||||||||||||0||1||0||0||||||(nsnf/ckd) - see Links|| See Links||||||||||||||||0||||||||||New||||||||||||||0||~~|^^|graphic-linkpopup||item.||fastpivot-2007||references||||||||Graphic, Link to Pop-up ||||webmaster-pages > references > ||Webmaster Pages > YS How-To > ||||||||||||||||0||1||0||0||||||(nsnf/ckd) - see Links|| See Links||||||||||||||||0||||||||||New||||||||||||||0||~~|^^|graphics2||item.||fastpivot-2007||indevelopment||||||||Graphics||||webmaster-pages > indevelopment > ||Webmaster Pages > Store Work > ||||||||||||||||0||1||0||0||||newusagephotos usphre ||CATEGORY|| (nsnf/ckd) - Insert Graphics at Item Pages - Insert Graphics at each Section Page - Size/enlarge-ability. Several notes on PL/PR emails.||||||||||||||||0||||||||||New||||||||||||||0||~~|^^|graphics1||item.||fastpivot-2007||references||||||||Graphics ||||webmaster-pages > references > ||Webmaster Pages > YS How-To > ||||||||||||||||0||1||0||0||||||(nsnf/ckd)|| We will refer to the Image or Icon property of a given page as graphics. We also use graphics when we are talking about and image, photo, or line drawing. Related pages will help you get to correct section for help and info||||||||||||||||0||||||||||New||||||||||||||0||~~|^^|graphics-alt-title-tags||item.||fastpivot-2007||references||||||||Graphics, Alt & Title Attributes ||||webmaster-pages > references > ||Webmaster Pages > YS How-To > ||||||||||||||||0||1||0||0||||||(nsnf/ckd)|| Resource ALT Attribute The Alt attribute of the <img> HTML tag specifies text (alternative information) that will display if the image itself cannot be displayed due to slow Internet connection, error in the src (source) attribute, or use of a screen reader. Therefore, we should always include an Alt attribute in the <img> HTML tag, written as ALT="alternative text". Older versions of Internet Explorer display this 'alt' text when mousing over the image, but this is NOT correct behavior according to the HTML specification for the Alt attribute. TITLE Attribute The Title attribute of the <img> HTML tag displays text when mousing over an image. Therefore, we should always also include a Title attribute in the <img> HTML tag, written as TITLE="alternative text". Use the same text as used for the ALT attribute. Image below has ALT="Text if image does not display" attribute in the Image tag. When hoovering over this image with older versions of I.E., "Text if image does not display" may be displayed. In Firefox NO text will be displayed. Image below has TITLE="Name for graghic - additional information" in the Image tag. When hoovering over it in I.E. or Firefox the "Name for graghic - additional information" text is displayed. Image below has both ALT and Title attributes in Image tag: ALT="Text if image does not display". TITLE="Name for graghic - additional information" When hoovering over it in I.E. or Firefox the "Name for graghic - additional information" text is displayed.||||||||||||||||0||||||||||New||||||||||||||0||~~|^^|grhowtochfig||item.||fastpivot-2007||references||||||||Graphics, Editing a Fireworks Graphic||||webmaster-pages > references > ||Webmaster Pages > YS How-To > ||||||||||||||||0||1||0||0||||||(nsnf/ckd)|| 1. Make sure EF has left graphic with ungrouped elements and is acsessible to edit parts. 2. Open the png version of the file on the i-Drive Server while in Fireworks. A. File Menu > Open B. Specify location (see 6B. below) C. If it asks, "Maintain File Location" 3. Click on the element you want to change. (Double click to edit text.) 4. To move an element, select pointer tool (first one at top) and click arrow keys or drag. 5. Save (saves png) A. Specify location on i-Drive Server. For SWS graphics this would be i-Drive > 40. Publishing > Images > Outside Our Numbering System > Sale Images WS Graphics > Folder: 5.SWS 6. Save as jpeg A. File Menu > Save As B. Select .jpg in 2nd dropdown and save to same location as .png referenced above. 7. When finished with each Fireworks file be sure to close tab at top (x).||||||||||||||||0||||||||||New||||||||||||||0||~~|^^|graphics-embedded||item.||fastpivot-2007||references||||||||Graphics, Embedded ||||webmaster-pages > references > ||Webmaster Pages > YS How-To > ||||||||||||||||0||1||0||0||||||(nsnf/ckd) - also see Introduction (Cat) Pgs at Standard Formats|| (approved ?.??.??/??) Also, see Introduction (Category) Pages at Standard Formats. (#15.91.95.61 Page Layout) When graphics (photos or other images) need to be located in a area other than the "Image," "Icon," or "Inset" fields, they should be embedded in the Caption. 1. Text Flow The graphic can be manipulated to have the text appear in a variety of ways: A. Wrapped around the graphic B. Aligned with the top, bottom, or middle of graphic C. After the graphic (leaving the graphic alone on one line). 2. Permanently Embed Graphic = Putting into HTML on Webpage A. First determine if a graphic has already been placed permanently at the store. (1) Right click on graphic at Store page and select Properties. (2) Look at Locations (Address). If placed permanently, the address will start with http://lib.store.yahoo.net/lib/vintagewoodworks/ei- ... a. Permanently embedded graphics are saved on our Server and at the YS Library. (Winter Sale Banners are located at Server > i\40 Publishing\Images\Outside our Numbering System\Yahoo Store Embedded Images and at i\40 Publishing\Images\Outside our Numbering System\Sale Images\WS Graphics b. Each permanently embedded graphic's name starts with ei- (3) If graphic was previously placed permanently, simply use the following when embedding on a page: a. <img src="https://sep.turbifycdn.com/ty/cdn/vintagewoodworks/ei-?t=1764692804&graphic name> b. Don't forget to add other required Attributes to the HTML, such as ALT="text" and TITLE="text" B. To Save a Graphic Permanently to the Store into Lib Files: (1) Upload the graphic with a new "ei" version name of the file to YS File Library (Lib Files) a. Yahoo Store > Click 'Files' button in a new tab (CTRL + Files) b. Click 'Upload' button (2nd row) c. Click 'Browse' and navigate to graphic on Server d. Double click on File Name. e. Back in 'Upload' box, #2. Enter the name you want this file to have on the server (e.g. foo.gif). You have to choose some name for it. Enter the appropriate ei name for the image including suffix (.jpg) f. Click 'Send' g. Repeat steps b-f for each file you need to upload (currently, 3 for sale banners) h. You can verify your work at Lib Files by clicking on a staged file and then opening it with your browser. i. Note: Clicking "Publish All Staged Files" near top of Library Files (takes a few minutes and a rotating circle in tab name is the only indicator that publishing is taking place) will cause changes to display in public mode immediately after Staged File publishing is completed. To avoid this, such as when changing a banner file for the next sale in a series, you can stage changed files and wait for the entire Store to be published, as that will publish staged files automatically. j. If you're waiting to publish entire Store before automatically publishing Staged Files, you can verify your changes in Edit Mode. (Be sure to refresh Store page after changing a Lib File.) (3) Navigate to page where you want to embed this graphic (or where it's already embedded to see that changes have been made). a. If embedding for first time, paste appropriate HTML code, changing the pop-up page URL, IMG SRC location, and ALT & TITLE tags as needed. Examples for Sale Banner w/ pop-up: HOME Banner <CENTER><a href="javascript:testWindow('sale-popup.html')"><IMG SRC="/lib/vintagewoodworks/ei-promo-banner-home.jpg" ALT="Sale Banner" TITLE="Sale Banner" BORDER=0></a></CENTER> PRODUCT Banner <CENTER><a href="javascript:testWindow('sale-popup.html')"><IMG SRC="/lib/vintagewoodworks/ei-promo-banner-product.jpg" ALT="Sale Banner" TITLE="Sale Banner" BORDER=0></a></CENTER> b. If HTML code already exists but changing from temporary to permanent file reference (or any other reason to change), simply replace IMG SRC lib file location. Example: IMG SRC="/lib/vintagewoodworks/ei-promo-banner-home.jpg" (4) If New Graphic doesn't display, file name is probably wrong. If so, go back to Library Files at Store, delete wrong file, and redo. (5) Publish store (6) To View a File from Library Files a. Click on the File Name (URL) in Lib File list. b. In popup box, click next to Open and then Browse to select Internet Explorer and click OK. c. It should open in your browser. Three HTML Attributes Required Embedding a Graphic/Image into the Caption field requires the following HTML tag with 3 attributes: <IMG SRC="image url" ALT="alternative text to be displayed when graphic cannot be displayed" TITLE="same text as in alt attribute"> Additional attributes to control location of graphic align="right" The graphic will be placed at the right margin of the page. All text will appear to the left of the graphic. align="left" The graphic will be placed at the left margin of the page. All text will appear to the right of the graphic. Adding space to graphic without editing graphic Horizontal Space HSPACE controls amount of space added to both left and right of graphic Vertical Space <img src="https://sep.turbifycdn.com/ty/cdn/vintagewoodworks/ei-prod-brkt-crescent1114?t=1764692804&" alt="example" title="example" align="left" VSPACE="20"> VSPACE controls amount of space added to both top and bottom of graphic. Border around graphic When graphics/images are used as links, the blue border around the graphic can be removed by adding the attribute BORDER="0" Sizing a Graphic To manually size a graphic if it is too large or too small, you use a width and height command for the image. width="150" height="135" Adjust the width and height as needed until you get the size you need. Steps 6 - 10 should be done by FBG office. 6. Review Embeded Graphics A. Do monthly review of embedded graphics. B. Do not correct embedded graphics for at least 2 months (allowing some time for changes) C. In EDIT Mode select "Contents" then "images-in-caption-incorrectly" D. Click on link to show graphic E. Right click on graphic, click "Save As" F. Locate file: \\Vww-39\i\40 Publishing\Images\Outside our Numbering System\ Yahoo Store Embedded Images (1) Give graphic a proper new name a. Unfortunately, the program at YS will replace a file with the same name without notification. b. In order to avoid naming our graphics with the same name as what YS or FP used, we begin all graphic File Names with ei- (embedded image) (2) Examples: a. Info pages - ei-info-... b. Google Feed pages - ei-gf-category-sku.jpg c. Reference pages - ei-ref-.... d. Products - ei-prod-door7102-1 (use "-2" for larger pop-up graphics) e. Promotions - ei-promo-.... f. Vendor - ei-'az'-(AZEK), ei-'yw'-(YellaWood) etc..... g. View names on file for more examples h. Follow the steps above for several graphics at one time (3) Open the YS Library Files in a new tab (CTRL + Files) a. Click "Upload" b. Click "Browse" and navigate to location of all Yahoo Store Embedded Images c. Double click on File Name d. Enter the File Name you want this file to have on our Server e. Use the ei-... name without the .jpg, .gif, or .png (ei-prod-door7102-1) f. Once all saved files have been downloaded, click "Publish All Staged Files" 7. When the files have been published, return to the "images-in-caption-incorrectly" page 8. Click on link to edit the page. 9. Locate the embedded graphic HTML and replace the URL with the new URL at the YS Library File location A. Example: "/lib.vintagewoodworks/ei-prod-door7102-1" B. Update page. C. Check to see that the graphics are the same - change as needed. 10. Do NOT publish store for these changes, just wait for next publishing. ==================================== (1) Open Fireworks (even if they graphic doesn't need editing) a. File Menu > Open > Navigate to image location on our Server. (Winter Sale banners are located at Server > i\40 Publishing\Images\Outside our Numbering System\Sale Images\WS Graphics\ b. Click 'Open' or double-click c. Do a 'Save As' i. Save in the "Embedded Images" folder on Server > i\40 Publishing\Images\Outside our Numbering System\Yahoo Store Embedded Images ii. Rename with "ei" prefix and "jpg" suffix. Examples for sale banners: ei-promo-banner-home.jpg ei-promo-banner-product.jpg ei-promo-banner-door.jpg iii. If you are wanting to replace an existing graphic at YS, you must use the exact same file name. The computer will beep to let you know file exists and that you will be replacing with a file of the same name. Yes, you want to replace it. ||||||||||||||||0||||||||||New||||||||||||||0||~~|^^|graphics-pdf||item.||fastpivot-2007||references||||||||Graphics, from PDF||||webmaster-pages > references > ||Webmaster Pages > YS How-To > ||||||||||||||||0||1||0||0||||||(nsnf/ckd)|| 1. Download pdf and save to server 2. Open pdf from server 3. Click camera icon in tool bar (or may be menu item on some PDF versions) and highlight graphic 4. Click ok 5. Paste to Fireworks||||||||||||||||0||||||||||New||||||||||||||0||~~|^^|graphics-locating-files||item.||fastpivot-2007||references||||||||Graphics, Locating Files||||webmaster-pages > references > ||Webmaster Pages > YS How-To > ||||||||||||||||0||1||0||0||||||(nsnf/ckd)|| 1. Open FileMaker Pro 2. Click "Open Existing File." 3. Navigate to "I on VWW 39 / 40 Publishing / Images / Database of Images" 4.Click on "Records" then "Modify Last Find," A. Scroll down to "Website URL Usage" section. B. Enter Photo in question in first box (1) Format: Section Photo #__ Examples: Porch Photo #44 or Bracket Photo #2 5. Click "Find." 6. If not found, try entering photo on second box and clicking "Find." 7. A photo can be used on multiple Usage Photo sections. A. It may be necessary to search on third, or forth box. 8. The number needed to locate on server and/or physical file folder is the Graphics Number A. Locating Physical Files: (1) Publishing files are stored in BIG Office. (2) Stored in numerical order in file cabinets in front of Cubical # 1. (3) If file is not there, check files pulled for Porch Post Photos. a. Location: Hanging file folders on desk of Cubical # 1 b. Cross Reference printout located in front of hanging files. c. Each green hanging folder holds 10 files. d. If a file is pulled do the following: i. Prior to pulling file write File Number on scratch paper (full size). ii. Pull file and place scratch paper standing up right as a place holder. iii. Write "Refile w/photos pulled for Porch Posts" on smaller scratch paper. iii. Paperclip refile note to file and deliver file. B. Locating Server Files: (1) Navigate to "I on VWW 39 / 40 Publishing / Images" (2) Select "Usage Photos." (3) Select category. (4) Porch Photos are broken into 2 categories: a. Houses - full view of houses b. Porches - view of only the porch 9. Refiling physical files: A. File back in numerical order (when applicable). B. File pulled for Porch Post Photos (1) Remove small scratch paper. (2) Place file in front of place holder scratch paper. (3) Remove place holder scratch paper. Alternative method for locating Porch Photos 1. In EDIT mode, navigate to Porch Photo. 2. Click "Edit". 3. File sub-category and number for graphic are located in "Caption" field in a comment html. A. <!-- House #123 --> B. <!-- Porch #123 --> 4. Follow steps 8 & 9 from above.||||||||||||||||0||||||||||New||||||||||||||0||~~|^^|router-bit||item.||fastpivot-2007||concealoc||||https://s.turbifycdn.com/aah/vintagewoodworks/groove-cutting-router-bit-41.jpg||||Groove Cutting Router Bit||CONCEALoc||products > azpvcpr > azek-products-item > azekfasten > concealoc > ||Products > AZEK® Brand PVC > AZEK® Product Listings > Fasteners for AZEK® > CONCEALoc® Hidden Fastener System > ||46.990||46.990 ||||CONCEALoc® Groove Cutting Router Bit||||||||1||1||0||0||||||||  Use the CONCEALoc® Router Bit to correctly groove a solid AZEK® or TimberTech® Deck Board for CONCEALoc® Hidden Fasteners. 1/4" shank, carbide-tipped 3-wing cutter, and re-configured sealed bearings to allow grooving already installed planks. Use the CONCEALoc® Router Bit to correctly groove a solid AZEK® or TimberTech® Deck Board for CONCEALoc® Hidden Fasteners. 1/4" shank, carbide-tipped 3-wing cutter, and re-configured sealed bearings to allow grooving already installed planks.||||||||||||||||0||||||||||New||||||||||||||0||~~|^^|groupf||item.||fastpivot-2007||newporchphotos||||||||Group F||||webmaster-pages > indevelopment > porches5 > newporchphotos > ||Webmaster Pages > Store Work > Porches > New Porch Photos > ||||||||||||||||0||1||0||0||||||(nsnf/ckd)|| F1 = #3 F2 = #4 ----------------- Sometimes the best solution may be a multi-sided porch. Here are two examples. PHOTO #F-1 Using two posts to make each 45 degree front corner. PHOTO #F-2 The more traditional approach, using one post at each 45 degree corner.||||||||||||||||0||||||||||New||||||||||||||0||~~|^^|grouph||item.||fastpivot-2007||newporchphotos||||||||Group H||||webmaster-pages > indevelopment > porches5 > newporchphotos > ||Webmaster Pages > Store Work > Porches > New Porch Photos > ||||||||||||||||0||1||0||0||||||(nsnf/ckd)|| H1 = #466 H2 = #463 H3 = #464 H4 = #??? - GT had a note on H3 folder that said "H4 - remove" H5 = #467 ----------------- Smaller porches, particularly those with delicate pastel color schemes, are often enhanced with smaller decorative items. Photo H-1 This picture perfect porch should put anyone visiting this psychotherapy office in a good frame of mind. Photo H-2 Painting the rings on this small porch is all it took to tie it to the color scheme. Photo H-3 Small Spandrel and Fan Brackets compliment this Victorian Cottage style home very well. On the other hand, small porches on large homes often need to go bold with their decorations! Photo H-4 Here 8 medium-sized Corbels (originals - includes 2 behind each post) were joined by our Old Lace Gable Decoration to add heft to a small porch on a large 2-story house. Photo H-5 The small porch on this 2-story home incorporates multiple techniques to add substance. The porch itself features a small gable with fancy cut shingles, pulled forward to add more room on the porch. This also allows two more posts with their attendant trim. Steps are slightly narrower than the two front posts, permitting the use of Newel Posts at both top and bottom of the steps. SR #4 Spandrel Brackets permit use of 6-1/2" Wisteria Spandrels while maintaining adequate headroom. 23" Cupid's Key Post Face Brackets extend across the face of the beam above the posts to complete the top decorations while substantial 3" Turned Balusters and Sloped-top Bottom Rails add their own heft to the balustrade area. Note also the appropriate use of Half Posts at the walls. By using larger-sized components on a more intricate porch structure, these owners have created a wonderfully inviting porch that greatly enhances the 'curb appeal' of their fine home.||||||||||||||||0||||||||||New||||||||||||||0||~~|^^|groupi||item.||fastpivot-2007||newporchphotos||||||||Group I||||webmaster-pages > indevelopment > porches5 > newporchphotos > ||Webmaster Pages > Store Work > Porches > New Porch Photos > ||||||||||||||||0||1||0||0||||||(nsnf/ckd)|| I1 = #460 I2 = #461 I3 = #462 ----------------- Not enough 'flat' at the top of the Porch Posts to accommodate your chosen Brackets? See if they will fit horizontally. Horizontal Bracket installation is also a good way to preserve limited headroom. Photo #I-1 Brackets on turned post tops should fit entirely within the unturned flat area. These horizontally mounted Brackets hang into the turned area only very slightly. That's much better than if they were installed vertically. Usually we can omit a small amount of the Bracket design if necessary to provide proper fit. Photo #I-2 These 21" Scroll Brackets are long realive to their height. They are a good choice for this porch because the Posts have a very limited unturned flat area at their tops. By chosing a relatively long Bracket, you can often achieve the desired overall Bracket size without violating the "must fit the flat" rule. Ampersand Gable Decoration also adds decorative flair. #I-3 These Posts are chamferred rather than turned, but they still have minimal flat space at their tops. Also, judging from the door height, there is limited headroom. (Same limitation on previous house.) Horizontally installed Bird of Paradise (right) and 21" Scroll (left)Brackets nicely solve both issues for this home.||||||||||||||||0||||||||||New||||||||||||||0||~~|^^|groupj1||item.||fastpivot-2007||newporchphotos||||||||Group J||||webmaster-pages > indevelopment > porches5 > newporchphotos > ||Webmaster Pages > Store Work > Porches > New Porch Photos > ||||||||||||||||0||1||0||0||||||(nsnf/ckd)|| J1 = #468 J2 = #469 ----------------- Chalet style homes often have broad gables sheltering a second floor porch. Sawn Balusters are very traditional for this style. Photo J-1 The intricate repeating pattern of Spear Sawn Balusters constrast playfully against the solid lines of this Swiss Chalet-style log home while providing a delightful underpinning for the full length flower box. Photo J-2 Heart & Fleur Sawn Balusters move this large cabin-style home towards its Chalet-style roots.||||||||||||||||0||||||||||New||||||||||||||0||~~|^^|groupk||item.||fastpivot-2007||newporchphotos||||||||Group K||||webmaster-pages > indevelopment > porches5 > newporchphotos > ||Webmaster Pages > Store Work > Porches > New Porch Photos > ||||||||||||||||0||1||0||0||||||(nsnf/ckd)|| K1 = #470 K2 = #471 K3 = #472 K4 = #473 ----------------- As you have seen, the decorative possiblities using Vintage Woodworks items are almost endless. However, sometimes all the owners want are the simplicity of Fan Brackets. Photo K-1 Photo K-2 Photo K-3 ||||||||||||||||0||||||||||New||||||||||||||0||~~|^^|guarantee||item.||fastpivot-2007||screendooror||||||||Guarantee||||products > screenstordo > screendooror > ||Products > Screen/Storm Doors > Info - Screen & Storm Doors > ||||||||||||||||0||1||0||0||||||Click to read about our guarantee||We gladly guarantee each Vintage Woodworks Screen/Storm Door against joint failure for 20 years of normal residential use if an adequate protective finish is maintained. However, if kept well painted, your door should actually last at least a lifetime... a lifetime of beauty and usefulness... a lifetime of openings and closings, even by little children! Because of their flat backs, they are the professional, traditional way to terminate Balustrades and post top decorative trim against a wall. See photo below. Vintage Woodworks provides Half Posts (Porch or Newel) already split and ready to install. The backs of all Half Posts should receive two or three coats of paint prior to installation. This includes Posts clad with synthetic materials such as AZEK or Polyurethane if they have wooden cores. Likewise, the bottoms of all Posts should be painted. When Half Posts are to be installed on an uneven wall surface, such as siding, brick, or stone, you should first install a plain 3/4" thick board that is about 1/2" to 1" wider overall than the Post. Spaces between this plain board and the wall surface should be caulked. Handrail is installed last. Handrail is applied on top of the Subrail (if used), thereby concealing the nails or screws used to hold the Baluster tops. By screwing up through the bottom of the Subrail into the bottom of the Handrail, all exposed hardware is eliminated! The width of the channel in the bottom of your Handrail must, of course, accommodate the width of the Subrail used. Feel free to order as many Handrail samples as you wish. Return to previous page CA Resident WARNING ||"Design" "Select one:" "------------" "P-2 Handrail (+$2.00)" "P-2 SET w/ Plain Subrail & S/T Bottom Rail (P2/SR/ST) (+$3.50)" "P-2 SET w/ Beaded Subrail & S/T Bottom Rail (+$4.00)" "----" "P-3 Handrail (+$2.00)" "P-3 SET w/ Plain Subrail & S/T Bottom Rail (+$4.00)" "P-3 SET w/ Beaded Subrail & S/T Bottom Rail (+$4.50)" "----" "P-4 Handrail (+$2.00)" "P-4 SET w/ Plain Subrail & S/T Bottom Rail (+$4.50)" "P-4 SET w/ Beaded Subrail & S/T Bottom Rail (+$5.00)" "----" "PVC Savannah Handrail (with U-Channel Insert) (+$4.45)" "PVC Savannah Handrail (with U-Channel Insert & I-Beam Support) (+$6.99)" "----" "PVC Standard Handrail (with U-Channel Insert) (+$3.84)" "PVC Standard Handrail (with U-Channel Insert & I-Beam Support) (+$6.37)" "----" "PVC Wood Core Handrail (+$3.00)" "----" "Solid Wood Handrail (+$2.00)" "YellaWood Handrail (+$2.00)"||||||||||||||0||||||||||New||||||||||||||0||~~|^^|handrails||item.||fastpivot-2007||rail-item||||https://s.turbifycdn.com/aah/vintagewoodworks/handrails-18.jpg||||Handrails||||products > rails > rail-item > ||Products > Rails > Rail Product Listings > ||||||||||||||||0||1||0||0||||pvc-savannah-top-rail pvc-standard-top-rail pvcwocoha p-handrails poly-rails-1 ||Click for 7 Designs|| Please consider Cellular PVC (synthetic wood) or Cypress for exterior Handrails. Otherwise, Poplar is better than Pine for exterior use because it is denser. We are currently unable to obtain Western Red Cedar at reasonable prices in the quality and lengths we require for Handrails. Interior Handrails are also available.||||||||||||||||0||||||||||New||||||||||||||0||~~|^^|hardware||item.||fastpivot-2007||screendooror||||||||Hardware||||products > screenstordo > screendooror > ||Products > Screen/Storm Doors > Info - Screen & Storm Doors > ||||||||||||||||0||1||1||0||||||Click for hardware info||We do not carry hardware for our Doors. It is difficult to recommend specific hardware, as installation requirements vary widely. Please check with your local hardware store, as many carry hardware specifically for the narrower frames of Screen Doors. You can also research online. Below are some websites that had screen door hardware when we last checked. At each, follow their menus to locate Screen Door Hardware or search the site for 'screen door hardware'. Alternatively, it may be possible to purchase just a narrow backplate (Google 'door hardware backplate' for starters) to use with hardware not specifically designed for Screen Doors. We have many of our Screen Doors installed in our remote "accounting and advertising" offices. These are our standard Screen Doors, except we've fitted the storm glass option in place of screens to use them as interior french doors. We used french door-style latch/handle hardware, as this style of hardware features a narrow backplate.
Harvest Bronze Hazelwood ||55522 55523 55524 55525 55532 55533 55534 55535 Full Head Blocks Top Head Blocks||"Design and Size" "Select one:" "Full Head Block 7/8'' x 2-1/2'' x 8-1/8'' (55522) (+$13.48)" "Full Head Block 7/8'' x 3-1/2'' x 10-1/4'' (55523) (+$19.62)" "Full Head Block 1'' x 4-1/2'' x 12-3/4'' (55524) (+$22.07)" "Full Head Block 1'' x 5-1/2'' x 13-3/4'' (55525) (+$24.52)" "----------" "Top Head Block 7/8'' x 2-1/2'' x 5-3/8'' (55532) (+$12.25)" "Top Head Block 7/8'' x 3-1/2'' x 7'' (55533) (+$17.17)" "Top Head Block 1'' x 4-1/2'' x 8-3/4'' (55534) (+$19.62)" "Top Head Block 1'' x 5-1/2'' x 9-3/4'' (55535) (+$22.07)"|^|"Material" "Select one:" "Pine, Yellow - jYP !T" "Cypress - j500 !T" "Oak, Red - j100 !T" "Oak, White - jWO !T" "Pine, White !T" "Poplar - j400 !T" "PVC - jPV !T" "----------------------------------------------" "I'll contact you about another wood." "Contact me about another wood."|^|"Add Corner Block design" "Select one:" "No thanks" "------------" "Design 1 (j001) (+$6.07)*" "Design 2 (j002) (+$6.07)*" "Design 3 (j003) (+$6.07)*" "Design 4 (j004) (+$6.07)*" "Design 5 (j005) (+$6.07)*" "Design 6 (j006) (+$6.07)*" "Design 7, same direction (j007same) (+$6.07)*" "Design 7, opposite direction (j007opposite) (+$6.07)*"|^|"Quantity Based Pricing" "Select one:" "Ordering 7 or more identical items" "Ordering 3 to 6 identical items !1" "Ordering 2 identical items !1" "Ordering only 1 identical item !1"||||||||||||||0||||||||||New||||||||||||||0||~~|^^|mouldingphoto9||item.||fastpivot-2007||moblet||||https://s.turbifycdn.com/aah/vintagewoodworks/moulding-photo-9-16.jpg||||Head Blocks & Miscellaneous Moulding Photo||||products > mouldings > moblet > ||Products > Mouldings > Usage Photos - Mouldings & Blocks > ||||||||||||||||0||1||0||0|||||| Click for more views|| Return to previous page 2. These items are not edited by VWW. A programmer will adjust sheet upon request. 3. Header consist of three rows of buttons and/or links A. First row - Home Bar B. Second row - Button Bar C. Third row - Our Story Bar 4. Some parts of the Header are editable by EF (only). A. Variables > Custom Variables area > Header box Shipping Notice: Our current shipping schedule is unusually long for us but we refuse to compromise on quality. Thanks for understanding during these unusual times!||||||||||||||||0||||||||||New||||||||||||||0||~~|^^|hebaatwepa||item.||fastpivot-2007||barostar||||https://s.turbifycdn.com/aah/vintagewoodworks/header-bargains-24.jpg||https://s.turbifycdn.com/aah/vintagewoodworks/header-bargains-25.jpg||Header Bargains||||webmaster-pages > q-storage > barostar > ||Webmaster Pages > Storage Area > Bargain Room Storage > ||||||||Bargain Room - Headers||||||||0||1||0||0||||||Click for Details (nsnf/ckd)|| With their “straight” bottoms, Headers are very appropriate over windows, doors, or almost anything you wish to decorate. OPTIONAL BOTTOM RAIL (shown in photo) - We’ll gladly install our moulded Bottom Rail on any of your Headers. This Rail is 3/4" tall and will add 2" to the length of the Header. It’s nicely moulded on the ends and front edge and is mounted flush with the back of the Header. Please indicate if you would like your Headers with Bottom Rails. The Headers listed below are FIRST QUALITY, unless otherwise noted. All differ in some way from our standard for that item, so they may differ from the picture. We will list this difference for each. (Drawings not to scale.) Paint grade means small cracks, chips, discoloration, etc. These will look great once they are painted. All sale Headers are listed here in the Bargain Room. Order a Header from the Bargain Room and you automatically move to the front of the line for almost immediate shipment of these items! And our regular return policy applies - a prompt refund if returned in the same condition and before finishing and installation. See our main Header page for our complete selection or to order more than is available here.||||||||||||||||0||||||||||New||||||||||||||0||~~|^^|headers||item.||fastpivot-2007||products||||https://s.turbifycdn.com/aah/vintagewoodworks/headers-28.jpg||||Headers||vww||products > ||Products > ||0.000||0.000 ||||||||||||1||1||0||0||||||4 Designs||Headers Quincy 2110n24 2110n34 Danbury 2126n36 2126n48 S 2138 Meredith 2107n13 2107n18||"Design" "Select one" "Quincy (2110n24) (+$56.45)" "Quincy (2110n34) (+$100.64)" "----------------------------------------" "Danbury (2126n36) (+$100.64)" "Danbury (2126n48) (+$115.38)" "----------------------------------------" "''S'' (2138) (+$49.08)" "----------------------------------------" "Meredith (2107n13) (+$44.16)" "Meredith (2107n18) (+$49.08)"|^|"Thickness" "Select one:" "3/4'' !1" "1'' !1" "1-1/4'' !1" "1-1/2'' !1"|^|"Material" "Select one: (Last selection is ''Other'')" "Poplar - j400 !1" "Cedar, Western Red - not available in 3/4'' thickness - j200 !1" "Cypress - j500 !1" "Oak, Red - j100 !1" "Oak, White - jWO !1" "Pine, White !1" "PVC - jPV !1" "Redwood - j300 !1" "--------------------" "Other - I'll contact you about another wood and/or thickness." "Other - Contact me about another wood and/or thickness."|^|"Bottom Rail" "Select one:" "No thanks" "Yes, please add flat-backed Rail - 2101 !1" "Yes, please add moulded-backed Rail - 2101 !1"|^|"Sale Item? (see Sale Listings)" "Select one" "YES, it is on Sale List." "NO, it is NOT on Sale List."|^|"Shipping Info" "Select one:" "- This item is 46'' or longer. I read the 'Important Shipping Info' link above." "- This item is less than 46'' in length."||||||||||||||0||||||||||New||||||||||||||0||~~|^^|heading||item.||fastpivot-2007||references||||||||Headings ||||webmaster-pages > references > ||Webmaster Pages > YS How-To > ||||||||||||||||0||1||0||0||||||(nsnf/ckd)|| Note: Browsers automatically add some empty space (a margin) before and after each heading. Headings are supposed to be good for Spiders. Heading 1 Example<h1> Text for Heading </h1>Heading 2 Example<h2> Text for Heading </h2>Heading 3 Example<h3> Text for Heading </h3>Heading 4 Example<h4> Text for Heading </h4>Heading 5 Example<h5> Text for Heading </h5>Heading 6 Example<h6> Text for Heading </h6>||||||||||||||||0||||||||||New||||||||||||||0||~~|^^|popup-heartfleur-usage||item.||popup||hold-sawnusage||||||||Heart & Fleur Sawn Baluster Usage Photo||||popup-pages > balusterpopups > hold-sawnusage > ||Pop-up Windows (Pages) > Baluster Pop-ups > Sawn Baluster Usage Photos pop-ups > ||||||||||||||||0||1||0||0||||||(nsnf/ckd)||Height While local building codes should always be followed, Handrails are visually pleasing at a height of 30" - 32". For second story porches and balconies, at least 36" is necessary for safety. Please see our Exterior Baluster Height Calculator to determine which Baluster length will achieve your desired Handrail height. We can cut your Balusters to length. Size If using Turned Balusters, our 3" size is much better than 2" when used with 6" Porch Posts. If the budget allows, this size is also more pleasing with 5" Posts. To achieve the best effect, spacing should be about 6" on center. A very cost effective solution is our 2" x 3" Cedar Baluster. If you install them with the 3" side facing toward the street they will look more like 3" Balusters, but are much less expensive. Our 4" Cedar Balusters should only be used with 6" Posts. When the budget will allow they provide a very substantial effect. We have Handrail, Subrail, and Sloped-top Bottom Rail, to fit our 4" Balusters. "Everyone was very helpful with answering my questions! And thank you for the extra help!" - Lisa C., UT "Let me tell you that not only [does Vintage Woodworks] carry a vast variety of old and new styles, their customer service takes me back to days of old, when the customer came first. They go the extra mile to help. They should start a consulting company... 'Vintage Consulting,' and teach these new companies how to do it right!" - H. Folmer, California Please select a topic below to continue.||||||||||||||||0||||||||||New||||||||||||||0||~~|^^|help-desk-listings||item.||fastpivot-2007||references||||||||Help Desk Listings||||webmaster-pages > references > ||Webmaster Pages > YS How-To > ||||||||||||||||0||1||0||0||||||(nsnf/ckd)|| This property can only be accessed under the "Variables" tab while in EDIT Mode. DO NOT CHANGE UNLESS INSTRUCTED BY MANAGEMENT Controls what is displayed under Help Desk section of Left Nav Bar. Like cross-sell-ids, the pages are listed using their Ids only (that is, without .html) Items on the Help Desk page live at Help Desk. 1. Help Desk listings can be altered using Additional-leftnav-links2-ids property. A. Click on "Variables" B. Navigate to the "Additional-leftnav-links2-ids" field. C. Review and/or edit listings. (1) Listings are listed from top to bottom according to the left to right listing at the Additional-leftnav-links2-ids field. (2) Listing are the product page ID (URL minus the ".html" suffix). 2. Name of second Leftnav can be changed by doing the following A. Navigate to the "Additional-leftnave-links-2-title" field B. Review and/or edit title and update page. ||||||||||||||||0||||||||||New||||||||||||||0||~~|^^|hemlock||item.||popup||materials||||||||Hemlock||||popup-pages > materials > ||Pop-up Windows (Pages) > Materials > ||||||||||||||||0||1||0||0||||||(nsnf/ckd)|| Western Hemlock WoodOur Hemlock items are made from clear, kiln-dried Western Hemlock. Like Pine, it is classified as a "softwood". Although Western Hemlock lacks the special weather resistant qualities of Cedar or Cypress, it is a traditional and widely used wood for exterior balustrade components. Indeed, it is the most common wood species for exterior Turned Porch Posts, Balusters, and Handrails. Western Hemlock should perform very satisfactorily if our painting and installation instructions are followed. Painting Exterior Trim After checking for proper fit, but before installation, completely paint all surfaces of exterior trim with a coat of premium oil based primer and multiple coats of quality oil-based paint. This will protect the wood for a longer life span, as oil-based paint tends to penetrate and bond with the wood surface better. Latex paints do not provide the thicker and harder surface protection exterior trim requires. Likewise stains, while fine for cedar, redwood, and interior work, don't adequately inhibit internal moisture changes. Wood's end grain absorbs moisture readily, so use extra coats of paint on all ends! Remember to refinish before the paint starts wearing thin or peeling.
- see Items-per-page|| See Items-per-page||||||||||||||||0||||||||||New||||||||||||||0||~~|^^|hide-related-pages||item.||fastpivot-2007||references||||||||Hide Related Pages ||||webmaster-pages > references > ||Webmaster Pages > YS How-To > ||||||||||||||||0||1||0||0||||||(nsnf/ckd) - see Sansrightnav (P)|| See Sansrightnav (P)||||||||||||||||0||||||||||New||||||||||||||0||~~|^^|hide-prev-button||item.||fastpivot-2007||references||||||||Hide-prev-button ||||webmaster-pages > references > ||Webmaster Pages > YS How-To > ||||||||||||||||0||1||0||0||||||(nsnf/ckd) - also see Info Pages at Standard Formats|| also see Info Pages at Standard Formats The fastpivot-2007 template has an automatic setting to show < Previous page that displays in the upper right hand of a given page below Header Info. Suppress "< Previous Page" Property = Hide-prev-button Type = yes/no Important: As we create new category pages with the horizontal index, it is important to disable this function. Example: OPG - Overview||||||||||||||||0||||||||||New||||||||||||||0||~~|^^|hide-price-initially||item.||fastpivot-2007||references||||||||Hide-price-initially ||||webmaster-pages > references > ||Webmaster Pages > YS How-To > ||||||||||||||||0||1||0||0||||||(nsnf/ckd)|| Property Type = yes/no Controls whether or not amount in Price field will be displayed initially 1. Item pgs without Options are set to automatically display the amount in the "Price" field. 2. VWW chooses not to have any prices displayed for Items unless on Sale or in the Bargain Room. 3. To "hide" the price, add a new property: A. At the appropriate page click "Edit" and then click "New Property" B. "Name" field = "Hide-price-initially" C. "Type" field = "yes - no" D. Click "Continue" and the edit page will refresh. D. Set "Hide-price-initially" field to "Yes" and click "Update." Currently no example. We have flattened most pages and do not use this property very much.||||||||||||||||0||||||||||New||||||||||||||0||~~|^^|hipo||item.||fastpivot-2007||poco||||https://s.turbifycdn.com/aah/vintagewoodworks/hipped-roof-porch-16.jpg||||Hipped-roof Porch||||products > porches > porin > bunewpo > poco > ||Products > Porches - START HERE! > ONLINE PORCH GUIDE > Understanding the Porch > Porch Shapes and Rooflines > ||||||||||||||||0||1||0||0|||||||| Hipped-roof Porch Click on photo for additional views - see Return to previous page|| See Return to previous page||||||||||||||||0||||||||||New||||||||||||||0||~~|^^|horul||item.||fastpivot-2007||references||||||||Horizontal Rule (line) ||||webmaster-pages > references > ||Webmaster Pages > YS How-To > ||||||||||||||||0||1||0||0||||||(nsnf/ckd)|| Standard Horizontal Rule is centered, 40% of page width, and gray: <hr width="40%" color="gray" /> Plain <hr /> - Displays all the way across page: size=_____ - Changes thickness of the Rule. Note that the line will not be filled in less the color attribute is added to tag. <hr size=2 /> <hr size=3 /> <hr size=4 /> <hr size=5 /> <hr size=6 /> <hr size=7 /> <hr size=8 /> <hr size=9 /> <hr size=10 /> color=_____ - Fills Rule: Examples below show size 10 in various colors <hr size=10 color=green /> <hr size=10 color=black /> <hr size=10 color=red /> <hr size=10 color=orange /> width=______ - controls the length of the rule. HR width of 75%, size 10, color Pink <hr size=10 color=pink width="75%" /> HR width of 50%, size 10, color Pink <hr size=10 color=pink width="50%" /> HR width of 10%, size 10, color Pink <hr size=10 color=pink width="10%" /> ||||||||||||||||0||||||||||New||||||||||||||0||~~|^^|cohohopl||item.||fastpivot-2007||products||https://s.turbifycdn.com/aah/vintagewoodworks/house-plans-36.jpg||https://s.turbifycdn.com/aah/vintagewoodworks/house-plans-37.jpg||||House Plans||||products > ||Products > ||||||||||||||||0||1||0||0||||||Browse 13,000 different plans!||Need house plans for your dream home? Here's a great source... Cool House Plans Company has over 13,000 different house plans organized by a wide varity of styles! When you click the blue banner below you will be taken to their site to browse for plans. Once there, scroll down to their list of House Plan Styles. You will find that most include porches so be sure to come back here to order the decorative items your porch will need. Your plans order will be expertly handled in association with Cool House Plans. Click Here for the COOLest House Plans on the Internet! Get inspired! Most house plans with porches don't show the details that make a porch special... and even if they do, they don't tell you where to get these items. Well, now you know where to get them... from us! Please review our photos to kindle great ideas for your own porches. Are you interested in house plans with porches? Please browse the photos, drawings, and floorplans in our Guide to get a better idea of what's involved in building a great porch. Study porch anatomy and construction and find the best decorative elements while learning proper installation techniques. From Flooring Boards to the decorative items at the top of the Posts, we've got what house plans with porches need. Our Railing systems provide easy, professional installation with maximum protection from water damage. Our 'Third Dimension' items create depth and authenticity. Our selection includes Brackets, Spandrels, Balusters, Rails, and much more in weather-resistant woods and AZEK Brand Cellular PVC. We are available by email or phone for a free personalized consultation on house plans with porches, help with choice of components, and all related questions. We have long believed that planning, designing, building, and decorating porches is a most worthwhile endeavor. We still do! Porches are our passion! During the past 30 years we've been involved with thousands of house plans with porches. Kit Prices calculated by the Porch Kit Estimator are based on two things: 1. The total length around the edge of your porch floor (to nearest whole foot). [show simple floor plan here of porch attached to house. Include measurements noted below. Right justify.] For example, if you have (or plan to have) a rectangular porch 20 feet long and projecting 8 feet out from the house , the total length around the front edge of your porch floor will be 8 + 20 + 8 = 36. Select 36 from the Total Length Around Edge of Porch Floor dropdown at the Estimator page. 2. Whether you already have Porch Posts or want to include them in the Kit price. If you indicate on the Estimator page that you want to include Porch Posts, we will estimate how many you will need based on the size of your porch and add their cost to the estimate. The Estimator does NOT adjust for the following: 1. The space that is (or will be) occupied by Porch Posts. Once you indicate at the Quote/Order page how many Porch Post you have (or will need), the total length of Spandrels and balustrade (if any) that will be required will be reduced. This will lower the total cost of your Kit. 2. Opening(s) in railings for steps. If you want railings the total Kit cost will be lower due to less total porch balustrade or perhaps higher if you want railings down the steps. The Quote/Order page for each Kit DOES take all of the above into account and also allows you to omit as many components as you wish, such as if you want to purchasing in stages, if you don't want railings, etc. Free assistance on how to build a porch! 30 years experience. Hundreds of photos with helpful tips on how to build a porch. Buy direct & save on 1000's of wood and synthetic parts for porches. Browse examples (photos, drawings, and floorplans). Study anatomy and construction. Learn how to plan, draw, and build your dream porch (no art skills required). Find the best decorative elements and learn proper installation techniques. Get inspired! Review our photos to kindle great ideas on how to build a porch. Keep in mind that your house doesn't need to be an exact match to create the same look and feel. Once you know how to build a porch our vast selection of parts includes everything you'll need! Our professional, easy to install Railing system and Third Dimension approach blend style, substance and authenticity. Extensive selection includes Brackets, Spandrels, Balusters, Rails, and much more in weather-resistant woods and AZEK Brand Cellular PVC. We are available by phone or email for a free personalized consultation on all questions about how to build a porch. We have long believed that planning, designing, building, and decorating porches is a most worthwhile endeavor. We still do! Porches are our passion! Over the past 30 years we've shared our insights on how to build a porch with thousands. Free assistance with how to build a porch! 30 years experience. 200 photos with helpful tips on how to build a porch. Buy direct & save on 1000's of wood and synthetic parts for porches. Get inspired! Review our photo to kindle great ideas on how to build a porch. Keep in mind that your house doesn't need to be an exact match to create the same look and feel. Our goal is to share knowledge. If you need to know how to build porches, this book will be of great help! Whether your goal is a do-it-yourself porch, designing a porch, or better understanding the porch building process, we believe our Porch Design book can be of genuine assistance with how to build a porch. If you are building a porch, we have what you'll need! Once you know how to build a porch, we can provide everything from Flooring Boards to the decorative items at the top of the Posts. Our Railing systems provide easy, professional installation with maximum protection from water damage. Our "Third Dimension" items create depth and authenticity. Our extensive selection includes Brackets, Spandrels, Balusters, Rails, and much more in weather-resistant woods and AZEK Brand Cellular PVC. We are available by phone or email for all questions about how to build a porch. We have long believed that planning, designing, and building porches is a most worthwhile endeavor. We still do! Over the past 30 years we've shared our insights about how to build porches with thousands. Now we're eager to help create the porch of your dreams! ||||||||||||||||0||||||||||New||||||||||||||0||~~|^^|how-to-build-a-porch-roof||item.||fastpivot-2007||porches1||||||||How to Build a Porch Roof||||landing-pages > porches1 > ||Alternate Landing Pages > Porches > ||||||||||||||||0||1||0||0||||link-porch-item link-porch-book ||(nsnf/ckd)|| * How to Build a Porch Roof with detailed illustrations * Photo Guide for Porch Shapes & Roof Lines * Porch Parts in wood and low maintenance synthetics. Want to know how to build a porch roof? Access our 30 years experience. Review hundreds of photos with helpful tips. Buy direct & save on 1000's of wood and low maintenance synthetic parts. Get inspired! Review our photos to kindle great porch roof ideas for your own home. Keep in mind that your house doesn't need to be an exact match to create the same look and feel. Includes how to build a porch roof plus a great deal more! Browse examples (photos, drawings, and floorplans), study anatomy and construction, identify the best decorative elements, and learn proper component installation techniques. From Flooring Boards to the decorative items at the top of the Posts, we have everything to bring your ideas to life! Our professional, easy to install Railing system and Third Dimension approach blend style, substance and authenticity. Extensive selection includes Brackets, Spandrels, Balusters, Rails, and much more in weather-resistant woods and AZEK Brand Cellular PVC. We are available by phone or email for a free personalized consultation on how to build a porch roof, help with choice of components, and all related questions. We have long believed that planning, designing, building, and decorating porches is a most worthwhile endeavor. We still do! Porches are our passion! During the past 30 years thousands have sought our advice on how to build a porch roof. More specific product information, such as product calculators and category-specific use and installation instructions, can be found at various product sections and at individual product pages. We also have an extensive Frequently Asked Questions (FAQ) section. If your specific question is not answered, please contact us.||||||||||||||||0||||||||||New||||||||||||||0||~~|^^|howtoinbrac||item.||fastpivot-2007||howtousebrac||||||||How to Install Brackets||||products > brackets > howtousebrac > ||Products > Brackets > Info - Brackets > ||||||||||||||||0||1||0||0||||||Click to read how to install brackets|| For most situations, we recommend installing Brackets with round-head (also called pan-head) brass screws, with screw heads left exposed. Screws allow more adjustment than nailing, avoid damage from hammer blows, and permit easy removal for future maintenance, particularly if you leave screw heads exposed and unpainted. Please realize that these instructions are intended as a guide, but will not cover all possible conditions. Therefore, we can’t be responsible for the final results obtained, nor for the workmanship of any installation.
Now congratulate yourself on a job well done! When repainting becomes necessary, it will work well to simply remove the screws, paint your Brackets, and then re-install. Yes, there is an easy way to hang Corbels. Just drill a hole into the back of the Corbel, then slip the Corbel over a large nail or screw! This hole should be drilled into the Corbel at an angle, as illustrated here. A nail or screw should be put into the wall at the same approximate angle as this drilled hole. We would strongly suggest your nail or screw be located in a wall stud for strength. Your local hardware store will have inexpensive stud locators available. For hanging Corbels on brick or masonry walls, it is necessary to drill a hole into the wall at an angle, as mentioned previously. Then use one of the many anchoring devices available from your local hardware store to secure a screw in place. If you are concerned your Corbel may move sideways at the lower end, you can use a spot of glue on the back side to hold the lower end into place. As with any installation, it is your responsibility to assure that the anchoring is sufficient for your load.||||||||||||||||0||||||||||New||||||||||||||0||~~|^^|howtousethis||item.||fastpivot-2007||howtoin||||||https://s.turbifycdn.com/aah/vintagewoodworks/how-to-use-this-website-15.jpg||How to Use This Website||||help > howtoin > ||Help Desk > How To Information > ||||||||||||||||0||1||0||0|||||||| Caution - Because each search canvasses the entire site, entering a word we use frequently, such as Brackets, will find a great many entries. Enclosing your search entry in quote marks will limit the results to EXACT matches. For example, entering a search of "13-3/4" will find all items exactly 13-3/4 inches in at least one dimension. (Since we typically enter dimensions using dashes and slashes, it's important to include that punctuation in search terms with fractions.) Ordering Click the Put in Shopping Cart button at each product listing to put that item in your Shopping Cart. That will also take you to the Shopping Cart page, where you can update the quantity ordered or delete an item from your Cart. Click the Keep Shopping or Place Order buttons to continue. Hint - Return to your Shopping Cart at any time by clicking the Shopping Cart button at the top of any page. Additional Information Please visit our Frequently Asked Questions Page or the various links on the previous page. Return there with your browser's Back button or by clicking the 'Help' button at the top of any page. PORCH... such a simple word, yet so meaningful a place! For some it conjures up memories of lazy summer afternoon retreats. Perhaps your memories are of neighbors... taking their evening stroll... and stopping by to visit. Maybe you can remember hearing the great political debates waged out on the front porch by your father and his friends long after you had been tucked into bed. Could it be that you fell in love while sitting on a porch swing? Or do you remember the magical place your grandmother's porch was when you played there as a child? Tall, cool glasses of lemonade... shared secrets... rainy days... and quiet tree-lined streets... such are the joys of a porch. A transitional space A porch serves as a transitional space, not merely connecting inside to out, but buffering the sanctuary, comfort, and order of home from the hustle and bustle of the world beyond. It offers a place of serenity in those first moments of the day as you awaken to a cup of coffee or your favorite cereal. A porch can also offer a marvelous window on Mother Nature... with shade from the sun... protection from the rain... even protection from insects if it's screened! How will you use your porch? Will it primarily serve as a covered passage? Do you envision occasional close family gatherings? Will your porch be an extension of your home's living area when you are entertaining larger numbers of guests? Another room As another room to your home, the porch can provide a special place in time for children to be with you... an oasis from the demands inside the home. It's the place that beckons you to sit and put your feet up for a spell as you come in from a long, hectic day. What furnishings would you like on your porch? Porch swings, rocking chairs, a breakfast table, potted plants, and even firewood are found on many porches, and all require space. A first impression A porch introduces the home. First impressions are generally lasting ones. This is true of homes as well as of people. The porch is the means by which your home says Hello ... and Welcome! <table> <table BORDER=1 CELLSPACING="3" WIDTH="400"> <TH COLSPAN=6>2" (net 1-7/16") Cedar Balusters</TH> <tr> <TH>Design</TH> <TH>Size</TH> <TH>Overall Length</TH> <TH>Top Flat</TH> <TH>Turning</TH> <TH>Bottom Flat</TH> </tr> <tr> <td rowspan=6 align=center>Classic </td> <tr> <td> 2" x 20" </td> <td> 19-3/4" </td> <td> 2-1/2" </td> <td> 14-3/4" </td> <td> 2-1/2" </td> </tr> <tr> <td> 2" x 24" </td> <td> 23-3/4" </td> <td> 4-1/2" </td> <td> 14-3/4" </td> <td> 4-1/2" </td> </tr> <tr> <td> 2" x 28" </td> <td> 27-3/4" </td> <td> 6-1/2" </td> <td> 14-3/4" </td> <td> 6-1/2" </td> </tr> <tr> <td> 2" x 32" </td> <td> 31-3/4" </td> <td> 8-1/2" </td> <td> 14-3/4" </td> <td> 8-1/2" </td> </tr> <tr> <td> 2" x 36" </td> <td> 35-3/4" </td> <td> 10-1/2" </td> <td> 14-3/4" </td> <td> 10-1/2" </td> </tr> </table> ||||||||||||||||0||||||||||New||||||||||||||0||~~|^^|popup-table2||item.||popup||tables-examples||||||||HTML Code for Table Example #2||||webmaster-pages > references > tables-examples > ||Webmaster Pages > YS How-To > Tables, Examples > ||||||||||||||||0||1||0||0|||||||| <center> <TABLE BORDER CELLPADDING=5> <COL WIDTH=100> <COL WIDTH=100> <COL WIDTH=100> <TR align=center> <TH> COLUMN #1 </TH> <TH> COLUMN #2 </TH> <TH> COLUMN #3 </TH> </TR> <TR align=center> <TD> Info Col 1 </TD> <TD> Info Col 2 </TD> <TD> Info Col 3 </TD> </TR> <TR align=center> <TD> Info Col 1 </TD> <TD> Info Col 2 </TD> <TD> Info Col 3 </TD> </TR> <TR align=center> <TD> Info Col 1 </TD> <TD> Info Col 2 </TD> <TD> Info Col 3 </TD> </TR> <TR align=center> <TD> Info Col 1 </TD> <TD> Info Col 2 </TD> <TD> Info Col 3 </TD> </TR> </TABLE> </center> ||||||||||||||||0||||||||||New||||||||||||||0||~~|^^|html-attributes||item.||fastpivot-2007||references||||||||HTML, Attributes ||||webmaster-pages > references > ||Webmaster Pages > YS How-To > ||||||||||||||||0||1||0||0||||||(nsnf/ckd)|| Attributes provide additional information about HTML elements. Attributes provide additional information about HTML elements. They are always specified in the start tag. Attributes come in name/value pairs like: name="value" HTML links are defined with the <a> tag. The link address is specified in the href attribute <a href="index.html">Home Page</a> Always Quote Attribute Values Attribute values should always be enclosed in quotes. Double style quotes are the most common, but single style quotes are also allowed. In some rare situations, when the attribute value itself contains quotes, it is necessary to use single quotes: name='John "ShotGun" Nelson' More info at w3schools.com||||||||||||||||0||||||||||New||||||||||||||0||~~|^^|html-basics||item.||fastpivot-2007||references||||||||HTML, Basics ||||webmaster-pages > references > ||Webmaster Pages > YS How-To > ||||||||||||||||0||1||0||0||||||(nsnf/ckd)|| HTML markup tags are usually called HTML tags. HTML tags are keywords (tag names) surrounded by angle brackets like <html>. HTML tags normally come in pairs like <b> and </b>. The first tag in a pair is the start tag, the second tag is the end tag. The end tag is written like the start tag, with a forward slash before the tag name. Start and end tags are also called opening tags and closing tags. HTML Element is everything between the opening tag and closing tag. Empty Elements are closed in the start tag with a space followed by a forward slash and then the greater than symbol. Examples: Line Break HTML Tag <br /> Horizontal Rule Tag <hr /> COMMON HTML TAGS: Bold <b>text</b> Carriage Return, Enter Key, Line Break <br /> Omit wrap or line break <nobr /> Center <center>all text to be centered </center> Italics <i>text</i> Space see Indentation, Bullets, or Lists for adding an extra blank space type the following Underline <u>text</u> Page Line: <HR WIDTH="75%>||||||||||||||||0||||||||||New||||||||||||||0||~~|^^|html-colors||item.||fastpivot-2007||references||||||||HTML, Colors ||||webmaster-pages > references > ||Webmaster Pages > YS How-To > ||||||||||||||||0||1||0||0||||||(nsnf/ckd)|| Standard VWW HTML color codes: Red <font color=8C2118>text</font> Tan Rules on Homepage separating Announcement <font color=DFD5B6>text</font> Tan 2nd top bar on Homepage and Left Nav background <font color=F3EDDC>text</font> GRAY <font color=gray>text</font> BLUE background on charts/tables <font color=A7B5C5>text</font> TAN background on Tables <font color=DECEB1>text</font> TAN background left nav w/out hoovering <font color=EFE9D3>text</font> Additional HTML for colors can be found at Math is Fun or 4096 Color Wheel ||||||||||||||||0||||||||||New||||||||||||||0||~~|^^|html-display||item.||fastpivot-2007||references||||||||HTML, Display ||||webmaster-pages > references > ||Webmaster Pages > YS How-To > ||||||||||||||||0||1||0||0||||||(nsnf/ckd)|| To display the HTML Tag (code) on a given page without the program interpreting it as HTML; replace < and > with the following: For < type the following with no spaces & l t ; For > type the following with no spaces & g t ; amp less than semicolon amp greater than semicolon||||||||||||||||0||||||||||New||||||||||||||0||~~|^^|html-emptyurl||item.||fastpivot-2007||references||||||||HTML, Empty URL ||||webmaster-pages > references > ||Webmaster Pages > YS How-To > ||||||||||||||||0||1||0||0||||||(nsnf/ckd)|| Possible errors causing the "empty url" status on the Broken Links Report The link has only one quote mark in the tag Example: <a href="URL>Missing last quote mark </a> The link does not include a URL between quotes in the tag Example: <a href=" " >Missing URL </a> Tip: Use the Find Command to help locate Empty URLS||||||||||||||||0||||||||||New||||||||||||||0||~~|^^|html||item.||fastpivot-2007||references||||||||HTML, Multiple ||||webmaster-pages > references > ||Webmaster Pages > YS How-To > ||||||||||||||||0||1||0||0||||||(nsnf/ckd)|| Close them in the opposite order they were opened. Example: A dog barked A dog <font size=+1> <b> barked!</b> </font>||||||||||||||||0||||||||||New||||||||||||||0||~~|^^|html-tutorial-websites||item.||fastpivot-2007||references||||||||HTML, Tutorial Websites ||||webmaster-pages > references > ||Webmaster Pages > YS How-To > ||||||||||||||||0||1||0||0||||||(nsnf/ckd)|| RG prefers this site. It will let you know which browsers accept a given HTML tag w3schools The following is great for obtaining Color codes This site provides both the Hexadecimal and Decimal numbers for colors. Hexadecimal Colors||||||||||||||||0||||||||||New||||||||||||||0||~~|^^|pk-savings||item.||fastpivot-2007||porch-kits||||||||Ideas for Saving on Porch Kits||||webmaster-pages > indevelopment > porches5 > porch-kits > ||Webmaster Pages > Store Work > Porches > Porch Kits > ||||||||||||||||0||1||0||0||||||(nsnf/ckd)|| Our Porch Kits are based on over 30 years of experience. They are carefully designed, built, and shipped. Everything for a given Kit is guaranteed to work properly together to create a porch that is balanced, functional, and visually rewarding. This ensures you'll be very happy with the final results! You Can Proceed in Stages We feel strongly that it's better to do part of the project well, and come back later when the budget allows, than to spread the pocketbook too thin and have the entire project displease you! For example, we would favor a structurally sound porch with no decoration at first, rather than a poorly constructed porch that may require a redo at a later date. Specific Cost Saving Ideas There are many ways to reduce the cost of a given Porch Kit. Here are some of our favorites: Start with the Posts If you need new Porch Posts, these must be installed before the Post Top and Balustrade items. However, if you don't need Railings for safety, your Balustrade items could be added later. And Post Top and Eave Decorations can always be added later. Just be sure to purchase the correctly sized Posts, and in adequate quantity. The trick is to know up front where you want to finish, as it's critical that Porch Posts properly accommodate your chosen other items when the time is right to add those. Add Balustrades Add Balustrade (Balusters and Rails) now if required for safety considerations. Otherwise, these can wait until later. [mention cost-saving strategy involving Balusters] Add Post Top Decorations If Rails are not required for safety you can add Post Top Decorations next, and here you have additional cost saving opportunities. For example, if your post top decorating plans call for Spandrels with Brackets beneath, but the budget is tight, install only the Brackets (using easily removable screws). If you allow room now for the Spandrels to be added, it will be a simple matter to later remove the Brackets, install the Spandrels, and then reinstall the Brackets below the Spandrels. Add Porch Eave Decorations We strongly recommend the use of Post Face Brackets and Cornice Brackets as Porch Eave Decorations because they provide an important third dimension for your porch. However, these are easily added later if you have planned for them in advance. Always Begin With a Plan Knowing from the start that your Porch Kit properly accommodates the various decorative elements, you can install items in stages if you wish, comfortable in the knowledge that your finished porch will be perfect! In fact, this approach will give you something to look forward to. The next stage of your master porch plan can also answer the question of what to give each other for Christmas, Birthdays, Anniversaries, and surprises! Return to previous page||||||||||||||||0||||||||||New||||||||||||||0||~~|^^|iframes||item.||fastpivot-2007||references||||||||iFrames||||webmaster-pages > references > ||Webmaster Pages > YS How-To > ||||||||||||||||0||1||0||0||||||(nsnf/ckd)|| Currently only have 2 pages that use iFrames. BB Calculator Bal Calculator||||||||||||||||0||||||||||New||||||||||||||0||~~|^^|image-rotator||item.||fastpivot-2007||references||||||||Image Rotator ||||webmaster-pages > references > ||Webmaster Pages > YS How-To > ||||||||||||||||0||1||0||0||||||(nsnf/ckd)|| IMPORTANT: Do not make changes to this property unless supervised by a Manager!! Property = --fp-cst-show-image-rotator Type = yes/no Controls whether Rotating Images on Home page will display. Rotating Images are controlled with 4 more additional properties. Rotator-image-1 Rotator-browse-link-1 Rotator-photo-link-1 Rotator-main-link-1 FastPivot representative will be the only person allowed to make changes to this feature of the online store. Images saved to Server > Co Files > Info Sys > Website > FastPivot > Image Rotator on Homepage > Larger Size for New Site Image size: 610 x 380||||||||||||||||0||||||||||New||||||||||||||0||~~|^^|image-icon-inset-properties||item.||fastpivot-2007||references||||||||Image, Icon, & Inset Properties||||webmaster-pages > references > ||Webmaster Pages > YS How-To > ||||||||||||||||0||1||0||0||||||(nsnf/ckd)|| 1. An Image will appear on the page and as a thumbnail on the previous page in the absence of an Icon. 2. An Icon will only appear as a thumbnail on the previous page. 3. An Inset will appear next to an image on the page below the page's name. 4. Standard Usage: A. Section Page (1)Typically, we prefer to use the "Icon" field so that the graphic will appear beneath the "Section" name. (2) Do not use the "Image" field - this will cause the graphic to appear above the page’s name. (3) Use the "Image" field only if needing to display two (2) graphics on the section page. B. Item Page (1) Typically prefer to use the "Image" field. (2)The appearance of the graphic will appear properly according to layout of each item page. (3) Graphic in "Image" field will appear on item page and on previous page. (4) Use the "Icon" field only when the graphic that appears on the previous page needs to be overridden. (5) Use the "Inset" field only when displaying a usage photo. Program is set to display Insets as a "View in Use" graphic. 5. Always save the 'enlargeable' version of the graphic from its item page for future use. Saving the 'thumbnail' version of a graphic causes the loss of enlargement ability.||||||||||||||||0||||||||||New||||||||||||||0||~~|^^|images||item.||fastpivot-2007||references||||||||Images ||||webmaster-pages > references > ||Webmaster Pages > YS How-To > ||||||||||||||||0||1||0||0||||||(nsnf/ckd)|| We will refer to the Image or Icon property of a given page as graphics. We also use graphics when we are talking about and image, photo, or line drawing. Related pages will help you get to correct section for help and info||||||||||||||||0||||||||||New||||||||||||||0||~~|^^|imperial-rake-details||item.||popup||hold-azekmldg||||||||Imperial Rake Crown Details - AZEK||||popup-pages > azprpo > hold-azekmldg > ||Pop-up Windows (Pages) > AZEK Product pop-ups > AZEK Moulding - measurement details > ||||||||||||||||0||1||0||0||||||(nsnf/ckd)||  Standard Polyurethane items should not be exposed to temperatures higher than 140 degrees F, such as directly above a fireplace. Returns You may return regular Polyurethane items within 45 days for a full merchandise refund less a 20% restocking fee, unless noted elsewhere. Custom items and custom length items are not returnable unless defective. Finishing All products in our Polyurethane Products section are primed with an exterior grade latex paint and are ready to install. We recommend final finishing after installation is complete for the most consistent appearance possible. Read more... Installation Polyurethane products are handled in the same way as wooden millwork. PL Premium Adhesive must be used for all bedding and butt joints. Shipping Due to the very wide range of Polyurethane products we offer, it is not possible to keep most of them in stock. Please allow 3 to 4 weeks (after order is paid) for us to ship, and a few more days in transit. Some orders may require additional shipping charges. If so, we will advise before finalizing your order. Most long items can be split in half (no additional charge) for more economical shipping. Use PL Premium Adhesive to rejoin halves. Installed Rail Length If ordering Rail Sets pre-drilled for Balusters and/or cut-to-length Rails, you'll need to provide your installed Rail lengths in the Installed Rail Lengths box on the previous page. This should be the actual width of the space where your Rails are to be installed. Therefore, we strongly recommend having your Porch Posts installed prior to measuring. Please measure this space (to 1/16" accuracy) with a steel carpenter's tape approximately where top and bottom Rails will be, and provide the longer of these two measurements. If the top and bottom measurements are off by more than 1/4" we recommend resetting your porch posts to equalize the distances and then record the corrected longer length. (At the 3:40 point in our 4th video, How to Install Porch Floors, you can see how to easily adjust Porch Posts.) Pre-drilling Pre-drilling can be done without cutting Rails to length. We will drill for Balusters based on your Installed Rail Lengths and the choices you make on the previous page, but will leave equal, undrilled amounts at each end. We will label each Rail's Installed Rail Lengths. Prior to installation, Rails should have equal amounts removed from each end. 4" Sphere Rule Many building codes require Baluster spacing that will not permit a 4" sphere to pass between them. Cut-to-Length If ordered cut-to-length, we will cut your Rails 1/4" less than the Installed Length you provide. This will leave a 1/8" space at each end for caulking. Please contact us if you need clarification. Upon arrival, please check all packages carefully for concealed damage. Report all damage immediately to the carrier. Call us at (903) 356-2158 if you have any problems or questions. Care and Feeding of Exterior Millwork 1. Never, ever expose unpainted millwork to direct sunlight! 2. Always protect unpainted millwork from moist conditions, such as storage on the ground, on concrete, or where rain blows in. 3. Always use a good oil-based primer and finish coats. Paint all surfaces (including ends) before exposure to sunlight. See Painting section. Natural Movement of Wood It is the nature of wood to expand and contract with changes in the surrounding humidity. When subjected to rapid variations in humidity, particularly rapid drying, cracks and warps can occur. Fortunately, such events do not generally affect the strength of the wood. Even kiln-dried wood still contains water. Our wood is kiln-dried to 8%-12% moisture content (except Cedar, which is air-dried). If stored improperly, these percentages can increase quickly, as raw wood absorbs moisture readily from its surroundings! Internal Stress Then, if this moisture-laden wood is allowed to dry too quickly, the internal stress causes cracks and twists to appear. Kiln operators are skilled professionals at the art of wood drying, and they still lose many boards to splits and warping! A sure torture treatment for unpainted wood is to first store it for awhile under damp conditions, and then put in direct sunlight. Sunlight, even when coming through a window, acts as a low temperature oven. Even a few hours in direct sunlight can rapidly dry unpainted wood, greatly increasing the risk of cracking or warping. Avoiding Problems Fortunately, there is an easy way to avoid most cracking and twisting! Since rapid drying of excess internal moisture is the culprit, you need to both avoid the build-up of internal moisture and limit the rate of drying. Both goals are met initially by proper storage and, for the long run, by completely painting all surfaces of each item with a good oil-based primer and multiple finish coats of oil-based paint. By following our guidelines for proper storage, painting, and installation, you will eliminate most cracks and warps. Proper Storage Store items inside if at all possible and away from direct sunlight prior to painting. If items must be stored outside, be sure they are well off the ground, protected with a waterproof/lightproof cover, and well ventilated. NEVER allow wood to come in direct contact with concrete or other masonry, as the relatively porous concrete will serve as a conduit for moving moisture out of the air or ground and into the wood. (Most Porch Posts set directly on concrete foundations soon rot at the bottoms. Our Post Mounting Blocks or Plates plus proper painting of Post ends will help prevent this.) Why take a chance? Please store all unpainted wood very carefully. 1. For Items 46" or longer The carrier charges us at least $17.50 extra per longer package. We will manually adjust your final invoice to include only ONE $17.50 additional shipping fee. This fee will not show on your online order nor on subsequent auto-generated emails, but will show on the invoice included with your shipment. 2. Additional Shipping Charges Some orders may require additional shipping charges (such as for oversized, overweight, etc.) to cover the actual cost to ship your order. We can only determine this after manually reviewing your order. If additional shipping charges are going to be necessary, we will of course, contact you before finalizing your order. We don't like shipping charges any more than you do! Thanks for understanding. 60" Rule When an order includes an item 60" or longer, we are charged at least $10.50 extra per oversized box to ship your order to you. Therefore, if you're ordering an item 60" or longer, please use the 60" or Longer drop down. Thanks for understanding! Additional Charges Some orders may require additional shipping charges. If so, we will advise before finalizing your order. Use Style Type where spacing/indentation/tabbing is required (instead of a string of ) We have standard padding below for Outline Formatting, Table of Contents, Procedures, and Bullets below Outline Formatting At top of Caption <STYLE TYPE="text/css"> <!-- .space12 { padding-left: 12pt; } .space26 { padding-left: 26pt; } .space40 { padding-left: 40pt; } .space52 { padding-left: 52pt; } .sectionHeading { font-size:22; font-weight:700;} --> </STYLE> Within Caption 1. First line in numbered procedure<br /> <span class="space12">A. 2nd level<br /> </span> <span class="space26">(1) 3rd level<br /> </span> <span class="space40">a. 4th level<br /> </span> <span class="space52">i. 5th level<br /> </span> What Displays 1. First line in numbered procedure A. 2nd level 1) 3rd level a. 4th level i. 5th level Table of Contents At top of Caption <STYLE TYPE="text/css"> <!-- .sixteen { padding-left: 16pt; font-weight:700; font-size:17px;} .thirty { padding-left: 30pt; font-size:17px;} .forty-eight { padding-left: 48pt;} --> </STYLE> Within Caption <span class=section >First Major section of Table of Contents</span> <br /> <span class="sixteen">sub-section a</span> <br /> <span class="sixteen">sub-section b</span> <br /> <span class="thirty">sub-sub-section 1</span> <br /> <span class="thirty">sub-sub-section 2</span> <br /> <span class="forty-eight">4th level section 1</span> <br /> <span class="forty-eight">4th level section 2</span> What Displays First Major section of Table of Contents sub-section a sub-section b sub-sub-section 1 sub-sub-section 2 4th level section 1 4th level section 2 Also see Style Type Procedures At top of Caption <STYLE TYPE="text/css"> <!-- .space16 { padding-left: 16pt; } .space32 { padding-left: 32pt; } .space44 { padding-left: 44pt; } .space60 { padding-left: 60pt; } .sectionHeading { font-size:22; font-weight:700;} --> </STYLE> Within Caption 1. First line in numbered procedure<br /> <span class="space16">A. 2nd level<br /> </span> <span class="space32">(1) 3rd level<br /> </span> <span class="space44">a. 4th level<br /> </span> <span class="space60">i. 5th level<br /> </span> What Displays 1. First line in numbered procedure A. 2nd level 1) 3rd level a. 4th level i. 5th level Also see Style Type Bullets At top of Caption <STYLE TYPE="text/css"> <!-- .bull { padding-left: 18pt; } .bull2 { padding-left: 26pt; } --> </STYLE> Within Caption <span class="bull">• First bullet text </span> <span class="bull2">text wrapping when needed </span> What Displays using Style Type • First bullet text text wrapping when needed ||||||||||||||||0||||||||||New||||||||||||||0||~~|^^|index-supress||item.||fastpivot-2007||references||||||||Index, Suppress ||||webmaster-pages > references > ||Webmaster Pages > YS How-To > ||||||||||||||||0||1||0||0||||||(nsnf/ckd) - see No Search No Follow|| See No Search No Follow||||||||||||||||0||||||||||New||||||||||||||0||~~|^^|azpoboin2||item.||fastpivot-2007||azekporchboards||https://s.turbifycdn.com/aah/vintagewoodworks/info-azek-174-porch-boards-34.jpg||https://s.turbifycdn.com/aah/vintagewoodworks/info-azek-174-porch-boards-35.jpg||||Info - AZEK® Porch Flooring||||products > porches > porches-item > porch-flooring > azekporchboards > ||Products > Porches - START HERE! > Porch Parts Product Listings > Porch Flooring > AZEK® TimberTech® PVC Porch Flooring Boards > ||||||||||||||||0||1||0||0||||azek-timbertech-install-warranty link-porch-bd-video azekdoubdare ||Click for ordering, installation, maintenance, etc info|| Porch Flooring takes a beating from foot traffic and weather. Now there’s a super durable, easy to clean, authentic looking solution - AZEK® Porch! AZEK® Porch Flooring is easy to install, easy to maintain (because there really isn't any maintenance), and very easy to live with! Just avoid rubber-backed items (door mats, pool toys, etc), abrasive cleaners, and certain products containing chemicals harmful to plastics, and your AZEK® Porch floor will still look like new many years from now! (See Care & Maintenance.) To calculate number of Porch Boards needed, and assuming the use of Boards long enough to span the depth of your porch front to back (including 1" front overhang), convert porch length to inches and then divide by 3-3/16" (3.1875), the installed width of one board. Example: A porch which is 8 feet deep (including 1" front overhang) and 10 feet long = 120" divided by 3.1875 = 37.65 = 38 Boards, each 8 feet long. Order one extra Board. Order your Sample Kit of AZEK® Porch Flooring and take the AZEK® Double Dare Challenge! Prove for yourself that AZEK® Porch Flooring is your best solution now and for the future! See the Videos||||||||||||||||0||||||||||New||||||||||||||0||~~|^^|azekhelp||item.||fastpivot-2007||azpvcpr||||https://s.turbifycdn.com/aah/vintagewoodworks/info-azek-174-pvc-19.jpg||||Info - AZEK® PVC ||||products > azpvcpr > ||Products > AZEK® Brand PVC > ||||||||||||||||0||1||0||0||||pvc azek-timbertech-install-warranty ||Click for description and installation info|| AZEK® Brand Cellular PVC is a miracle material that will never rot, cup, split, twist, or warp, is impervious to moisture, salt, and insects, and is suitable for ground or masonry contact. Intended for use in non-stress and non-loadbearing applications. AZEK® Industry-leading Manufacturer's Lifetime Limited Warranty! Please select a topic below to continue.||||||||||||||||0||||||||||New||||||||||||||0||~~|^^|beadboardhelp||item.||fastpivot-2007||beadboard||https://s.turbifycdn.com/aah/vintagewoodworks/info-beadboard-v-groove-boards-30.jpg||||||Info - Beadboard & V-Groove Board||||products > beadboard > ||Products > Beadboard & V-Groove > ||||||||||||||||0||1||0||0||||info-wood-pvc-bb-vg info-pvc-bb-planks ||Click for product details, options and installation info || We ship thousands of feet of Beadboard and V-Groove Board all over the country each month. Order a sample at any Beadboard or V-Groove Board category to see why! Please select an info sub-category below to continue.||||||||||||||||0||||||||||New||||||||||||||0||~~|^^|howtousebrac||item.||fastpivot-2007||brackets||https://s.turbifycdn.com/aah/vintagewoodworks/info-brackets-45.jpg||https://s.turbifycdn.com/aah/vintagewoodworks/info-brackets-46.jpg||||Info - Brackets||||products > brackets > ||Products > Brackets > ||||||||||||||||0||1||0||0||||bracorin howtochoosri usingbrackets usrebr howtoinbrac inbronanpo unthirdim1 kirby-modifications link-poly-info bracket-sizes ||Click for details, usage, installation and additional info|| From choosing just the right Bracket to ordering and installation, here's what you need to know. If the following sections don't fully answer your questions, don't hesitate to contact us! Installation instructions are included with each box or bundle of Western Red Cedar Shingles. In addition, you will find the answers to many installation questions here in our online information pages. Location Ceiling Medallions are typically installed centered on the width and length of a room. However, when used with lighting fixtures and/or ceiling fans, they should be positioned above these. Many of our Ceiling Medallions come with a center hole. If not, and you need one for wiring, a standard wood drill bit will work well and quickly. Size Medallion size is like most decorating choices - a personal preference. However, if you have a small room, a very large Ceiling Medallion may overwhelm the space. Likewise, a small Ceiling Medallion would look skimpy in a large room. You will also want to consider the size of the Medallion relative to the light fixture and choose a Medallion that will provide a balanced look. Finish Our Medallions are provided unfinished. They can be installed as is if you want a white Medallion, or you can finish them to suit your decorating scheme. Finishing Polyurethane||||||||||||||||0||||||||||New||||||||||||||0||~~|^^|column-info||item.||fastpivot-2007||columns||||https://s.turbifycdn.com/aah/vintagewoodworks/info-columns-22.jpg||||Info - Columns||||products > columns > ||Products > Columns > ||||||||||||||||0||1||0||0||||install-round-columns column-install-rail roundcolumn-dimensions ||Click for load rating, installation, and returns info|| Please select a topic below to continue.||||||||||||||||0||||||||||New||||||||||||||0||~~|^^|gadein||item.||fastpivot-2007||gabledecor||https://s.turbifycdn.com/aah/vintagewoodworks/info-gable-decorations-41.jpg||||||Info - Gable Decorations||||products > gabledecor > ||Products > Gable Decorations > ||||||||||||||||0||1||1||0||||gadeorin deyoropi gadein2 ||Click for details and installation info|| Please select a topic below to continue.||||||||||||||||0||||||||||New||||||||||||||0||~~|^^|stairparin||item.||fastpivot-2007||instpa||||https://s.turbifycdn.com/aah/vintagewoodworks/info-interior-stair-parts-20.jpg||||Info - Interior Stair Parts ||||products > instpa > ||Products > Stair Parts, Interior > ||||||||||||||||0||1||0||0||||stgu instpaiddi ||Click for step by step guide, identification diagram and stair building guide book|| Please select a topic below to continue.||||||||||||||||0||||||||||New||||||||||||||0||~~|^^|moulbloc1||item.||fastpivot-2007||mouldings||https://s.turbifycdn.com/aah/vintagewoodworks/info-mouldings-blocks-45.jpg||https://s.turbifycdn.com/aah/vintagewoodworks/info-mouldings-blocks-46.jpg||||Info - Mouldings & Blocks ||||products > mouldings > ||Products > Mouldings > ||||||||||||||||0||1||0||0||||ormoulblocan casblocbrief vinwoodmouls sacrmopa ||Click for details and installation info|| Please select a topic below to continue.||||||||||||||||0||||||||||New||||||||||||||0||~~|^^|nepoin||item.||fastpivot-2007||newelposts2||https://s.turbifycdn.com/aah/vintagewoodworks/info-newel-posts-34.jpg||||||Info - Newel Posts||||products > newelposts2 > ||Products > Newel Posts > ||||||||||||||||0||1||0||0||||sampletable cedar-newel-chart link-half-newels link-paint-rings ||Click for measurements charts and other info||If possible, Porch Posts should be spaced evenly across the length of your porch. However, such ideal spacing doesn't always permit Porch Posts at either side of the steps. Newel Posts can be used here to provide the ending point for Rails. Newel Posts are also used on either side at the bottom of steps to "catch" the Rails. And finally, when the distance between Porch Posts is fairly long, Newel Posts can be used to good advantage between pairs of Porch Posts. Such placement adds visual interest by interrupting the Balustrade with another decorative element. Bottom area of your Newel Posts may be trimmed as necessary during installation to fit your job. ||||||||||||||||0||||||||||New||||||||||||||0||~~|^^|popoin||item.||fastpivot-2007||porchposts1||https://s.turbifycdn.com/aah/vintagewoodworks/info-porch-posts-37.jpg||https://s.turbifycdn.com/aah/vintagewoodworks/info-porch-posts-38.jpg||||Info - Porch Posts ||||products > porchposts1 > ||Products > Porch Posts > ||||||||||||||||0||1||0||0||||geov link-choosing-right-post link-halfposts shforanpo1 hepopowebera weightbearing-cedar inin inacin link-paint-rings ||Click for general overview, installation and other info|| Our Doors are made for a lifetime of openings and closings, even by little children! In short, a lifetime of beauty and usefulness. Screen or Storm Doors, when installed in front of main doors, must swing opposite the main doors. For most installations, it is preferable for the main doors to open into the room and the Screen or Storm Doors to swing outward. "Ordered 2 spectacular screen doors from you 10 years ago. Prepped and painted them according to your instructions they have remained straight and true. Truly beautiful craftsmanship. Thank you for maintaining such high standards." - Nancy S, California Please select a topic below to continue.||||||||||||||||0||||||||||New||||||||||||||0||~~|^^|info-wood-pvc-bb-vg||item.||fastpivot-2007||beadboardhelp||https://s.turbifycdn.com/aah/vintagewoodworks/info-wood-pvc-beadboard-and-v-groove-board-39.jpg||||||Info - Wood & PVC Beadboard and V-Groove Board||||products > beadboard > beadboardhelp > ||Products > Beadboard & V-Groove > Info - Beadboard & V-Groove Board > ||||||||||||||||0||1||0||0||||beboorin beboin1 beadboardcalc1 ||Click for product details, options, installation info, and usage calculators|| - see Info Page Format @ Standard Formats|| see WM > Standard Formats > Info Page Format||||||||||||||||0||||||||||New||||||||||||||0||~~|^^|info-pages||item.||fastpivot-2007||standard-formats||||||||Info Pages||||webmaster-pages > standard-formats > ||Webmaster Pages > Standard Formats > ||||||||||||||||0||1||0||0||||||(nsnf/ckd)|| 1. Image/Icon A. Set Image as Mr Henry when there are 3 or more lines of text in the caption (1) Use Image setting when Mr Henry graphic should appear on page and as thumbnail (2) Use Icon setting when Mr Henry graphic should ONLY appear as thumbnail B. Location of Mr Henry: 1) \\Vww-39\I\40 Publishing\Images\Graphics\Icons 2) File Number: 1075.gif 2. Horizontal Links (centered): 3. Contents: A. Set to 2 Columns B. Set Contents-elements settings 1) If each sub page has an ICON, set to display Image 2) If each sub page does NOT have an ICON, set to NOT display Image a. If set to show ICONs, any page with an IMAGE will display as thumbnail (ICON) b. This is easier than setting up INSET or embedded graphic 4. Custom properties A. Page Title B. Cross-sell-ids (Related Pages) C. Hide-prev-button ||||||||||||||||0||||||||||New||||||||||||||0||~~|^^|initial-price-display||item.||fastpivot-2007||references||||||||Initial Price Display||||webmaster-pages > references > ||Webmaster Pages > YS How-To > ||||||||||||||||1||1||0||0|||||| See Hide Price Initially||See hide-price-initially||||||||||||||||0||||||||||New||||||||||||||0||~~|^^|initial-price-text||item.||fastpivot-2007||references||||||||Initial-price-text ||||webmaster-pages > references > ||Webmaster Pages > YS How-To > ||||||||||||||||0||1||0||0||||||(nsnf/ckd)|| Property Type = text Controls the text following Price: "(displays after selecting options)" There are some Items that do not have any Options; especially after they are flattened. We do not want the text to confuse customers. We change the text to read as Price: (displays after selecting ITEM Design) Example: Small Cedar Finials Price: (displays after selecting Finial Design) <font color=000000; size=-1>(displays after selecting Finial Design)</font> Bargain Room: When we list more than one item per pg at the BR, are unable to use the Price and Sale Price fields. We have to change the text to let customers know the Sale price will be displayed after they make a selection. Example: BR Turned Balusters Price: Sale Price displays after selecting Bargain Number <font color=000000; size=-1>Sale Price displays after selecting Bargain Number</font> Alternate Use Leave blank to omit this text. No example also see Price-explanation 1. Property controls the "(displays after selection options)" text. 2. Text can be omitted or edited by adding new property A. At appropriate page click "Edit" and then click "New Property." B. "Name" field = "Initial-price-text" C. "Type" field = "Text" D. Click "Continue" to have edit page refresh 3. To omit text, leave "Price-explanation" field empty 4. Enter new desired text in the "Price-explanation" field and click "Update."||||||||||||||||0||||||||||New||||||||||||||0||~~|^^|insetporch||item.||fastpivot-2007||poco||||https://s.turbifycdn.com/aah/vintagewoodworks/inset-porch-16.jpg||||Inset Porch||||products > porches > porin > bunewpo > poco > ||Products > Porches - START HERE! > ONLINE PORCH GUIDE > Understanding the Porch > Porch Shapes and Rooflines > ||||||||||||||||0||1||0||0|||||||| Inset Porch General Considerations Allow 1/4" at each end of a run for expansion. Butt joints should fall on a joist, stud, or other nailing surface and each end of the board should be secured. When installing PVC Beadboards, use PVC Adhesive where board ends meet. High Moisture Areas In areas of high humidity, but where direct contact with water is unlikely, you can use wooden boards as long as all surfaces, including the edges and back, are well painted. If staining, you should finish the front and both edges with a clear protective top coating. This will need to be renewed on a regular basis. For even better protection against high humidity you can consider Cedar or Cypress. For areas with frequent direct water contact, such as inside a tub or shower stall, we only recommend PVC. This MIRACLE material will never rot, cup, split, twist, or warp. It is impervious to moisture, salt, and insects. It's also suitable for ground or masonry contact and comes with a 25-year manufacturer's warranty. For the surface to be truly waterproof, even when using PVC boards, you will need to waterproof the seam between each board by running a continuous thin bead of waterproof caulk into each groove immediately before installation. Tongue and Groove Joints Our Wood and PVC Beadboard and V-Groove Board is made with a precision groove on one edge and a tongue on the other. During installation the groove of the next board is inserted over the tongue of the previously installed board. This creates an invisible, interlocking joint between each board. Why tongue and groove? By locking all boards together in this way it is almost impossible for one or more individual boards to warp, twist, or curl out of place! Pre-finish We greatly favor pre-finishing prior to installation and the best finishing results will be obtained by completely finishing each board, including edges and ends, prior to installation. Otherwise, if the boards shrink slightly, unfinished wood will be visible in the tongue and groove area. Care should be taken not to leave a buildup in the tongue and groove areas that would interfere with installation. Concealed Nailing Tongue and groove joints permit concealed nailing. This is accomplished by nailing at approximately a 45 degree angle through the base of the tongue (perpendicular into nailing tab on PVC Beadboard Planks.) The groove of the next board then covers the nail head. Make sure the tongue is not obstructed by the nail, as the groove of the next board must be inserted over the previously nailed tongue. Nail Gun If available, use a nail gun to shoot small brads at approximately a 45 degree angle through the base of the tongue. Hammer If hammering, nails will also be used at approximately a 45 degree angle through the base of the tongue. You may want to pre-drill for each nail. Use an 8 penny finishing nail. Set the nail heads with a Nail Set tool. Nail Spacing Nail approximately every 24" along the length of each board. When installing AZEK® PVC boards on a ceiling we would suggest using 5/8" thick boards, as PVC is somewhat more pliable than wood for a given thickness. It is possible that thinner boards might sag slightly over time. Also, for this same reason, it is important that PVC ceiling boards be nailed every 16" or less except that PVC Beadboard Planks can be nailed 24" apart providing the adjoining space does not exceed 130 degrees fahrenheit. If it does, then PVC Beadboard Planks should also be installed on joists with 16" centers. Attic space should be well ventilated. If you are installing wainscoting or other wall applications where individual boards run vertically, you will need something solid every 24" to nail into. This can be accomplished in several ways: Existing Wood Walls - If you are installing over existing wood walls you can nail directly into them. Exposed Studs - If the wall framing studs are exposed you can install nailing blocks horizontally between the studs. These are typically short pieces of 2x4 framing material. Horizontal Nailers - A quicker method is to install 1x4 construction grade boards horizontally every 24" (including at the floor and ceiling) to the face of the exposed studs. Another advantage of this method is that shims can be used, where required, behind these horizontal nailers to even out bowed studs, thereby creating a flat surface on which to install your Beadboard or V-Groove Board. Keep in mind, however, that you are adding an additional 3/4" of thickness to your walls if you install horizontal nailers. Door and window jamb projections, electrical switches, outlet boxes, Baseboards, and Casing should all be considered, as discussed below. Construction Adhesive We do not have experience with this method, but sometimes construction adhesive is used to install wall boards without nails directly over drywall (also known as gypsum board, wallboard, plasterboard, and sheetrock). We do not recommend adhesive for ceiling installations because gravity is working against you. Inside Corners Cut the grooved edge off of the starting board and butt that cut edge against the corner. Nail through the base of the tongue of that first piece. Outside Corners (standard 90 degree) Cut a 45 degree miter cut on each of the two corner pieces. Nail alternately into both sides of the corner to lock this seam into place. Alternatively, our Outside Square Corner Bead can be used, eliminating the miter cuts. Baseboard, Casing, and Electrical Boxes Baseboard and Casing Traditionally, Baseboard and Casing (door and window trim) is installed over the boards. If Baseboard and Casing is already in place, it should be carefully removed and then reinstalled over the new boards. Jamb Extensions It may be necessary to extend the depth of door and window jambs to accomplish this. If so, the seam between old and new jamb can usually be hidden behind repositioned Door Stop moulding or behind wider new Door Stop If you have difficulty locating sufficiently wide Door Stop locally, please let us know and we can provide that. Electrical Boxes Also, the electrical boxes that switches, outlets, and ceiling lights are installed into might need to be extended or repositioned forward for safety and code requirements. Wainscoting Chalk line Snap a level chalk line on the wall at the height you want the top of your wainscoting. Measure the distance from one side of the wall to the other at this line and at the floor. If there is a difference, you will need to 'cheat' each individual board by a slight amount to ensure that the last board will end flush with the far wall, Casing, etc. This is accomplished by installing either the top or the bottom of the tongue and groove joints slightly tighter to adjust for the measured difference by the time you reach the other end. If this adjustment is done gradually over the entire length of the wall no one, including yourself, will be able to detect this once you have gotten to the other end of the wall. Face Nailing If nails will be covered by Baseboard and Cap Moulding, then nail at the top and bottom of each wainscot board. If wainscot is taller than 36" it is best to also nail through the tongue, as described above, halfway along the height of the each board. Alternate Method Depending upon your situation, you may be able to install your wainscoting without having something solid and horizontal to nail the top of each board to. If you use an overlapping top Cap (or a trim board beneath our Shelf Cap), the Cap (or top trim board) can be nailed into each wall stud. This will secure the top of the boards without having to nail the top of the boards themselves to the wall. Be sure to keep the tongue and groove joints tight as you proceed. This can be accomplished by periodically nailing the Cap (or top trim board) to the last board you have installed, thereby locking several previously installed boards tightly into place at their tops. Wood framed walls typically have a bottom plate under the studs at the floor to which you can nail the bottom of the boards. As you nail the bottom of each board to this plate, confirm that each board remains plumb (perfectly vertical). Wainscot Cap Moulding You will want to finish the top edge of your wainscoting with Wainscot Cap Moulding. Walls The wainscot instructions above also mostly apply to floor to ceiling walls. Ceilings Ceiling board installation is easiest when the ceiling boards run perpendicular to the ceiling joists, as that allows nailing directly to each joist. Porch ceiling boards traditional run with the length of the porch. That works well because ceiling joist almost run from front to back across the porch. However, since porch floor boards typically run from front to back, some prefer porch ceiling boards to also run front to back, which normally means the same direction as the ceiling joists. This can be accomplished by install blocking between the joists or 1x4 nailers to the bottom of the joists. Either way, for interior applications where a roof is directly above the ceiling, a plastic vapor barrier should be stapled to your ceiling joists, with insulation above. Joist Spacing Modern construction typically uses ceiling joist 16" on center. However, in our office building we have several ceilings with 24" on center joists. We installed our wood 5/8" thick Beadboard directly to these joists. While we do not know if this will satisfy your local building codes, it has been very satisfactory for us due to the interlocking tongue and groove. When installing AZEK PVC boards on a ceiling we would suggest using 5/8" thick boards, as PVC is somewhat more pliable than wood for a given thickness. It is possible that thinner boards might sag slightly over time. Also, for this same reason, it is important that PVC boards be nailed every 16" or less. Interior Ceilings For interior installations, we also feel it's very important to install your boards when interior conditions are reasonably dry, and after the boards have been allowed to "season" inside for several weeks. Otherwise, if you install boards under humid conditions, it is possible to later experience excessive shrinking. It's always a good precaution to leave a 1/4" or so space between the walls and the ceiling boards to allow for expansion. This void can be covered with any flat-backed Moulding, including simple quarter-round available locally. For Gable Decorations with a center Drop, the following instructions apply. The product listing for Gable #4208, includes installation tips. For other designs without a center Drop, please skip to step 4 below, and install Side Pieces touching at center of gable. Typical installation: Gable Decorations are screwed to the soffit, the bottom board of the eave. The fascia (eave face board) usually overhangs the soffit by a small amount. Gable Decorations are normally installed below and immediately behind the fascia. That is, they are mounted out from the wall, suspended just behind the front edge of the eave. Scollwork should touch the center Drop when installed. Optional installations: If your fascia boards are 1-1/2" or more in thickness, you may prefer screwing Center Drop and Side Pieces directly to the bottom of these fascia boards. In this case only, you'll remove the top flange of Drop, and bevel the top of Drop to fit your gable angle . This may, however, make it more difficult to attach Drop to eave. This Drop modification may also be required if your roof is built without fascia boards. 2. Pre-drill Drop While on the ground or a flat portion of the roof, pre-drill rounded flange to accept wood screw(s). 3. Install Drop Screw flange of Drop to fascia boards, as shown in Fig.2. 4. Install Side Pieces Pre-drill frames of Side Pieces for screws, and then screw Side Pieces into bottom of soffit, as shown in Fig.3. If fascia overhangs soffit, frames should rest just behind fascia boards. Cutwork of Side Pieces should fit tightly against sides of Drop. Now stand back (but only after coming down from on high, please!) and accept the compliments. ||||||||||||||||0||||||||||New||||||||||||||0||~~|^^|bb-planks-install||item.||fastpivot-2007||info-pvc-bb-planks||https://s.turbifycdn.com/aah/vintagewoodworks/installation-pvc-beadboard-planks-27.jpg||https://s.turbifycdn.com/aah/vintagewoodworks/pvc-beadboard-planks-installation-12.jpg||||Installation - PVC Beadboard Planks||||products > beadboard > beadboardhelp > info-pvc-bb-planks > ||Products > Beadboard & V-Groove > Info - Beadboard & V-Groove Board > Info - PVC Beadboard Planks > ||||||||||||||||0||1||0||0||||||Click for installation info|| Also see General Beadboard Installation Instructions. NOTE: It is traditional to run ceiling Beadboard with the length of the ceiling. That usually means perpendicular to standard ceiling joist layout, thereby allowing Beadboard to be nailed directly to each joist. Before installing the first Plank, test fit two Planks together. Note how the tongue edge of one piece fits into the grove edge of the other. The groove edge has the nailing fin discussed below. 1. Allow 1/4" on each end of the porch for expansion. You can cover this space with Moulding. 2. With the nailing fin positioned away from the wall, face nail the first Plank near the wall with maximum nail spacing of 24". (See Note #1 below.) 3. Next, nail through the nailing fin on the other edge of this first Plank. Maximum nail spacing is 24". 5. 16 gauge pneumatic nailers or staplers are also acceptable for Steps 2 - 4. Recommended air pressure is 75-80 psi. 6. Use clear PVC cement where Plank ends must be butted together. 8. The last Plank will probably need its width adjusted. Measure, mark and rip to the desired width. 9. A power saw can be used to cut last Plank to a width that will leave at least 1/4" for expansion. 11. Trim with your choice of PVC Moulding. Install Moulding using finish nails or screws. Glue joints with PVC Adhesive and finish with latex caulk. PLEASE NOTE: 1. PVC Beadboard Planks can be installed on joists spaced 24" on center as long as the adjoining space does not exceed 130 degrees Fahrenheit. If it does, then PVC Beadboard Planks must be installed on joists with 16" centers. 2. Attic above where Planks are installed should be well ventilated. Check with local building code. 3. Air temperature should be 65 to 75 degrees Fahrenheit during installation. 4. PVC Beadboard Planks are not load bearing. 5. Can be painted but that is not required. If you have another color in mind, use a 100% acrylic latex paint. If Planks will receive direct exterior sunlight paint should have a Light Reflective Value of 55 or higher. See paint manufacturer's recommendation for painting PVC. Cellular PVC does not absorb moisture so paint lasts much longer than on wood. Installation Accessories||||||||0||1||0||0||||cybamobl albamopl1 ||Click for 2 designs|| Wood exterior Post bottoms must be protected from water damage. If Posts are allowed to sit directly on the porch floor they will eventually get the dreaded "soggy bottom rot!" This is caused by moisture working its way into the space between Post and floor and then remaining there for long periods of time due to limited air circulation. The solution is two-fold: 1. Completely paint wood Post bottoms prior to installation. 2. Use one of our Installation Accessories to elevate Porch Posts above the porch floor. Polyurethane and Polyethylene Posts with Steel Cores do not require Installation Accessories for moisture protection. However, the use of these will give these Posts a more traditional and finished installed appearance.||||||||||||||||0||||||||||New||||||||||||||0||~~|^^|rail-accessories||item.||fastpivot-2007||ub-products-temp||||||||Installation Accessories||UB-a||webmaster-pages > indevelopment > ub-products-temp > ||Webmaster Pages > Store Work > UB Products Temp > ||0.000||0.000 ||||Rail Installation Accessories||||||||0||1||0||0||||||(nsnf/ckd)|| These kits are great for many exterior applications. The extruded bracket designs and included hardened screws provide exceptional strength. The coating uses a proprietary process that provides maximum protection. We recommend using the Installation Kits below when installing Handrails and Bottom Rails. Available in 2 sizes. 1-1/2" works on Straight Run Rails (Both Handrails and Bottom Rails) with Sub-rail and bottom Rails upto 1-1/4". 1-1/2" size is also available with and angled Bracket. (Angle is approximately 126 degrees.) This set can be used on Stair Rails. 1-1/4" works on Straight Run Rails (Both Handrails and Bottom Rails) upto ________". When using our standard Sloped-Top Bottom Rail on Straight Run Rails use the 1-1/4" Kit. Due to the size of our standard Sloped-Top Bottom Rail's bottom piece, the 1-1/2" size will be to large. ||"Applications" "Select one" "Straight Run - top rail (+$4.99)" "Straight Run - bottom rail (+$4.99)" "Straight Run - Sloped-Top Bottom Rail (+$4.99)"|^|"Size of Rail" "Select one" "1-1/2''" "1-1/4''" "Other - Enter Below"||||||||||||||0||||||||||New||||||||||||||0||~~|^^|inacin||item.||fastpivot-2007||popoin||||https://s.turbifycdn.com/aah/vintagewoodworks/installation-accessory-instructions-17.jpg||||Installation Accessory Instructions||||products > porchposts1 > popoin > ||Products > Porch Posts > Info - Porch Posts > ||||||||||||||||0||1||0||0||||cymoblin inalbbamopl inbrwitrin ||Click for installation accessory instructions||||||||||||||||||0||||||||||New||||||||||||||0||~~|^^|inbrwitrin||item.||fastpivot-2007||inacin||||https://s.turbifycdn.com/aah/vintagewoodworks/installation-bracket-with-trim-instructions-25.jpg||https://s.turbifycdn.com/aah/vintagewoodworks/installation-bracket-with-trim-instructions-26.jpg||Installation Bracket with Trim Instructions||||products > porchposts1 > popoin > inacin > ||Products > Porch Posts > Info - Porch Posts > Installation Accessory Instructions > ||||||||||||||||0||1||0||0||||||Click for installation info|| INSTALLATION WITH PVC TRIM SLEEVE • Slide PVC Trim Sleeve over Post prior to positioning Post. • Attach each half of Metal Bracket to floor with screws. • Once Post is in place, attach Metal Bracket to Post. (If Post has synthetic exterior shell, be sure screws penetrate interior structural pipe or wood core.) • Slide PVC Trim Sleeve into position over Metal Bracket and caulk around top of PVC Trim Sleeve. INSTALLATION WITH WOOD MOULDING Pre-paint all surfaces of the 4 pieces of Moulding. Attach the 4 pre-mitered pieces of Moulding to the installed Post with finishing nails. Carefully caulk around top of Moulding. • Important Considerations • Overview • Painting • Balustrade Sections • Actual Installation Take your time. Enjoy the work as you proceed. Life is not merely results, however grand, But mainly the thoughts, the actions, and The individual moments leading to a goal. Your added bonus is the joy, the satisfaction, And the memory of a job well done. - Vintage Woodworks Catalog #3 (Also see Care & Feeding of Millwork for instructions on proper storing and finishing.) Following is a brief overview of our recommended general installation techniques. More detailed installation information can be found at many product sections. Brass Screws - For most items we recommend round-head (also called pan-head) brass screws, with screw heads left exposed. Screws allow more adjustment than nailing, avoid damage from hammer blows, and permit easy removal for maintenance. Pre-drilling - Holding the item in place, mark appropriate screw locations. Pre-drill screw holes large enough to allow screws to snugly fit through the item without using a screw driver. You may also drill pilot holes into the mounting surface. These should be slightly smaller than the screws, for a good hold. Installation Books Our Online Porch Guide includes a comprehensive section on Installation of Porch Parts. Crown Moulding and Trim has 132 full color pages to aid in the installation of your Crown Mouldings. A companion set of wood templates is also available. And, of course, you have all of us! We're eager to answer any questions you may have... so give us a call at 903-356-2158. PS - Don’t forget to send a picture when your project is finished. We love sharing your success. (nsnf/ckd)|| A pleasing height for most first floor porch handrails is 30" - 32". For second story porches and balconies, at least 36" is necessary for safety. Local building codes should, of course, always be followed in determining installed Handrail height. of Rails We offer lots of information to help you install your Balusters. Please click a link below to continue...
using Rail Fastening Kit #________||||||||0||1||0||0||||||(nsnf/ckd)|| OVERVIEW Wood exterior Rails and Newel Posts are vulnerable to premature failure where Rails and Newels (or wall) meet. This is particularly true of Stair Rail installations and is caused when moisture remains in the small space between end of Rail and Newel. Rather than caulking after installation, it is far better to caulk from "the inside out" during installation. This approach fills the entire space between Rail and Newel, is superior in several ways, and exposes less caulk to view! It's also better to leave a small space between Rail and Newel and let the caulk serve as an "expansion joint". The following instructions create this space and incorporate "from the inside out" caulking. They also assume you are using a Subrail beneath your Handrail and our 2-part Sloped-top Bottom Rail. This system will minimize visible hardware while making installation and future maintenance much easier. INSTRUCTIONS As shown in Drawing #1, Brackets A and B will be installed between Newels and end of Rail. Brackets C and D will extend the thickness of the Bracket beyond the end of the Rails. Therefore, Rail lengths will be 3/16" less (the thickness of 2 Brackets) than the distance from Newel to Newel. 1. Measure the sloped distance from Newel to Newel at the points where Subrail is to be installed. 2. Trim Subrail to this length while also beveling the ends to the correct slope. Test fit this Subrail by temporarily inserting Brackets at each end of the Subrail, between Subrail and Newels. (For this test fitting, the Bracket in position C will be inverted so that it is between Subrail and lower Newel.) 3. Installing Bracket C onto Subrail A. Use a second white Bracket to position the shorter leg of white Bracket C the thickness of itself beyond the lower end of the Subrail you prepared in Step 2. Mark the Subrail with a pencil through the two outer holes of the longer leg of one Bracket, as shown in Drawing #2. B. Using a drill bit slightly smaller than the diameter of the screws, predrill perpendicular to the bottom of the Subrail at your 2 marks. C. Screw Bracket C onto Subrail. 4. Installing Bracket A onto Subrail When it's time to install the assembled Balustrade (Rails and Balusters - but Handrail will be installed last) into place, you will need to screw through the top of the Subrail, through white Bracket A, and into the upper Newel. A. Hold Bracket A in postion and mark the two outer holes of the longer leg. B. Using a drill bit slightly smaller than the diameter of the screws, predrill perpendicular to the bottom of the Subrail at your 2 marks. C. Screw Bracket A onto Subrail. D. Using the same drill bit, drill through the two holes in the shorter leg and entirely through the Subrail. E. Hold Subrail in position. Using same drill bit, drill through Subrail and through shorter leg of Bracket A into the upper Newel. These two holes will become your pilot holes when it's time to install the Balustrade section. 5. Installing Bracket B onto Subrail A. <<<<< 4.16.10 - rht will do a prototype >>> 6. Installing Bracket D onto Subrail A. Using one of the galvanized t-shaped Brackets, hold it only the end of the bottom piece of the Sloped-top Bottom Rail so that the shorter portion of the "T" is entirely below the Rail, as shown in Phto # __. B. Mark the positon of the two upper holes in the longer portion of the "T". C. Using a drill bit slightly smaller than the diameter of the screws, predrill perpendicular to the bottom of the Subrail at your 2 marks. C. Screw Bracket A onto Subrail. ||||||||||||||||0||||||||||New||||||||||||||0||~~|^^|column-install-rail||item.||fastpivot-2007||column-info||||https://s.turbifycdn.com/aah/vintagewoodworks/installing-handrails-to-round-columns-36.jpg||||Installing Handrails to Round Columns||||products > columns > column-info > ||Products > Columns > Info - Columns > ||||||||||||||||0||1||0||0||||||Click for installation info|| 1. Mark the desired height of the Rail on the Column where the Rail is to be attached. NOTE: Local building codes may dictate the Rail height for your particular installation. Be sure to check with your building code official to determine the proper Handrail height. 2. Temporarily hold the Handrail in place. Use a carpenter's pencil to draw the curvature of the Column onto the top of the Handrail. Use a coping saw to cut the curvature into the end of the Handrail. 3. With the coped end of the Rail held in place, mark and accurately cut the Rail to length. 4. A rust-resistant corner brace (i.e. Stanley 1-1/2" zinc plated metal corner brace or equivalent) will be mounted to the Handrail with rust-resistant screws and to the Column with toggle bolts (hollow wall anchors). Corner braces can be found locally at most home improvement stores. Mark the Column at the bottom of the Handrail. It may be necessary to sand a small area on the Column to provide a flat mounting surface for the corner brace. 5. Temporarily hold the corner brace in place where the bottom of the Handrail will be and mark the holes in the corner brace on the Column. Pre-drill pilot holes in the Column for toggle bolts. 6. Set the Handrail in place and attach the corner brace to the bottom of the Rail using rust-resistant wood screws. 7. Apply paintable silicone sealant to the joint between Column and Handrail. Important Additional Info Integral Spandrel An integral Spandrel is occasionally used between the Handrail and the Balusters. It is most applicable when a fancier Balustrade is desired. It is also a most effective way to increase the overall height of a balustrade. Typically, the height of the Spandrel itself would not exceed eight inches. Stair Components||||webmaster-pages > misc > content-links > ||Webmaster Pages > Misc Pgs @ WM > Content Links > ||||||||||||||||0||0||0||0||||||||||||||||||||||||0||||||||||New||||||||||||||0||~~|^^|link-int-stair-turnings||link.||storetemplate.||content-links||https://s.turbifycdn.com/aah/vintagewoodworks/interior-stair-turnings-20.jpg||||||Interior Stair Turnings||||webmaster-pages > misc > content-links > ||Webmaster Pages > Misc Pgs @ WM > Content Links > ||||||||||||||||0||0||0||0||||||||||||||||||||||||0||||||||||New||||||||||||||0||~~|^^|link-int-balustrade||link.||storetemplate.||content-links||https://s.turbifycdn.com/aah/vintagewoodworks/interior-balustrade-components-23.jpg||||||Interior Balustrade Components||||webmaster-pages > misc > content-links > ||Webmaster Pages > Misc Pgs @ WM > Content Links > ||||||||||||||||0||0||0||0||||||||||||||||||||||||0||||||||||New||||||||||||||0||~~|^^|inba||item.||fastpivot-2007||instpa||||https://s.turbifycdn.com/aah/vintagewoodworks/interior-balusters-spindles-17.jpg||||Interior Balusters (Spindles)||||products > instpa > ||Products > Stair Parts, Interior > ||||||||Interior Baluster (Spindle) Categories||||||||0||1||0||0||||sqtopba tatopba plsqba ||Click for 22 Designs Square Top, Taper Top, and Plain Square|| Square Top and Plain Square Balusters are typically used with Handrail which has a bottom channel. Taper Top Balusters are typically used with Handrails without a bottom channel. Drawings not to scale. Although some Balusters are offered as primed, they are for interior use only and are not recommended for exterior use. We also sell a large selection of Porch Balusters that can be used inside as well.||||||||||||||||0||||||||||New||||||||||||||0||~~|^^|int-shoefilletsub||item.||fastpivot-2007||instpa||||https://s.turbifycdn.com/aah/vintagewoodworks/interior-bottom-shoe-rails-fillet-24.jpg||||Interior Bottom (Shoe) Rails & Fillet||SM-RALwd (caf)||products > instpa > ||Products > Stair Parts, Interior > ||0.000||0.000 ||||||||||||1||1||0||0||||||7 Designs||Interior Bottom (Shoe) Rails & Fillet SM-RALwd SM-6006, SM-H6006, SM-H 6006, SM-6007, SM-6007A, SM-6007 A, SM-6050 6006, H6006, H 6006, 6007, 6007A, 6007 A, 6045, 6050||"Design/Material" "Select one:" "SM-6006 Reversible Shoe Oak - 1-3/4'' Channel (+$18.73)" "SM-6006 Reversible Shoe Oak - 1-5/8'' Channel (+$18.73)" "SM-6006 Reversible Shoe Maple - 1-3/4'' Channel (+$16.93)" "SM-6006 Reversible Shoe Maple - 1-5/8'' Channel (+$16.93)" "SM-6007 Fillet Oak (+$1.33)" "SM-6007 Fillet Maple (+$2.30)" "SM-H6007 Fillet Hemlock (+$0.83)" "SM-6007A Fillet Oak (+$1.43)" "SM-6007A Fillet Maple (+$2.45)" "SM-6050 Fillet Oak (+$2.45)" "SM-6050 Fillet Maple (+$2.30)" "SM-6050 Fillet Hemlock (+$1.00)" "iSM-6208H Fillet Hemlock (+$0.50)" "iSM-6308H Fillet Hemlock (+$0.50)" "iSM-6308H Fillet Hemlock (+$0.50)"|^|"LENGTH: Length" "Select one:" "Random Lengths for Fillet (12'')" "8 Feet (96'')" "10 Feet (120'')" "12 Feet (144'')" "14 Feet (168'')" "16 Feet (192'')"|^|"Shipping Info" "Select one:" "- This item is 46'' or longer. I read the 'Important Shipping Info' link above." "- This item is less than 46'' in length."||||||||||||||0||||||||||New||||||||||||||0||~~|^^|handrails3||item.||fastpivot-2007||instpa||||https://s.turbifycdn.com/aah/vintagewoodworks/interior-handrails-29.jpg||||Interior Handrails||SM-RALwd (caf)||products > instpa > ||Products > Stair Parts, Interior > ||0.000||0.000 ||||||||||||1||1||1||0||||||11 Designs||Interior Handrails SM-RALwd SM-6010, SM-6010P, SM-6010 P, SM-6010 SC, SM-6010SC, SM-6019, SM-6040, SM-6042, SM-6210, SM-6210P, SM-3210 P, SM-N6210, SM-N6210P, SM-N6210 P, SM-6810, SM-6810P, SM-6810 P 6010, 6010P, 6010 P, 6010 SC, 6010SC, 6019, 6019 H,6040, 6042, 6210, 6210P, 6210 P, N6210, N6210P, N6210 P||"Design/Material" "Select one:" "SM-6010 Oak (+$19.38)" "SM-6010P Oak with 1-1/4'' Bottom Channel (Please ask about availability and price)" "SM-6010 Maple (+$22.93)" "SM-6010P Maple with 1-1/4'' Bottom Channel (+$22.45)" "---------------------------" "SM-6010SC Oak (+$29.35)" "SM-6010SCP Oak with 1-1/4'' Bottom Channel (Please ask about availability and price)" "---------------------------" "SM-6019 Oak (+$45.68)" "SM-6019 Plowed - No longer available" "---------------------------" "SM-6040 Oak (+$12.73)" "SM-6040 Maple (+$15.65)" "SM-6040 Hemlock (+$3.95)" "---------------------------" "SM-6042 Oak (+$12.33)" "SM-6042 Hemlock (+$4.73)" "SM-i6042 Hemlock - SALE LENGTHS ONLY, as listed above (+$1.00)" "---------------------------" "SM-6210 Oak (Please ask about availability and price)" "SM-6210P Oak with 1-1/4'' Bottom Channel (+$24.50)" "SM-6210P Oak with 1-5/8'' Bottom Channel (+$26.00)" "SM-6210P Oak with 1-3/4'' Bottom Channel (+$25.23)" "---------------------------" "SM-N6210 Oak (+$28.20)" "SM-N6210P Oak with 1-1/4'' Bottom Channel (+$24.50)" "SM-N6210P Oak with 1-5/8'' Bottom Channel (+$26.83)" "SM-N6210P Oak with 1-3/4'' Bottom Channel (+$25.23)" "SM-N6210 Maple (Please ask about availability and price)" "SM-N6210P Maple with 1-1/4'' Bottom Channel (+$25.28)" "SM-N6210P Maple with 1-5/8'' Bottom Channel (Please ask about availability and price)" "SM-N6210P Maple with 1-3/4'' Bottom Channel (Please ask about availability and price)" "---------------------------"|^|"LENGTH: Length of each piece" "Select one:" "8 Feet (96'')" "10 Feet (120'')" "12 Feet (144'')" "14 Feet (168'')" "16 Feet (192'')"|^|"Shipping Info" "Select one:" "- This item is 46'' or longer. I read the 'Important Shipping Info' link above." "- This item is less than 46'' in length."||||||||||||||0||||||||||New||||||||||||||0||~~|^^|kent1||item.||fastpivot-2007||barostar||https://s.turbifycdn.com/aah/vintagewoodworks/interior-newel-bargains-34.jpg||||||Interior Newel Bargains||vww||webmaster-pages > q-storage > barostar > ||Webmaster Pages > Storage Area > Bargain Room Storage > ||0.000||0.000 ||||Bargain Room - CF - Kent Newel (#2)||||||||0||1||1||0||||||(nsnf/ckd)|| 4040 4040 BT-H 4040 BT-H-5 #2 2 4040BT-H 4040BT-H-5||"Size" "Select one" "(i4040BT-H) FULL 4'' (net 3-1/4'') x 47'' (+$29.99)" "(i4040BT-H-5) HALF 4'' (net 3-1/4'') x 47'' (+$9.99)"|^|"Add Installation Kit" "Select one" "---------" "No thanks" "---------" "Yes, add FULL Deluxe Installation Kit, PVC (RB-90214jPV) (+$14.99)" "Yes, add FULL Deluxe Installation Kit, Cypress (RB-90214j500) (+$14.99)" "Yes, add FULL Deluxe Installation Kit, Cedar (RB-90214j200) (+$14.99)" "Yes, add FULL Deluxe Installation Kit, Poplar (RB-90214j400) (+$14.99)" "Yes, add FULL Deluxe Installation Kit, Pine (RB-90214) (+$14.99)" "Yes, add FULL Deluxe Installation Kit, Oak (RB-90214j100) (+$14.99)" "Yes, add FULL Deluxe Installation Kit, Redwood (RB-90214j300) (+$14.99)" "---------" "Yes, add HALF Deluxe Installation Kit, PVC (RB-90214hjPV) (+$9.99)" "Yes, add HALF Deluxe Installation Kit, Cypress (RB-90214hj500) (+$9.99)" "Yes, add HALF Deluxe Installation Kit, Cedar (RB-90214hj200) (+$9.99)" "Yes, add HALF Deluxe Installation Kit, Poplar (RB-90214hj400) (+$9.99)" "Yes, add HALF Deluxe Installation Kit, Pine (RB-90214h) (+$9.99)" "Yes, add HALF Deluxe Installation Kit, Oak (RB-90214hj100) (+$9.99)" "Yes, add HALF Deluxe Installation Kit, Redwood (RB-90214hj300) (+$9.99)" "---------" "Yes, add FULL Standard Installation Kit, PVC (141500jPV) (+$14.99)" "Yes, add FULL Standard Installation Kit, Cypress (141500j500) (+$14.99)" "Yes, add FULL Standard Installation Kit, Cedar (141500j200) (+$14.99)" "Yes, add FULL Standard Installation Kit, Poplar (141500j400) (+$14.99)" "Yes, add FULL Standard Installation Kit, Pine (141500) (+$14.99)" "Yes, add FULL Standard Installation Kit, Oak (141500j100) (+$14.99)" "Yes, add FULL Standard Installation Kit, Redwood (141500j300) (+$14.99)" "---------" "Yes, add HALF Standard Installation Kit, PVC (141501jPV) (+$9.99)" "Yes, add HALF Standard Installation Kit, Cypress (141501j500) (+$9.99)" "Yes, add HALF Standard Installation Kit, Cedar (141501j200) (+$9.99)" "Yes, add HALF Standard Installation Kit, Poplar (141501j400) (+$9.99)" "Yes, add HALF Standard Installation Kit, Pine (141501) (+$9.99)" "Yes, add HALF Standard Installation Kit, Oak (141501j100) (+$9.99)" "Yes, add HALF Standard Installation Kit, Redwood (141501j300) (+$9.99)"||||||||||||||0||||||||||New||||||||||||||0||~~|^^|innepowgr||item.||fastpivot-2007||instpa||||https://s.turbifycdn.com/aah/vintagewoodworks/interior-newel-posts-17.jpg||||Interior Newel Posts||||products > instpa > ||Products > Stair Parts, Interior > ||||||||Interior Newel Post Categories||||||||0||1||0||0||||nepowgr ovne boxnewels ||Click for 49 Designs Post-to-Post, Pin Top, and Box|| Handrails are fitted to Newels either over-the-post or post-to-post. Please see our Step-by-step Selection Guide to determine which style you prefer. Newels do not have to match the Baluster design. Half Newels can be used where Handrails terminate into walls.||||||||||||||||0||||||||||New||||||||||||||0||~~|^^|fittings1||item.||fastpivot-2007||instpa||||https://s.turbifycdn.com/aah/vintagewoodworks/interior-rail-fittings-17.jpg||||Interior Rail Fittings||||products > instpa > ||Products > Stair Parts, Interior > ||||||||Interior Rail Fitting Categories||||||||0||1||0||0||||mifi risers warafi ||Click for 46 Designs|| Fittings are on sale below! If you want an over-the-post railing system, you'll need Fittings that match the profile of your Handrail. Square Top, Taper Top, and Plain Square||||||||||||||||||0||||||||||New||||||||||||||0||~~|^^|stair-accessories||item.||fastpivot-2007||instpa||||https://s.turbifycdn.com/aah/vintagewoodworks/interior-stair-accessories-27.jpg||||Interior Stair Accessories||SM/CF-ACC||products > instpa > ||Products > Stair Parts, Interior > ||0.000||0.000 ||||||||||||1||1||0||0||||||Click to browse and order interior stair accessories ||Interior Stair Accessories Parts SM/CF-ACC SM-3000-O SM-3000-M SM-3000-H Plug SM-B3000A Button SM-3000A SM-3000S-O SM-3000S-M SM-3000S-H Plug SM-3001-CW Rail Bolt Curved Washer SM-3001SP Special Rail Bolt SM-3002 SM-3002-C Wall SM-3002-SN Wall Bracket SM-3002-B Wall Bracket SM-3002H SM-3002H-C SM-3002H-SN SM-3002H-B SM-3002H-ORB Heavy Duty Bracket SM-3003 Dowel Screw SM-3004 Rail Bolt Wrench SM-3006 Dowel Screw Driver SM-3008 Rail Bolt Driver SM-7017-O SM-7017-M Round Rosette SM-7037-O SM-7037-M SM-7037-H Oval Rosette SM-7217-O Round Rosette SM-7237-O SM-7237-M Oval Rosette||"Number/Item" "Select one:" "SM-3000-O Plug, 1'' - Oak (+$.68)" "SM-3000-M Plug, 1'' - Maple (+$1.15)" "SM-3000-H Plug, 1'' - Hemlock (+$1.63)" "----------" "SM-B3000A Button, 1/2'' - Oak (Please ask about availability and price)" "----------" "SM-3000A Plug, 1/2'' - Oak (+$.38)" "----------" "SM-3000S-O Plug, 1-1/2'' - Oak (+$1.78)" "SM-3000S-M Plug, 1-1/2'' - Maple (+$2.30)" "SM-3000S-H Plug, 1-1/2'' - Hemlock (+$1.78)" "----------" "SM-3001-CW Rail Bolt Curved Washer (+$.95)" "SM-3001SP Special Rail Bolt (+$11.58)" "----------" "SM-3002 Wall Bracket - Bright Brass (+$6.78)" "SM-3002-C Wall Bracket - Polished Chrome (+$6.78)" "SM-3002-SN Wall Bracket - Satin Nickel (+$7.13)" "SM-3002-B Wall Bracket - Black (+$11.18)" "----------" "SM-3002H Heavy Duty Bracket - Bright Brass (+$15.88)" "SM-3002H-C Heavy Duty Bracket - Polished Chrome (+$17.03)" "SM-3002H-SN Heavy Duty Bracket - Satin Nickel (+$18.38)" "SM-3002H-B Heavy Duty Bracket - Black (+$10.20)" "SM-3002H-ORB Heavy Duty Bracket - Oil Rubbed Bronze (+$19.68)" "----------" "SM-3003 Dowel Screw (+$0.90)" "----------" "SM-3004 Rail Bolt Wrench (+$43.43)" "----------" "SM-3006 Dowel Screw Driver (+$65.95)" "SM-3008 Rail Bolt Driver (+$68.53)" "----------" "SM-7017-O 4-1/2'' Round Rosette - Oak (+$13.98)" "SM-7017-M 4-1/2'' Round Rosette - Maple (+$7.60)" "----------" "SM-7037-O 4'' x 5-1/2'' Oval Rosette - Oak (+$19.05)" "SM-7037-M 4'' x 5-1/2'' Oval Rosette - Maple (+$12.70)" "SM-7037-H 4'' x 5-1/2'' Oval Rosette - Hemlock (+$6.15)" "----------" "SM-7217-O 5'' Round Rosette - Oak (+$14.08)" "----------" "SM-7237-O 5-1/2'' x 6'' Oval Rosette - Oak (+$19.05)" "SM-7237-M 5-1/2'' x 6'' Oval Rosette - Maple (+$15.03)"|^|"Quantity Based Pricing" "Select one:" "Ordering 10 or more identical items - no extra charge" "Ordering 3 to 9 identical items !1" "Ordering 2 identical items !1" "Ordering only 1 identical item !1"||||||||||||||0||||||||||New||||||||||||||0||~~|^^|stairparts||item.||fastpivot-2007||bargainroom||||https://s.turbifycdn.com/aah/vintagewoodworks/interior-stair-parts-bargains-25.jpg||||Interior Stair Parts Bargains||||products > bargainroom > ||Products > The Bargain Room! > ||||||||Bargain Room - Interior Stair Part Categories||||||||0||1||0||0||||br-subrails-shoes ||Click to browse||  Bargain Room Stair Parts are heavily discounted! All are FIRST QUALITY and, unless otherwise noted, made of Red Oak (for interior use).||||||||||||||||0||||||||||New||||||||||||||0||~~|^^|br-subrails-shoes||item.||fastpivot-2007||stairparts||||https://s.turbifycdn.com/aah/vintagewoodworks/interior-subrails-and-shoe-bargains-24.jpg||||Interior Subrails and Shoe Bargains||iC- (caf)||products > bargainroom > stairparts > ||Products > The Bargain Room! > Interior Stair Parts Bargains > ||0.000||0.000 ||||Bargain Room Interior Subrails & Shoes||||||||1||1||0||0||||||||Interior Subrails and Shoe Bargains 6031 6032 6006 6045 Channel Subrail Channel Shoe Channel SS Shoe||"Design and Length" "Select one" "1-3/4'' Channel Subrail - 3 Feet (6032) (+$0.75)" "----------" "1-3/4'' Channel Shoe - 3 Feet (6006) (+$0.75)" "1-3/4'' Channel Shoe - 8 Feet (6006) (+$2.00)" "1-3/4'' Channel Shoe - 10 Feet (6006) (+$2.50)" "----------" "1-1/4'' Channel Shoe - 15 Feet (6045) (+$3.75)" "1-1/4'' Channel Shoe - 16 Feet (6045) (+$4.00)" "----------"|^| "Shipping Info" "Select one:" "- This item is 46'' or longer. I read the 'Important Shipping Info' link above." "- This item is less than 46'' in length."||||||||||||||0||||||||||New||||||||||||||0||~~|^^|wall-bb-photos||item.||fastpivot-2007||beadboard||||https://s.turbifycdn.com/aah/vintagewoodworks/interior-walls-ceilings-17.jpg||||Interior Walls & Ceilings||||products > beadboard > ||Products > Beadboard & V-Groove > ||||||||Interior Wall & Ceiling Beadboard||||||||0||1||0||0||||||Click for additional interior uses|| (Click each photo below for larger sizes, more views, etc.) ceilings are extremely easy to live with! They instantly transform any room, adding a rich texture and quality to your surroundings. (Samples available at each Category) The magnificent pool room above and to the left have enjoyed painted wood Beadboard for over 15 years with no signs of distress from the high humidity. The photo to the left illustrates the ease with which our individual-board Beadboard can be installed on a curve. Soaring Ceiling Stain for this 3-1/4" wide Beadboard ceiling was a mix of Cherry and Honey Oak to achieve the precise color the owner wanted. We think the results are just outstanding! Kitchen Walls Floor to ceiling (and the ceiling!) of this kitchen are covered with stained Beadboard. It provides a perfect backdrop for the creative window surround the owners created with our Cupid's Key Brackets, and an extra Shelf Board. Beadboard Adds Interest Beadboard was used near the middle on opposing sides of this very large rectangular office to break up a 38 foot long expanse of conventional drywall. It was also used to create the custom closet doors seen on the right side of the photo. Click this photo for an explanation of how these doors were very easily created on the job site starting with a pair of our standard doors. Beadboard Everywhere! Unlike the office above, this office is all Beadboard all the time! Floor to ceiling walls feature large windows and glass doors so it's really not as much Beadboard as one might think ... and it's gotten lots of compliments over the years. PVC Beadboard Great for screened or regular porch walls (as well as porch ceilings) and other exterior walls because PVC Beadboard is easy to clean, holds paint exceptionally well, and looks great doing it! (Samples available at each Category) Thus, for Post Face Brackets (which are mounted to the faces of the Posts), you'll see the full outline of only the Bracket that shows to the side of the porch. For all other Post Face Brackets, you're seeing only the front edge, not the flat side of the Bracket. That's what you'd see looking straight at the front of a porch. We represent this edge as a long, gray rectangle. Likewise, Belt Course Brackets, installed perpendicular to the face of the Beams, are shown as a gray edge. Please remember as you study these illustrations that the most successful porches do present themselves in real life in three dimensions! It's not as easy to see exactly what a specific item will look like from this perspective drawing but it will help you understand the overall relationship that various components have to one another. - see Introduction (Category) Page Formats at Standard Formats|| see WM > Standard Formats > Introduction (Category) Pages||||||||||||||||0||||||||||New||||||||||||||0||~~|^^|intro-pages||item.||fastpivot-2007||standard-formats||||||||Introduction (Category) Pages||||webmaster-pages > standard-formats > ||Webmaster Pages > Standard Formats > ||||||||||||||||0||1||0||0||||||(nsnf/ckd)|| 1. Main Categories must be built as a "section." 2. Name field should be the general name such as "Brackets." 3. Headline should be "Introduction to Category General Name" Example: Introduction to Brackets 4. Horizontal Links (centered): 5. Introduction line in bold and centered Example: component in your Architectural Details decorating repertoire. 6. Intro photo A. Should be 325px wide B. Should have a 1px black border C. Link to Usage Photo D. See Embedded Graphics for help 7. Add or create "Shop All Button" after fist paragraph. 8. Add supporting photos and text. A. Supporting Photos (1) Should be 275px wide (2) Should have a 1px black border (3) Link to Usage Photo (4) See Embedded Graphics for help B. Supporting Text (1) Should describe applications of product (2) Should end with <!-- DO NOT REMOVE THIS LINE --> <a name="bottom"></a> 9. Contents A. Product Listings B. Usage Photos C. Info D. Set to 3 Columns E. Standard Contents-elements settings 10. Custom properties A. Page Title B. Cross-sell-ids (Related Pages) C. Hide-prev-button ||||||||||||||||0||||||||||New||||||||||||||0||~~|^^|link-appliques-intro||link.||||content-links||https://s.turbifycdn.com/aah/vintagewoodworks/introduction-to-appliques-27.jpg||||||Introduction to Appliques||||webmaster-pages > misc > content-links > ||Webmaster Pages > Misc Pgs @ WM > Content Links > ||||||||||||||||0||0||0||0||||||||||||||||||||||||0||||||||||New||||||||||||||0||~~|^^|link-azek-intro||link.||||content-links||https://s.turbifycdn.com/aah/vintagewoodworks/introduction-to-azek-brand-pvc-20.jpg||||||Introduction to AZEK Brand PVC||||webmaster-pages > misc > content-links > ||Webmaster Pages > Misc Pgs @ WM > Content Links > ||||||||||||||||0||0||0||0||||||||||||||||||||||||0||||||||||New||||||||||||||0||~~|^^|link-balusters-intro||link.||||content-links||https://s.turbifycdn.com/aah/vintagewoodworks/introduction-to-balusters-20.jpg||||||Introduction to Balusters||||webmaster-pages > misc > content-links > ||Webmaster Pages > Misc Pgs @ WM > Content Links > ||||||||||||||||0||0||0||0||||||||||||||||||||||||0||||||||||New||||||||||||||0||~~|^^|link-beadboard-intro||link.||||content-links||https://s.turbifycdn.com/aah/vintagewoodworks/introduction-to-beadboard-v-groove-20.jpg||||||Introduction to Beadboard & V-Groove||||webmaster-pages > misc > content-links > ||Webmaster Pages > Misc Pgs @ WM > Content Links > ||||||||||||||||0||0||0||0||||||||||||||||||||||||0||||||||||New||||||||||||||0||~~|^^|link-blocks-intro||link.||||content-links||https://s.turbifycdn.com/aah/vintagewoodworks/introduction-to-blocks-18.jpg||||||Introduction to Blocks||||webmaster-pages > misc > content-links > ||Webmaster Pages > Misc Pgs @ WM > Content Links > ||||||||||||||||0||0||0||0||||||||||||||||||||||||0||||||||||New||||||||||||||0||~~|^^|link-brackets-intro||link.||||content-links||https://s.turbifycdn.com/aah/vintagewoodworks/introduction-to-brackets-20.jpg||||||Introduction to Brackets||||webmaster-pages > misc > content-links > ||Webmaster Pages > Misc Pgs @ WM > Content Links > ||||||||||||||||0||0||0||0||||||||||||||||||||||||0||||||||||New||||||||||||||0||~~|^^|link-ceilingmedallions-intro||link.||||content-links||https://s.turbifycdn.com/aah/vintagewoodworks/introduction-to-ceiling-medallions-14.jpg||||||Introduction to Ceiling Medallions||||webmaster-pages > misc > content-links > ||Webmaster Pages > Misc Pgs @ WM > Content Links > ||||||||||||||||0||0||0||0||||||||||||||||||||||||0||||||||||New||||||||||||||0||~~|^^|link-columns-intro||link.||||content-links||https://s.turbifycdn.com/aah/vintagewoodworks/introduction-to-columns-16.jpg||||||Introduction to Columns||||webmaster-pages > misc > content-links > ||Webmaster Pages > Misc Pgs @ WM > Content Links > ||||||||||||||||0||0||0||0||||||||||||||||||||||||0||||||||||New||||||||||||||0||~~|^^|link-corbels-intro||link.||||content-links||https://s.turbifycdn.com/aah/vintagewoodworks/introduction-to-corbels-14.jpg||||||Introduction to Corbels||||webmaster-pages > misc > content-links > ||Webmaster Pages > Misc Pgs @ WM > Content Links > ||||||||||||||||0||0||0||0||||||||||||||||||||||||0||||||||||New||||||||||||||0||~~|^^|link-cornices-intro||link.||||content-links||https://s.turbifycdn.com/aah/vintagewoodworks/introduction-to-corninces-10.jpg||||||Introduction to Cornices||||webmaster-pages > misc > content-links > ||Webmaster Pages > Misc Pgs @ WM > Content Links > ||||||||||||||||0||0||0||0||||||||||||||||||||||||0||||||||||New||||||||||||||0||~~|^^|link-fretpanmed-intro||link.||||content-links||https://s.turbifycdn.com/aah/vintagewoodworks/introduction-to-fretwork-panels-medallions-24.jpg||||||Introduction to Fretwork Medallions||||webmaster-pages > misc > content-links > ||Webmaster Pages > Misc Pgs @ WM > Content Links > ||||||||||||||||0||0||0||0||||||||||||||||||||||||0||||||||||New||||||||||||||0||~~|^^|link-gables-intro||link.||||content-links||https://s.turbifycdn.com/aah/vintagewoodworks/introduction-to-gable-decorations-20.jpg||||||Introduction to Gable Decorations||||webmaster-pages > misc > content-links > ||Webmaster Pages > Misc Pgs @ WM > Content Links > ||||||||||||||||0||0||0||0||||||||||||||||||||||||0||||||||||New||||||||||||||0||~~|^^|link-mouldings-intro||link.||||content-links||https://s.turbifycdn.com/aah/vintagewoodworks/introduction-to-mouldings-24.jpg||||||Introduction to Mouldings||||webmaster-pages > misc > content-links > ||Webmaster Pages > Misc Pgs @ WM > Content Links > ||||||||||||||||0||0||0||0||||||||||||||||||||||||0||||||||||New||||||||||||||0||~~|^^|link-porches-intro||link.||||content-links||https://s.turbifycdn.com/aah/vintagewoodworks/introduction-to-porches-porch-parts-23.jpg||||||Introduction to Porches & Porch Parts||||webmaster-pages > misc > content-links > ||Webmaster Pages > Misc Pgs @ WM > Content Links > ||||||||||||||||0||0||0||0||||||||||||||||||||||||0||||||||||New||||||||||||||0||~~|^^|link-rails-intro||link.||||content-links||https://s.turbifycdn.com/aah/vintagewoodworks/introduction-to-rails-16.jpg||||||Introduction to Rails||||webmaster-pages > misc > content-links > ||Webmaster Pages > Misc Pgs @ WM > Content Links > ||||||||||||||||0||0||0||0||||||||||||||||||||||||0||||||||||New||||||||||||||0||~~|^^|link-screendoors-intro||link.||||content-links||https://s.turbifycdn.com/aah/vintagewoodworks/introduction-to-screen-storm-doors-24.jpg||||||Introduction to Screen & Storm Doors||||webmaster-pages > misc > content-links > ||Webmaster Pages > Misc Pgs @ WM > Content Links > ||||||||||||||||0||0||0||0||||||||||||||||||||||||0||||||||||New||||||||||||||0||~~|^^|link-signs-intro||link.||||content-links||https://s.turbifycdn.com/aah/vintagewoodworks/introduction-to-signs-14.jpg||||||Introduction to Signs||||webmaster-pages > misc > content-links > ||Webmaster Pages > Misc Pgs @ WM > Content Links > ||||||||||||||||0||0||0||0||||||||||||||||||||||||0||||||||||New||||||||||||||0||~~|^^|link-spandrels-intro||link.||||content-links||https://s.turbifycdn.com/aah/vintagewoodworks/introduction-to-spandrels-19.jpg||||||Introduction to Spandrels||||webmaster-pages > misc > content-links > ||Webmaster Pages > Misc Pgs @ WM > Content Links > ||||||||||||||||0||0||0||0||||||||||||||||||||||||0||||||||||New||||||||||||||0||~~|^^|azcolors-island-oak||item.||popup||azek174colors||||||||Island Oak||||popup-pages > azprpo > azek174colors > ||Pop-up Windows (Pages) > AZEK Product pop-ups > AZEK ® Colors > ||||||||||||||||0||1||0||0|||||||| Island Oak - see HTML, Basics|| See HTML, Basics||||||||||||||||0||||||||||New||||||||||||||0||~~|^^|itempages||item.||fastpivot-2007||references||||||||Item Page Format||||webmaster-pages > references > ||Webmaster Pages > YS How-To > ||||||||||||||||1||1||0||0||||||(nsnf/ckd) - see Item Page Format at Standard Formats|| see WM > Standard Formats > Item Page Format||||||||||||||||0||||||||||New||||||||||||||0||~~|^^|item-pages||item.||fastpivot-2007||standard-formats||||||||Item Pages||||webmaster-pages > standard-formats > ||Webmaster Pages > Standard Formats > ||||||||||||||||0||1||0||0||||codenumbers drop teandth skus-in-dropdowns ||CATEGORY Code Numbers Dropdown Options Material / Thickness SKUs in Dropdown Options|| (nsnf/ckd) ADDING NEW ITEM PAGE 1. Review all new item information (can be obtained from NPDS & Pricing spreadsheet). A. Approved Name and SKU B. Price and Options C. Image and/or Icon graphic D. List of Related Pages 2. Assign a specific URL for new item. 3. Fill in the following fields: A. Name (1) This text will be displayed in the cart. (2) Avoid general Names such as 4x4 Cedar Balusters,(have more than one design). a. If a different name for the Section is needed use the “Headline” field. b. “Headline” field will be displayed on the actual page on screen c. “Name” field will be the name displayed in the Left Navigation Bar. (3) Do not include any html codes in the "Name" field. B. Image C. Code (SKU) D. Price (1) This field must not be left blank. (2) Place a zero '0' if using another pricing method E. Sale- price - this field only applied to BR items F. Orderable - must be set to 'yes' G. Options (1) Use DEV programming where applicable. (2) Do not include any html codes in the "Options" field. H. Caption - all important info for this item that is not in the Info page of the category. (1) If caption will have a pop-up window, Java script, at the beginning of the caption. (2) Do not insert any blank lines before or after the Java script. a. Java script: <SCRIPT LANGUAGE=JavaScript><!-- Hide Script from old browsers function testWindow(file) {newWindow = window.open(file,"logowin", win)newWindow.focus()}var win='toolbar=no,directories=0,menubar=0,scrollbars=yes,resizable=yes, width=700,height=500'; // End hiding script from old browsers --></SCRIPT> I. Abstract - program will add “Click for Details” automatically. (1) If more than one size available, add “x Designs” where applicable in the Abstract. J. Icon - only when icon differs from Image 4. Required Properties A. MUST add “Cross-Sell-Ids” (type - Ids) for Related Pages. B. MUST add “Page-title” (type - text) 5. 6. Optional Properties: A. Hide-Price-Initially B. Price-Explanation C. Initial-Price-Text D. Baseprice E. Layout 7. Update and review new item A. Review item page and compare to a similar item B. Make any necessary changes. (1) Update and review. (2) Repeat as needed. 8. Update any forms, Speed Note(s) and/or emails. 9. Get new Item page proofed and approved by Supervisor. Publish store. See #1591.95.18 Editing Yahoo Store, General Info Procedure. 10. Test item by placing in cart after publishing||||||||||||||||0||||||||||New||||||||||||||0||~~|^^|item-not-orderable-text||item.||fastpivot-2007||references||||||||Item-not-orderable-text ||||webmaster-pages > references > ||Webmaster Pages > YS How-To > ||||||||||||||||0||1||0||0||||||(nsnf/ckd)|| This property can only be accessed under the "Variables" tab while in EDIT Mode. DO NOT CHANGE UNLESS INSTRUCTED BY MANAGEMENT Property Type = text Controls text that will be displayed to UN-orderable items Currently reads as: We're sorry, but this item is currently unavailable. Please email or call us. If changing an ORDERABLE page into an INFORMATION page and you do not want "We're sorry, but this item is currently unavailable. Please email or call us." to show: 1. Clear CODE property. 2. Copy and Paste VISIBLE-CAPTION into CAPTION. 3. Set ORDERABLE property to NO. ||||||||||||||||0||||||||||New||||||||||||||0||~~|^^|items-per-page||item.||fastpivot-2007||references||||||||Items-per-page ||||webmaster-pages > references > ||Webmaster Pages > YS How-To > ||||||||||||||||0||1||0||0||||||(nsnf/ckd)|| Property Type = number Controls how many items will be displayed on a given page. Typically 10 or 12. Will also hide contents when set to 0. Example: Other Traditional Brackets set to display 12 per page Example: OPG set to 0 (hiding contents)||||||||||||||||0||||||||||New||||||||||||||0||~~|^^|azcolors-ivory||item.||popup||azek174colors||||||||Ivory||||popup-pages > azprpo > azek174colors > ||Pop-up Windows (Pages) > AZEK Product pop-ups > AZEK ® Colors > ||||||||||||||||0||1||0||0||||||(nsnf/ckd)|| Ivory - see Script, Javascript|| See Script, Javascript||||||||||||||||0||||||||||New||||||||||||||0||~~|^^|july-2012-newsletter||item.||fastpivot-2007||newsletter-archives||||https://s.turbifycdn.com/aah/vintagewoodworks/july-2012-customer-spotlight-bill-s-balustrade-17.jpg||||July 2012 - Customer Spotlight, Bill's Balustrade||||help > ourcompany > newsletter-archives > ||Help Desk > Our Company > Newsletter Archives > ||||||||||||||||0||1||0||0||||||||
| ||||||||||||||||||||||||||||||||||||||||||||||||||||||||||||||||||||||||||||||||||||||||||||||||||||||||||||||||||||||||||||||||||||||||||||||||||||||||||||||||||||||||||||||||||||||||||||||||||||||||||||||||||||||||||||||