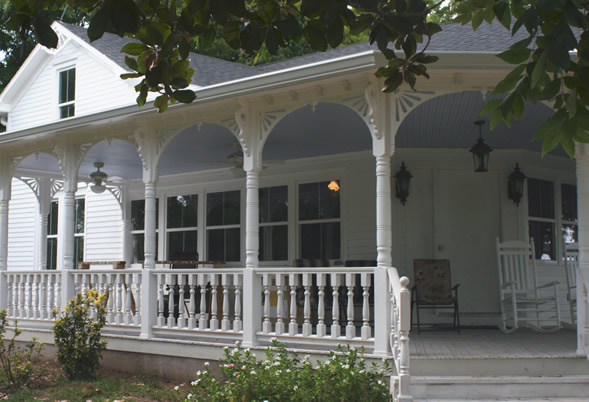
Keep Your Woodwork Beautiful
Wood has been a successful exterior building material for hundreds of years, but it can become damaged if there's a moisture problem. Here are our best tips to prevent damage and ensure your woodwork lasts at least a lifetime!
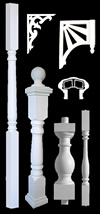 Prevention
1. Synthetic Materials - The time and money saved on maintenance will likely make the use of synthetic materials for all exterior "woodwork," including Porch & Deck Flooring, the more economical choice in the long run. Most of our products are available in synthetic materials. Learn more about Cellular PVC and Polyurethane.
2. Weather-Resistant Woods - If you prefer wood, we suggest using a weather-resistant wood such as Cypress or Cedar. Prevention
1. Synthetic Materials - The time and money saved on maintenance will likely make the use of synthetic materials for all exterior "woodwork," including Porch & Deck Flooring, the more economical choice in the long run. Most of our products are available in synthetic materials. Learn more about Cellular PVC and Polyurethane.
2. Weather-Resistant Woods - If you prefer wood, we suggest using a weather-resistant wood such as Cypress or Cedar.
3. Use Sloped-top Bottom Rail - Exterior bottom rail 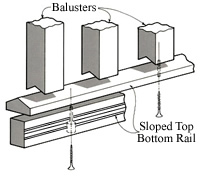 design is critical! Our unique Sloped-top Bottom Rail provides proper water drainage, simplified installation, and traditional styling. And, we can notch the bottoms of your Balusters to perfectly fit this Rail.
4. Slope Your Porch - Your finished porch floor should be slightly below the door threshold to permit proper water drainage and should slope gently away from the house. More about Porch Foundations & Floors.
5. Proper Finishing & Installation - design is critical! Our unique Sloped-top Bottom Rail provides proper water drainage, simplified installation, and traditional styling. And, we can notch the bottoms of your Balusters to perfectly fit this Rail.
4. Slope Your Porch - Your finished porch floor should be slightly below the door threshold to permit proper water drainage and should slope gently away from the house. More about Porch Foundations & Floors.
5. Proper Finishing & Installation - 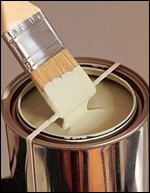 We recommend oil-based primer and at least two coats of oil-based paint on ALL surfaces (exposed or not) of exterior woodwork with extra caution used when painting the ends. How it's painted and installed (including proper installation hardware where applicable) are critical to the longevity of your porch parts. Important Considerations | Painting | Installation
6. Avoid Direct Sources of Moisture - Plants, especially acidic ones, too close to your porch will create a more humid microclimate. Better to keep plants trimmed at least two feet away from the edge of the porch. Also, check that your sprinklers do not spray on your porch parts and that your gutters are not blocked, causing them to overflow onto woodwork.
Early Detection
In addition to "Spring Cleaning" the flower beds and garage, please add checking the condition of ALL exterior woodwork to your list!
1. Check Your Paint - As paint ages, its ability to flex with the movement caused by humidity changes lessens. This usually causes hairline cracks in the paint. Once the paint surface is compromised, moisture penetrates into the wood. The presence of mildew or mold typically indicate failing paint. Another quick test: If rubbing your fingers across a painted surface leaves a chalky residue, you need to repaint. Use these steps to fully check your paint for degradation.
2. Look for Visible Problems - Get up close and inspect carefully, We recommend oil-based primer and at least two coats of oil-based paint on ALL surfaces (exposed or not) of exterior woodwork with extra caution used when painting the ends. How it's painted and installed (including proper installation hardware where applicable) are critical to the longevity of your porch parts. Important Considerations | Painting | Installation
6. Avoid Direct Sources of Moisture - Plants, especially acidic ones, too close to your porch will create a more humid microclimate. Better to keep plants trimmed at least two feet away from the edge of the porch. Also, check that your sprinklers do not spray on your porch parts and that your gutters are not blocked, causing them to overflow onto woodwork.
Early Detection
In addition to "Spring Cleaning" the flower beds and garage, please add checking the condition of ALL exterior woodwork to your list!
1. Check Your Paint - As paint ages, its ability to flex with the movement caused by humidity changes lessens. This usually causes hairline cracks in the paint. Once the paint surface is compromised, moisture penetrates into the wood. The presence of mildew or mold typically indicate failing paint. Another quick test: If rubbing your fingers across a painted surface leaves a chalky residue, you need to repaint. Use these steps to fully check your paint for degradation.
2. Look for Visible Problems - Get up close and inspect carefully,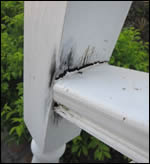 paying extra attention to the ends of items. These "joints" between parts can collect water, plus, paying extra attention to the ends of items. These "joints" between parts can collect water, plus, e nd grain absorbs moisture more readily. So, get out there and check your Porch Posts, Newel Posts, Balusters, Rails (especially at the bottom of the stair rails as shown at right), and any other exterior trim.
3. Probe for Hidden Damange - Don't wait 'til you see it...  check your porch components with a flat blade screwdriver using these instructions for early detection.
If you have detected damage in your Post bottoms, one of the most common locations for it, see Gregory's solution in the sidebar at the right.
For more information on keeping your woodwork looking beautiful and healthy, please click the links above or contact us! check your porch components with a flat blade screwdriver using these instructions for early detection.
If you have detected damage in your Post bottoms, one of the most common locations for it, see Gregory's solution in the sidebar at the right.
For more information on keeping your woodwork looking beautiful and healthy, please click the links above or contact us!

Earth Day
Celebrated in over 192 countries on Monday April 22nd,  Earth Day was observed for its 43rd year, but we hope you join us in being kind to the earth every day! Read more about our environmental commitment. Earth Day was observed for its 43rd year, but we hope you join us in being kind to the earth every day! Read more about our environmental commitment.
|
|
From the Owners...
 Thirty years ago our remodeling contractor installed wooden Porch Posts on the front porch of our home. He used a 1" wide strip of 1/2" thick metal under each to keep them 1/2" above the wood floor. At the time I assumed this was adequate but soon found out better! Thirty years ago our remodeling contractor installed wooden Porch Posts on the front porch of our home. He used a 1" wide strip of 1/2" thick metal under each to keep them 1/2" above the wood floor. At the time I assumed this was adequate but soon found out better!
In a few years, obvious rot began to be visible in the bottom 2 or 3 inches of a few of the posts. Upon closer inspection, we determined almost all post bottoms were rotting on at least one side, but on most the paint was hiding the rot happening below the surface. Indeed, some were so rotten below the paint we could make a deep depression in the surface with just our thumbs!
We removed the posts one at a time for closer inspection and immediately noticed they had never been painted on their bottoms. Oops! We knew wood end grain readily absorbs moisture, and had assumed the painter knew this also. Fortunately, no Posts were rotten on more than half their bottom, so we replaced the rotten portions with fresh wood and sanded the seams smooth.
We painted the new wood AND the post bottoms with multiple coats of oil-based paint. When the paint was dry we smeared the entire bottom of each post with long-life caulk and promptly attached PVC Mounting Blocks, letting the caulk ooze out all around the post. When the caulk was sufficiently dry we cleaned off the excess, ran a bead of caulk around the joint between post and block, and painted that area again to cover the exposed caulk.
That was many years ago. We continue to re-paint when needed, and I'm happy to report these posts are completely sound and look great. If we continue to maintain a good paint surface and re-caulk the seams between posts and blocks when that becomes necessary, I expect these wood Porch Posts to last indefinitely!
Gregory

Photo of the Month...
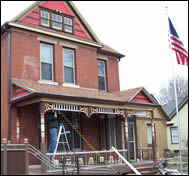
It's not finished yet, but this porch remodel is looking great!
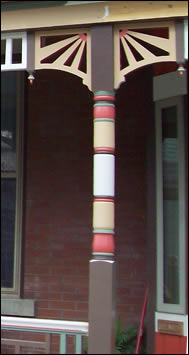
Aren't these paint colors fantastic? Learn more about Easy Ring Painting
|


